If you're planning to can tomatoes at home, it's important to follow a safe, tested method, and that's exactly what you'll find here. This step-by-step guide walks you through the water bath canning process, using trusted techniques that have been tested.
Whether you're working with fresh garden tomatoes or a box from the farmers market, this recipe will help you preserve all that tomato goodness to enjoy long after the season ends.

Thanks! My first time and your instructions were awesome! ~ Karen via email
Canning Tomatoes for Beginners
I’ve been canning tomatoes for more than 25 years, but this isn’t just a method I’ve picked up through trial and error. Everything I share here is based on safe, tested practices approved by the National Center for Home Food Preservation and the USDA. These organizations base their recommendations on scientific research to ensure home-canned foods are safe from harmful bacteria like botulism. I started following their guidelines early on, and over the years, they’ve become my go-to source for canning methods I know I can trust.
When it comes to canning, following research-backed guidelines is essential, not only for the best results, but for your health and safety. This method uses water bath canning, which is ideal for preserving high-acid foods like tomatoes, as long as you add the proper amount of acid to each jar.
Whether you're new to canning or have a few seasons under your belt, this step-by-step guide will walk you through exactly what you need to do—from selecting your tomatoes to sealing the jars. I’ve included plenty of tips along the way to make the process easier and more approachable.
A few things to keep in mind before you get started:
- Add acid to every jar: Tomatoes need added acid (bottled lemon juice or citric acid) to ensure a safe pH level for water bath canning.
- Use ripe, firm tomatoes: Skip the soft or damaged ones. Quality going in means quality on the shelf.
- Read through the entire process before starting: It helps you stay organized, avoid mistakes, and makes the whole experience go smoother.
Ingredients for canning tomatoes
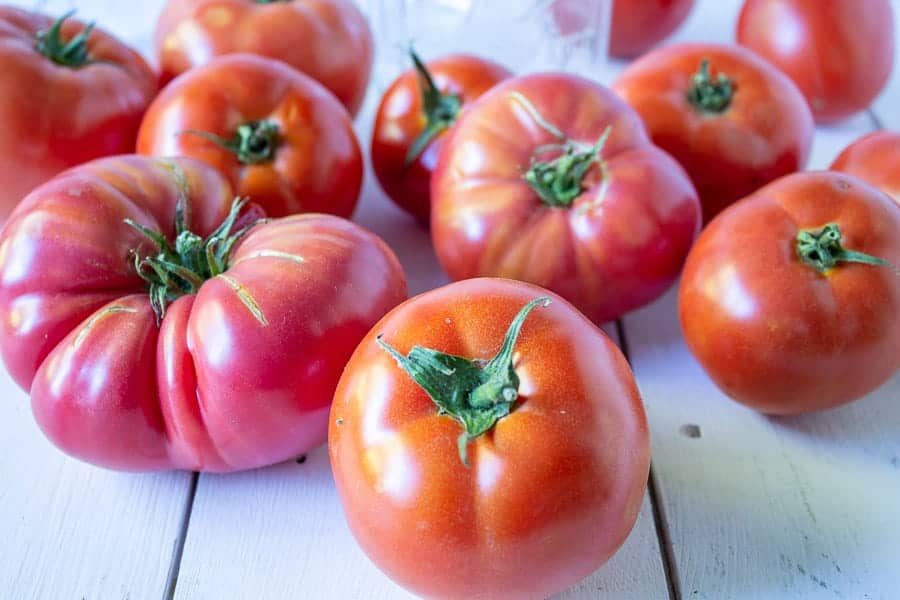
- Tomatoes - You can use just about any variety of tomatoes. We grow a lot of different varieties and we use them all. I do avoid using our cherry tomatoes because you do need to peel these tomatoes and peeling cherry tomatoes is too time-consuming. They are best just popping in your mouth!
- Don't use tomatoes from dead or frost killed vines.
- Lemon juice - Needed to make certain the acid level is high enough in the tomatoes. If the level is too low, it isn't safe to can using a hot water bath method. This is one of the few times I recommend using bottled lemon juice. The acidity level of bottled lemon juice is consistent.
- Salt - Adding salt is optional, and I usually don't add it to my canned tomatoes. If you do add salt, make certain you are using canning salt and not regular table salt.
How many tomatoes do I need?
You will need about 21 pounds of tomatoes to can 7 quarts.
Equipment for Canning Tomatoes
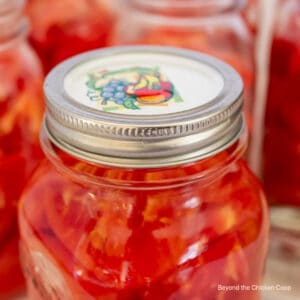
- Canning Jars
- Jar Lifter and canning tools
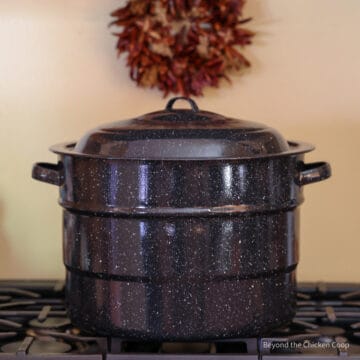
- Hot water bath pot
- Canning lids - if you already have jars
How to Can Tomatoes
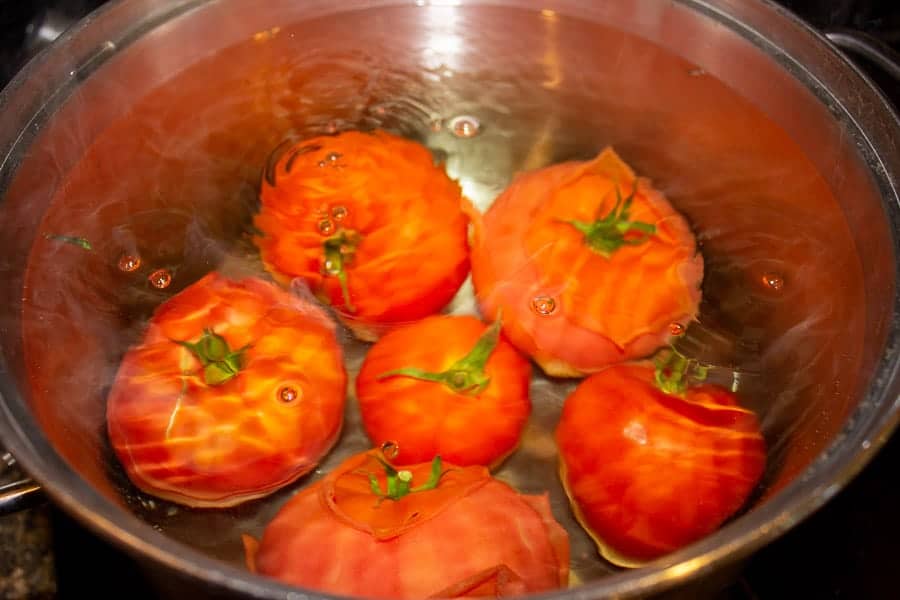
- Bring a large pot of water to a boil. Add a few tomatoes at a time
- Remove tomatoes and add to ice water
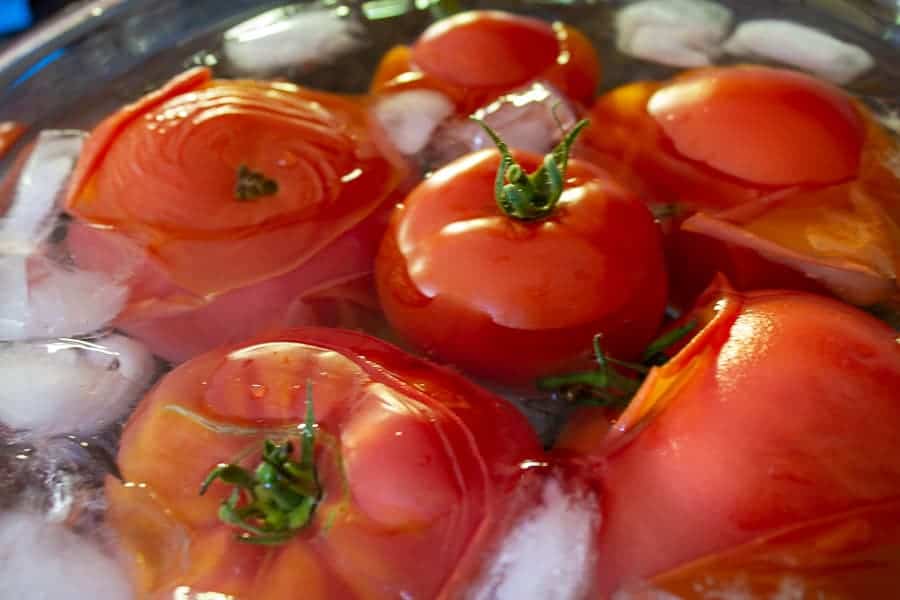
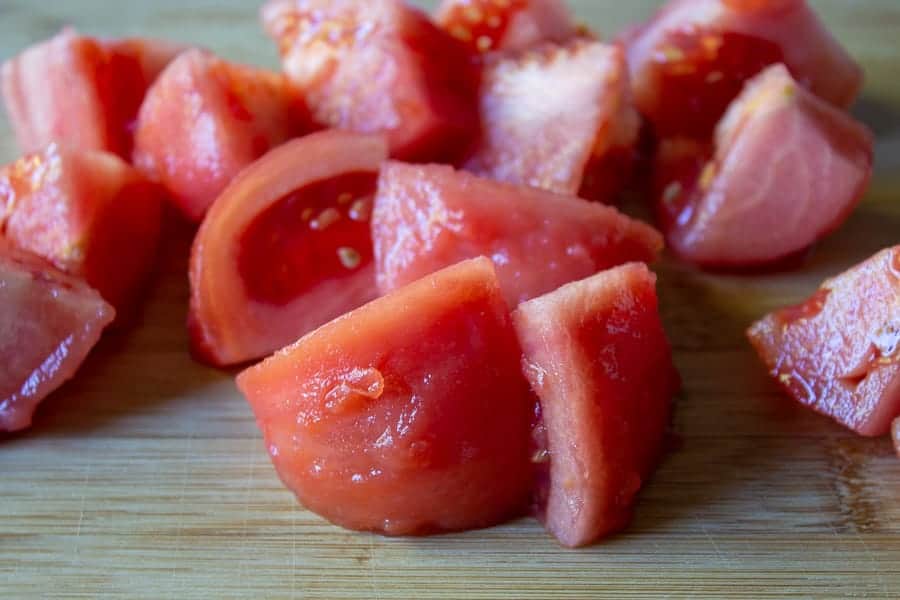
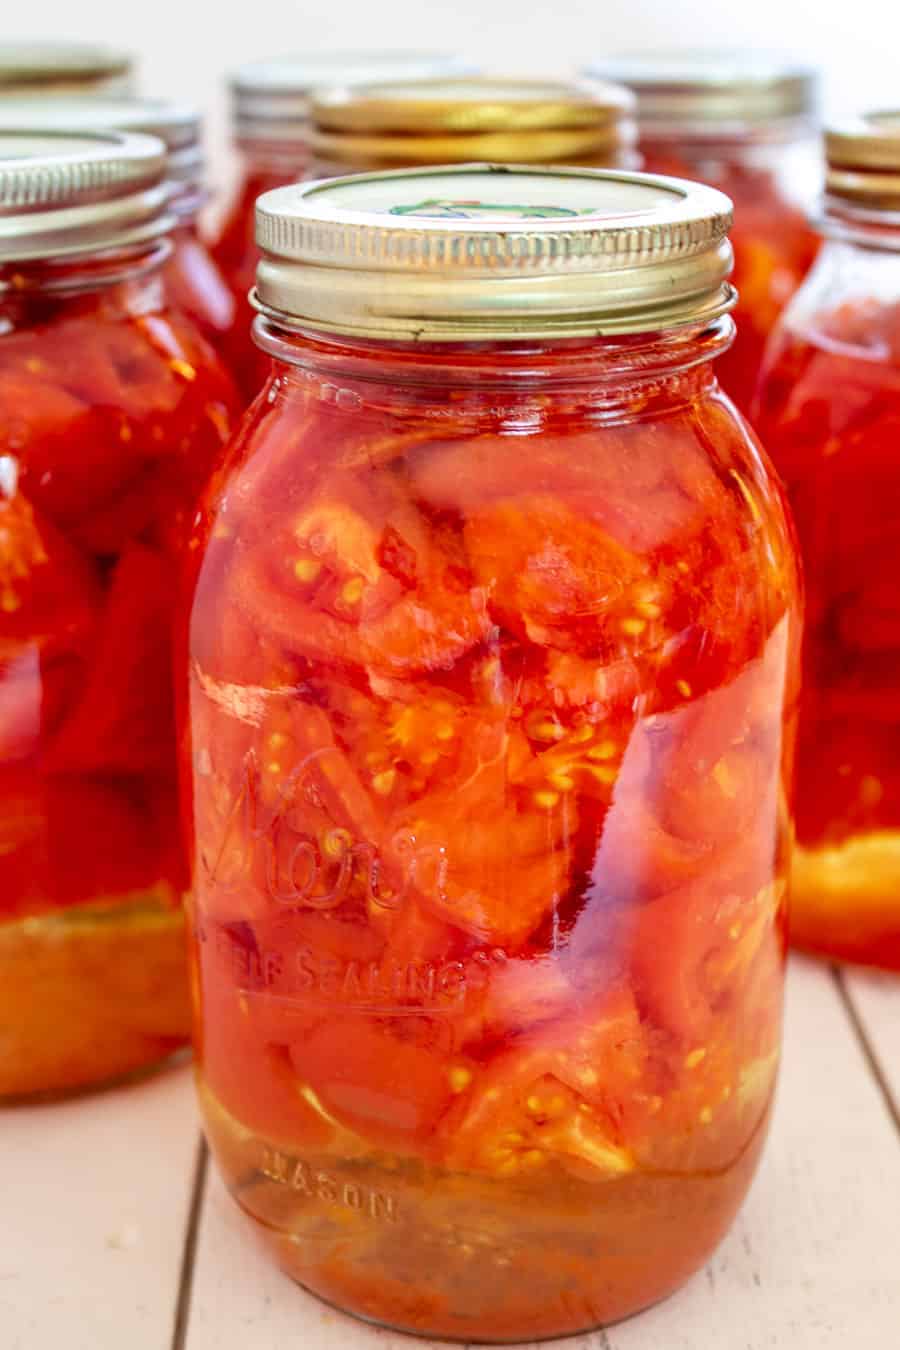
- Peel skins and chop tomatoes into large chunks. Remove the stem. The size you cut your tomatoes is up to you. You could also leave tomatoes whole, as long as they fit into your canning jars.
- Add lemon juice and salt (if using) to each canning jar. Add tomatoes
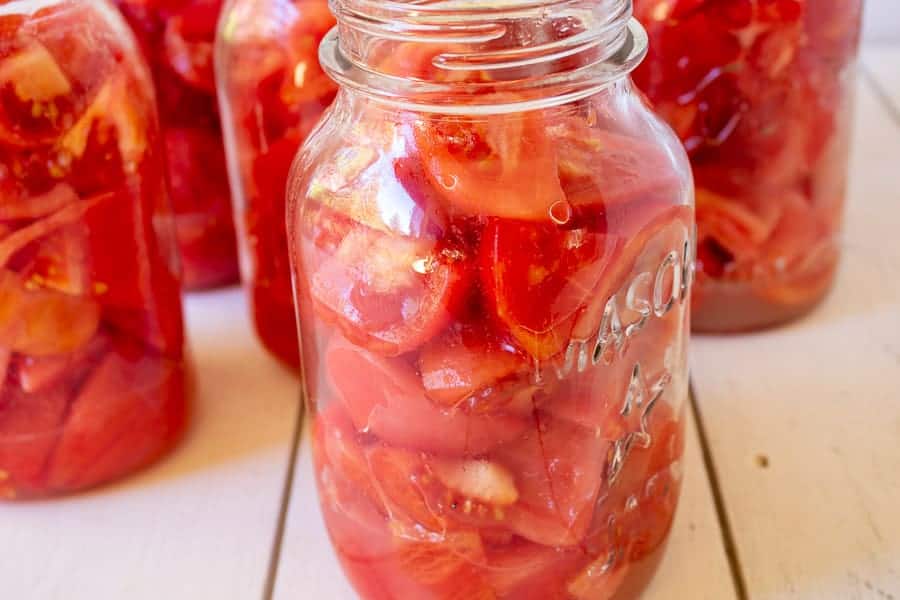
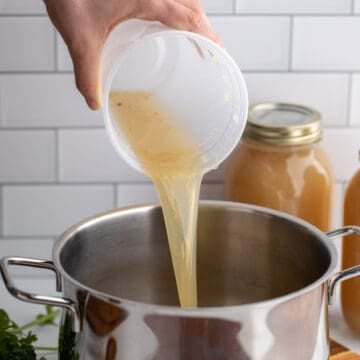
- Boil another pot of water. Add boiling water to each jar, leaving a ½ inch headspace. Slide a debubbler or a plastic knife around the inside of the jar to help remove trapped bubbles. You can also bang jars gently on the surface of counter to help remove bubbles.
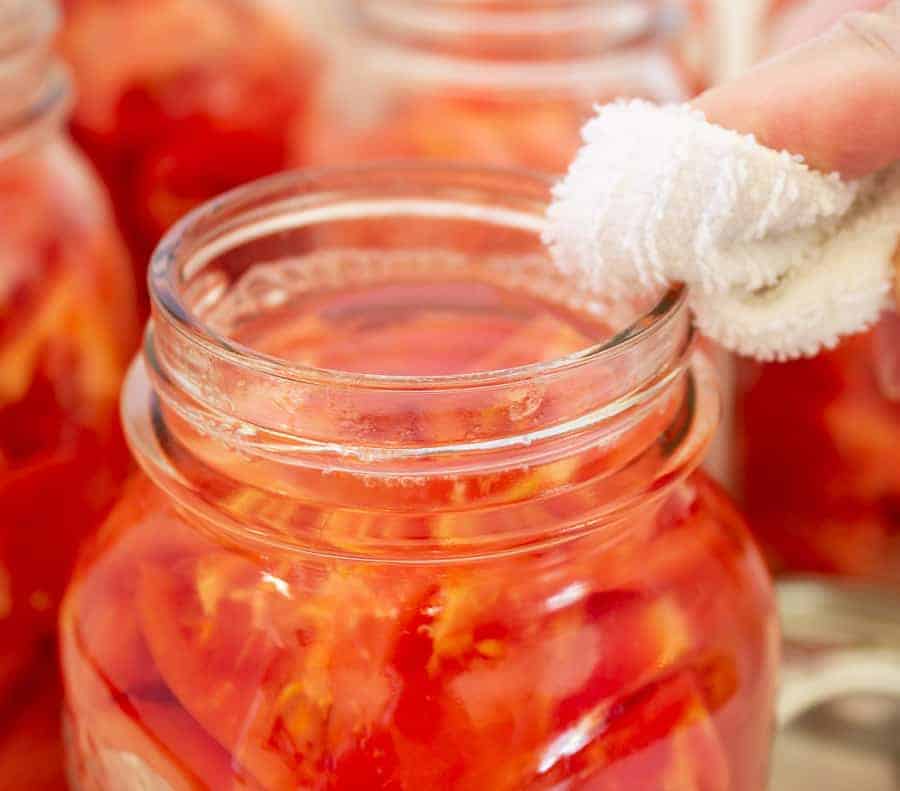
- Wipe tops of jars with a clean, wet cloth
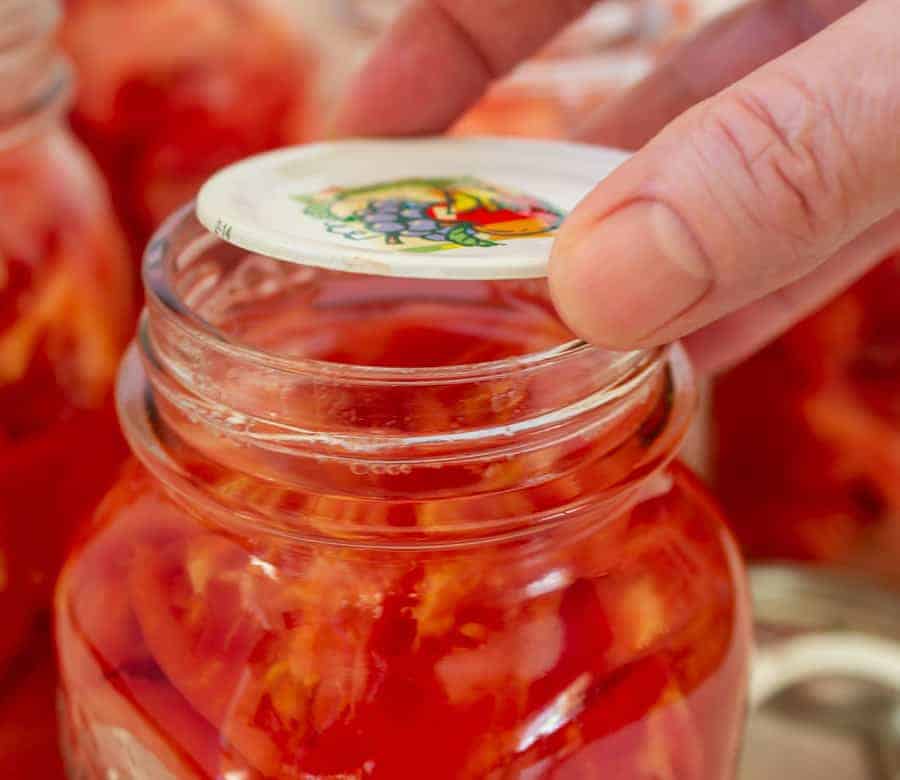
- Put lid on top of jar and screw on band
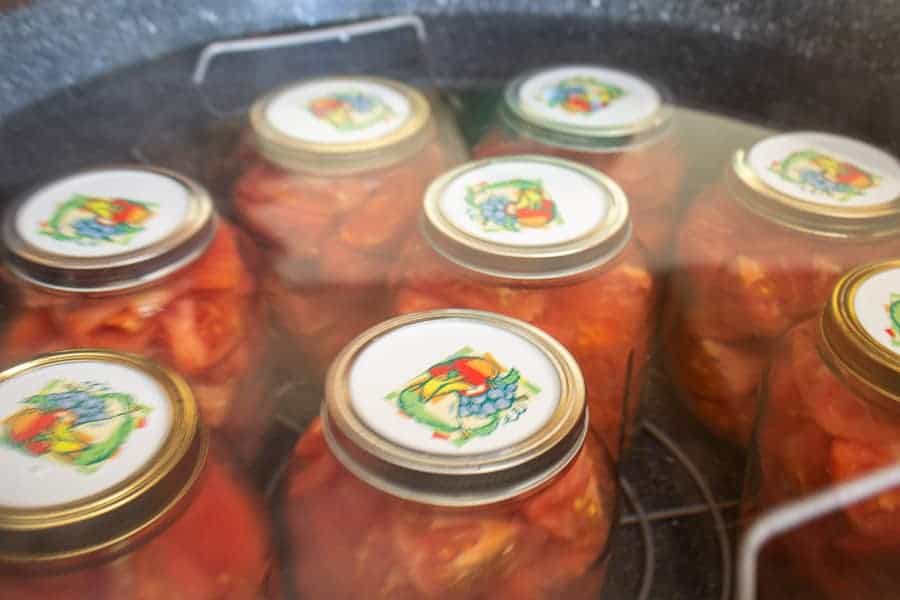
- Place jar in a large pot half filled with water. When all jars are in the pot, add enough water so jars are covered by 2 inches of water. Cover the pot and bring to a boil. Turn the heat down so the pot maintains a boil, and boil for 45 minutes for quarts and 40 minutes for pint-sized jars. Adjust the processing time for your elevation using the chart below.
Canning Tomatoes Recipe Altitude Adjustment
| Altitude Feet | Increase Processing Time |
|---|---|
| 1,001- 3,000 3,001- 6,000 6,001- 8,000 8,001-10,000 | 5 minutes 10 minutes 15 minutes 20 minutes |
- After full processing time, remove jars from pot and place on a baking rack. Let jars cool for 12 hours. Test each lid to to make certain each jar has sealed.
- Remove bands and wash outside of jars in warm soapy water. Dry jars and label each jar with contents and date.
- Store in a cool, dark place.
Water Bath Canning Tomatoes
- Wash canning lids in warm, soapy water. Place lids in a dish with plain hot water before using. You do not need to boil your lids before using.
- Examine jars for any defects, especially along the rim. Do not use for canning if you find any chips or cracks.
- Use good quality tomatoes. Do not use if rotting or moldy.
- Processing times vary because boiling time varies depending on your elevation. Always adjust processing times for your elevation (see chart)
A Note on Home Canned Food
Improperly home canned food can carry the risk of causing botulism. If eaten, this can cause a serious form of food poisoning that can lead to paralysis or death. Please follow safety procedures and inspect your food before consuming.
- Always inspect your home canned food before eating
- If in doubt, throw it out!!! The FDA recommends throwing out the food and the jar.
- Do not taste if in doubt!
- Throw it out if -
- the can is bulging, leaking or swollen
- the container looks damaged or abnormal
- the container spurts liquid or foam when opened
- the food is moldy, discolored or smells bad
- the seal is no longer intact when you examine the food
To use canned tomatoes
You can use these canned tomatoes in any recipe calling for diced tomatoes or crushed tomatoes, like in this chicken bolognese. Depending on the recipe, you may need to first drain the tomatoes.
Some of my favorite recipes that include canned tomatoes:
FAQs for Canning Tomatoes
This is up to you, depending on what jars you have available and what size tomatoes you want to can. If you want to can whole tomatoes, you will want to use wide-mouth jars.
During the canning process, some of the liquid from the jars is often forced out of the jars. The jars will have a bit of residue on the jars and can be sticky. Washing the jars before storing helps keep the jars from growing any bacteria on the outside of the jar.
I always store my canning jars without the canning bands. If the contents have gone bad, the canning lid will often become unsealed. You can spot this easily when the jar does not have a band. If the contents become cloudy, bubbly, moldy, or develop an off smell, discard all contents and do not eat.
Canned tomatoes are safe to eat for many years. However, the quality of the tomatoes is best eaten within one year of canning. Always check each jar when opening to make certain there isn't an off odor or any mold or bubbling of the tomatoes before eating.
More canning recipes
- Canning carrots
- Canning dried beans
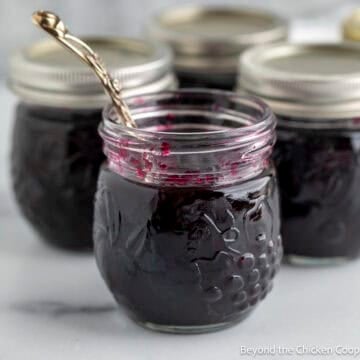
- Blackberry jam
- Orange marmalade
- Apricot jam
- Smoked Fish
- Canning Peaches
At the end of your gardening season, don't let those green tomatoes go to waste! Make this savory green tomato relish!
If you make this recipe, I’d love to hear about it! Leave a comment below and snap a picture and tag me on Instagram @beyondthechickencoop
Check out all my canning recipes here!

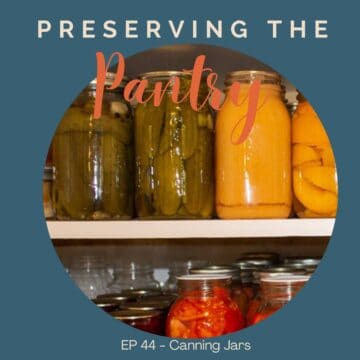
Listen to the recipe
You can listen to all the steps on how to can tomatoes on the podcast Preserving the Pantry! Just click on the play button below to listen now!
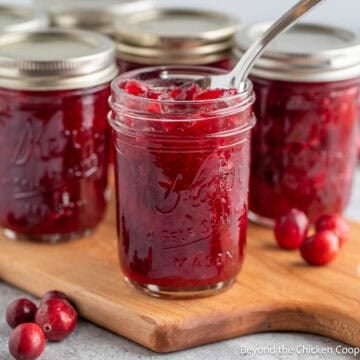
Canning Tomatoes
Equipment
- Canning Jars
- Large Canning Pot
Ingredients
- 2-3 pounds tomatoes (per quart)
- 2 Tablespoons Lemon Juice (per quart)
- ½ teaspoon canning salt (per quart, optional)
Instructions
- Blanch and peel tomatoes
- Chop tomatoes into desired size
- Add 2 tablespoons of lemon juice to each canning jar.
- Add ½ teaspoon of salt to each quart jar (optional)
- Add chopped tomatoes
- Pour boiling water over tomatoes. Fill making certain you leave ½ inch headspace. Remove air bubbles by running a debubbler or plastic knife around inside of jar and tapping bottom of jar gently against counter.
- Wipe rim of jars clean and add lid and band
- Place jar in a water bath canning pot half filled with warm water. Add additional water so the water cover the jars by 2 inches.
- Cover pot and bring to a roiling boil. Once boiling, lower temperature so there is a gentle but steady boil. Boil quarts for 45 minutes and pints for 40 minutes. (Add additional time for your altitude - see below)
- Once processing time is complete, turn off stove, but leave jars in the canner with the lid off for 5 minutes. This helps prevent siphoning of the liquid from the jars.
- Remove jars from canner and place on a towel or a baking rack to cool. Do not touch jars or tighten lids for at least 12 hours.
- After jars have cooled, check lids for a proper seal by pressing on the center of each lid. The lids should not have any give in the center. Remove bands wipe down jars to remove any residue. Label and store in a cool, dark place.
Notes
- Can use ½ teaspoon citric acid in place of the lemon juice
- If using pint jars add 1 Tablespoon lemon juice
- Adjust recipe based on amount of tomatoes you have available and on the size of your canning pot.
- Wash canning lids in warm soapy water. Place lids in a dish with plain hot water before using. You do not need to boil your lids before using.
- Examine jars for any defects, especially along rim. Do not use for canning if you find any chips or cracks.
- Use good quality tomatoes. Do not use if rotting or moldy.
- Always adjust processing times for your elevation:
- 1,001- 3,000 ft. - add 5 minutes
- 3,001- 6,000 ft. - add 10 minutes
- 6,001- 8,000 ft. - add 15 minutes
- 8,001-10,000 ft. - add 20 minutes
Nutritional Disclaimer:
Nutritional information is provided as a courtesy and should only be construed as an estimate rather than a guarantee. To obtain the most precise nutritional information in a provided recipe, you should calculate the nutritional information with the exact ingredients you are using when preparing the recipe using your preferred nutrition calculator.
Daphne says
Just read through your recipe and excited to try it! I have lots of frozen tomatoes in my freezer. Can I use them instead of fresh in this recipe? Thanks!
Kathy says
Hi Daphne,
You can use frozen tomatoes for canning, but they don't work well in this recipe, because the tomatoes are very soft and mushy when they thaw. They would be perfect for making tomato sauce. One advantage of frozen tomatoes is when they thaw, the skins will slip right off, no need to blanch them. Here's a great article from Simply Canning that offers a few more recipes for canning frozen tomatoes.
Kathy
Daphne says
Thanks Kathy for responding back! I will check out the simply canning and will be definitely using this recipe for this year harvest.
Kathy says
Thanks!
backlinks generator for youtube videos says
I like this site so much, bookmarked.
Kathy says
Thank you
Carol Johnson says
Thank you for the detailed instructions. I was wondering though, do I have to sterilize my jars before filling. Thanks
Kathy says
Hi Carol,
Jars only need to be sterilized if they are being processed for less than 10 minutes. (NCFHP https://nchfp.uga.edu/faqs/general-canning/category/faq-canning)
Kathy
Amy Wynn says
Is it normal to hear hissing after one removes the jars from the canning pot (after the rested post-boil for 5 minutes in the pot)?
Kathy says
Possibly. The hissing is most likely siphoning of the jar. The extra 5 minutes normally helps prevent that, but it still can happen. Keep an eye on that jar and test it after it is entirely cool. I suspect some of the liquid is gone. That is okay as long as the jar is fully sealed. If it's not sealed, put it in the fridge and use this one right away. Let me know if you have any further questions about that jar.
Kathy 🙂
Mauricea says
Hi! I was wondering ,how long would you process these in an electric pressure canner?
Kathy says
Hi,
If using a pressure canner, process for 40 minutes at 5 pounds of pressure. If your elevation is over 2000 feet, process for 40 minutes at 10 pounds of pressure. (Source NCFHP)
Mauricea says
Thank you!
Kathy says
You bet! 🙂
Jessica says
How long will these keep? Months or years?
Kathy says
Hi Jessica,
According to the National Center Home Food Preservation, "Properly canned food stored in a cool, dry place will retain optimum eating quality for at least 1 year. Canned food stored in a warm place near hot pipes, a range, a furnace, or in indirect sunlight may lose some of its eating quality in a few weeks or months, depending on the temperature. Dampness may corrode cans or metal lids and cause leakage so the food will spoil." Please read my tips in the post about how to check your home canned food before consuming.
Kathy
Chloe Avila says
Does the lemon juice have to be bottled or is fresh lemon juice fine?
Kathy says
For canning you need to use bottled lemon juice. The reason is that the acidity level in lemons varies and might not be enough to make your tomatoes safe for water bath canning. In all other areas of cooking, I use fresh lemons. In canning I use bottled.
Lochie says
Can you use lime juice
Kathy says
Yes, you can use bottled lime juice. Lime juice is actually just slightly more acidic than lemon juice so it will work fine when canning.
Kathy
Vanessa says
Good morning. Could I add fresh basil to each jar? How much for pint/quart? Thank you?
Kathy says
Hi Vanessa,
You can add fresh basil. I'd add 1-2 leaves to each quart jar. You can add whole or chopped.
Enjoy,
Kathy 🙂
Peggy says
Why lemon juice ,I just use tomatoes basil parsley salt I have great results also I use cherry tomatoes or compari tomatoes make the best sauce
Kathy says
Hi Peggy,
The lemon juice ensures the tomatoes are at the proper acidity level making them safe for water bath canning. You do not taste the lemon juice at all.
Kathy
don says
i see no value in removing the bands from the kids, instead we tighten them after jars cool
Kathy says
Hi Don,
Removing the rings is completely optional. I always remove my rings for a couple of reasons. First, I remove them to double check to make certain they fully sealed. Then I wash my jars to remove any residue before I store them. Finally I keep my rings off while they are stored as another way to monitor the seal. It's very rare for the tomatoes to go bad, but does happen. If it does happen, the lid will often no longer be sealed. This is a personal choice and you can certainly leave them on if you prefer.
Kathy
Peggy Charette says
I have been canning for fifty three years, and have always remove my rings the next day. And it has work out very well. And look at the savings. The following year you only have to buy lids. And the rings last for years. I have saved a fortune doing this.and bye the way. I am very pleased with beyond the chicken coop.com so very well . In all my years I have never seen a recipes explain it so well. Keep up the good work. I am 100% satisfied. Wish I had seen your page before , for my other canner I had done. I have been on the Internet searching for recipes, like pickle beets, plain beets in water. I had a canning book for years. But I gave it away. What a mistake. But I was blessed I found you. So again thanks a million.
Kathy says
Thank you for your kind words! I grew up canning and so did my husband and we do a fair amount every year. I am trying to get more and more canning recipes published and will need to do a pickled beet recipe soon! Glad you enjoyed my site! 🙂
Kathy
Curly says
We had lots of tomatoes this year so it was everything from chili sauce, marinara sauce, sundried tomatoes, canned bruschetta topping, toss whole tomatoes (skins on) in ziploc bags in the freezer, and of course these canned tomatoes...we call them stewed tomatoes. The only thing I added were 2-3 fresh basil leaves. My husband makes an awesome tomato base for mussels using these tomatoes. Great for those cozy winter nights!
Kathy says
It sounds like you've got quite a crop of tomatoes! So nice to have on hand. We also like to freeze the tomatoes whole with the skins on. They just slide right off when you run them under warm water and then pop the frozen tomato in a pot of chili or soup! Thanks for your comment! 🙂
Marcelyn Oliver says
Kathy you sound like me. I was raised on a farm and live in the country once again. I love gardening, cooking and raising animals also. I live in a small rural community in Texas. Trying to remember if my mom added water to her tomatoes when she canned them. I haven’t canned in a while. She never added lemon juice either but I understand the reasoning now. I believe I can just can the fruit in their own juice. I’m anxious to try your other recipes too. Your canned goods look awesome. Can’t wait to canning again. Glad to have found a new country friend!
Kathy says
Marcelyn,
Good for you for getting back to your roots! There's nothing better than growing, preserving and eating your own produce. I haven't tried canning tomatoes just with their own juice, but I'd love to know your method. Let me know how they turn out. Welcome to Beyond the Chicken Coop!
Kathy
Bob says
When I can quart jars after filling and packing with tomatoes there is very little space to add water. I use the extra tomato juice in the bottom of the bowl to top off. We have done 8 quarts so far this season and have lots left on the vine so more to come.
Kathy says
Lucky you to have so many tomatoes! Your pantry will be filled!!! Adding the extra tomato juice is a great idea, just make certain you fill all the air spaces with some sort of liquid. 🙂
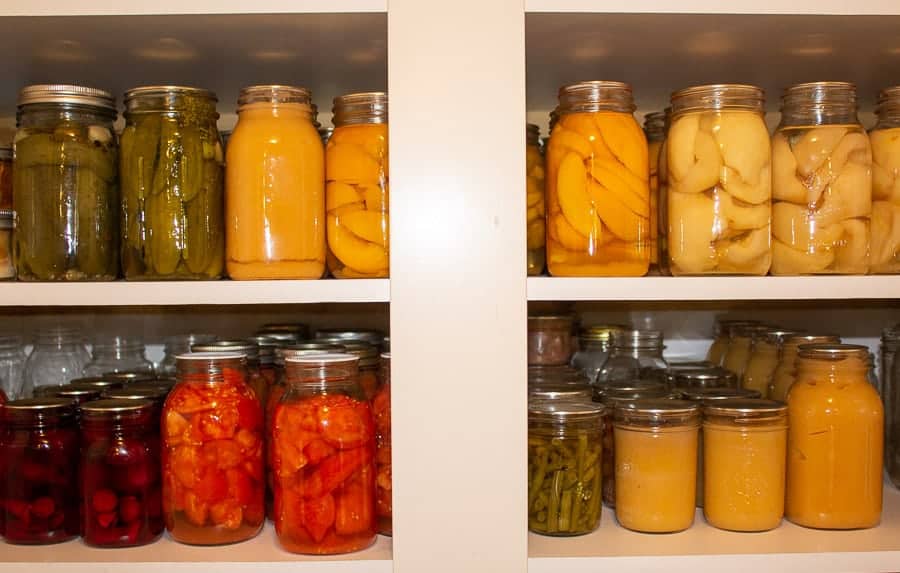
Valentina says
Oh my gosh, is that your cabinet full of beautiful canned goods? I'm SO impressed and it's so beautiful. This is a great post to keep on hand as a resource. Sometimes my dad's garden produces many more pounds of tomatoes than he can handle. 🙂 ~Valentina
Kathy says
That is my cabinet. It's a closet we have in our basement that we store most of our canned goods. We canned quite a bit, but we have some empty jars in there too! 🙂
Disappointed says
It’s important to leave a 1/2 inch headspace otherwise you will have something called siphoning happen. The tomato juice mixture will leak out from your jars and you will need to refrigerate those jars as food particles leaked underneath the rim. Bacteria can now grow more easily. I thought this was an important step left out in this recipe. I had to re-process all of my tomatoes due to siphoning.
Kathy says
Thank you for this reminder.
Dawn - Girl Heart Food says
I have yet to can tomatoes, but I do use store-bought canned tomatoes on the regular! Love all your tips here, Kathy! You've totally inspired me to bottle up some of my own to last all winter long!
Kathy says
These work great in any recipe calling for canned tomatoes! I hope you give them a try.
Alexandra @ It's Not Complicated Recipes says
So lovely to have these on hand, I am sure!
Kathy says
We use them in so many different recipes!
Kathy says
It is great to just grab what you need from our pantry.
David @ Spiced says
Every year, I say that I'm going to get into canning...and then I don't. This year, we only had a token garden, so we didn't end up with boatloads of produce like normal. (Well, except for jalapenos...and that's only because one jalapeno goes a long way!) This is an excellent how-to guide, though, Kathy. Totally hanging onto this in case we plant a legit garden next year!
Kathy says
There's nothing wrong with having a small garden! The best part is harvesting and enjoying all your work!
Tami says
First time tomato canner for me. So, it’s ok to put the tomato liquid in the jars with the meat of the tomato, correct? Thank you for responding.
Kathy says
Yep! Totally okay! Nice job on getting started canning tomatoes!
Judy G says
Thanks for the lesson Kathy. Must be very satisfying to have all those canned goods ready for the winter.
Kathy says
I love having a fully stocked pantry!
annie@ciaochowbambina says
Won't these perfect when the snow starts flying....oh wait - they're perfect for you now!! Sorry - couldn't resist! 😉 (WOW!) Nothing better than canned tomatoes, my friend!
Kathy says
Yep, nothing like an early snow to make everyone a little frantic! I'm not ready for winter, although my pantry is stocked!
Mary Ann | The Beach House Kitchen says
Great idea for a post Kathy! I'm embarrassed to say I've never canned tomatoes. I have friends that do it every season though. I need to get on the ball!