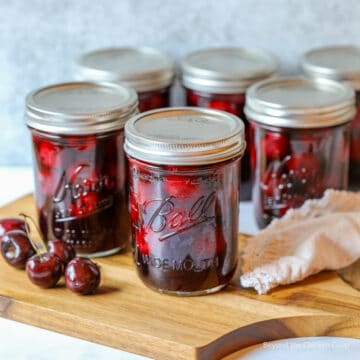
Preserve your fresh peaches by canning Peach Pie Filling! Your pantry will be filled with delicious ready-to-use pie filling.
Add to a pie crust and bake, spoon over ice cream, or add to a cobbler or crisp.

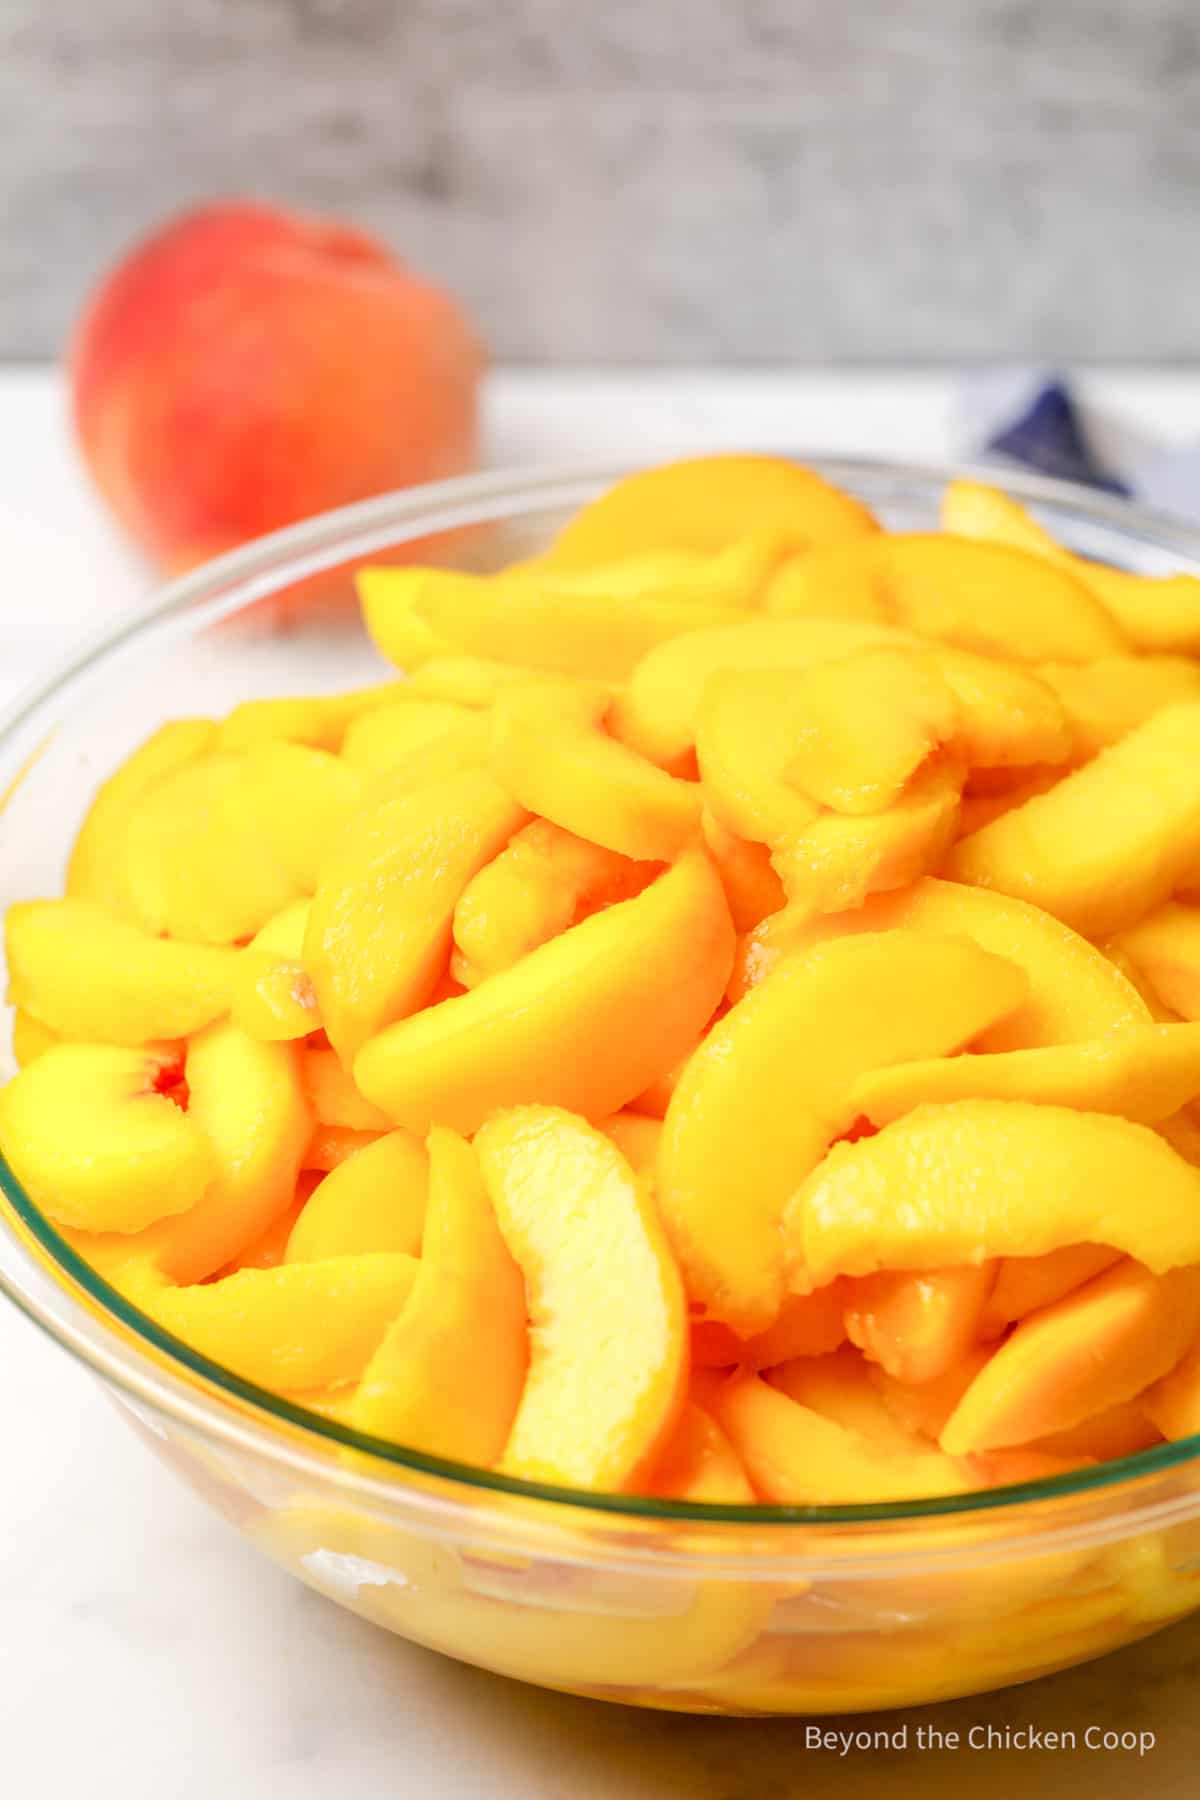
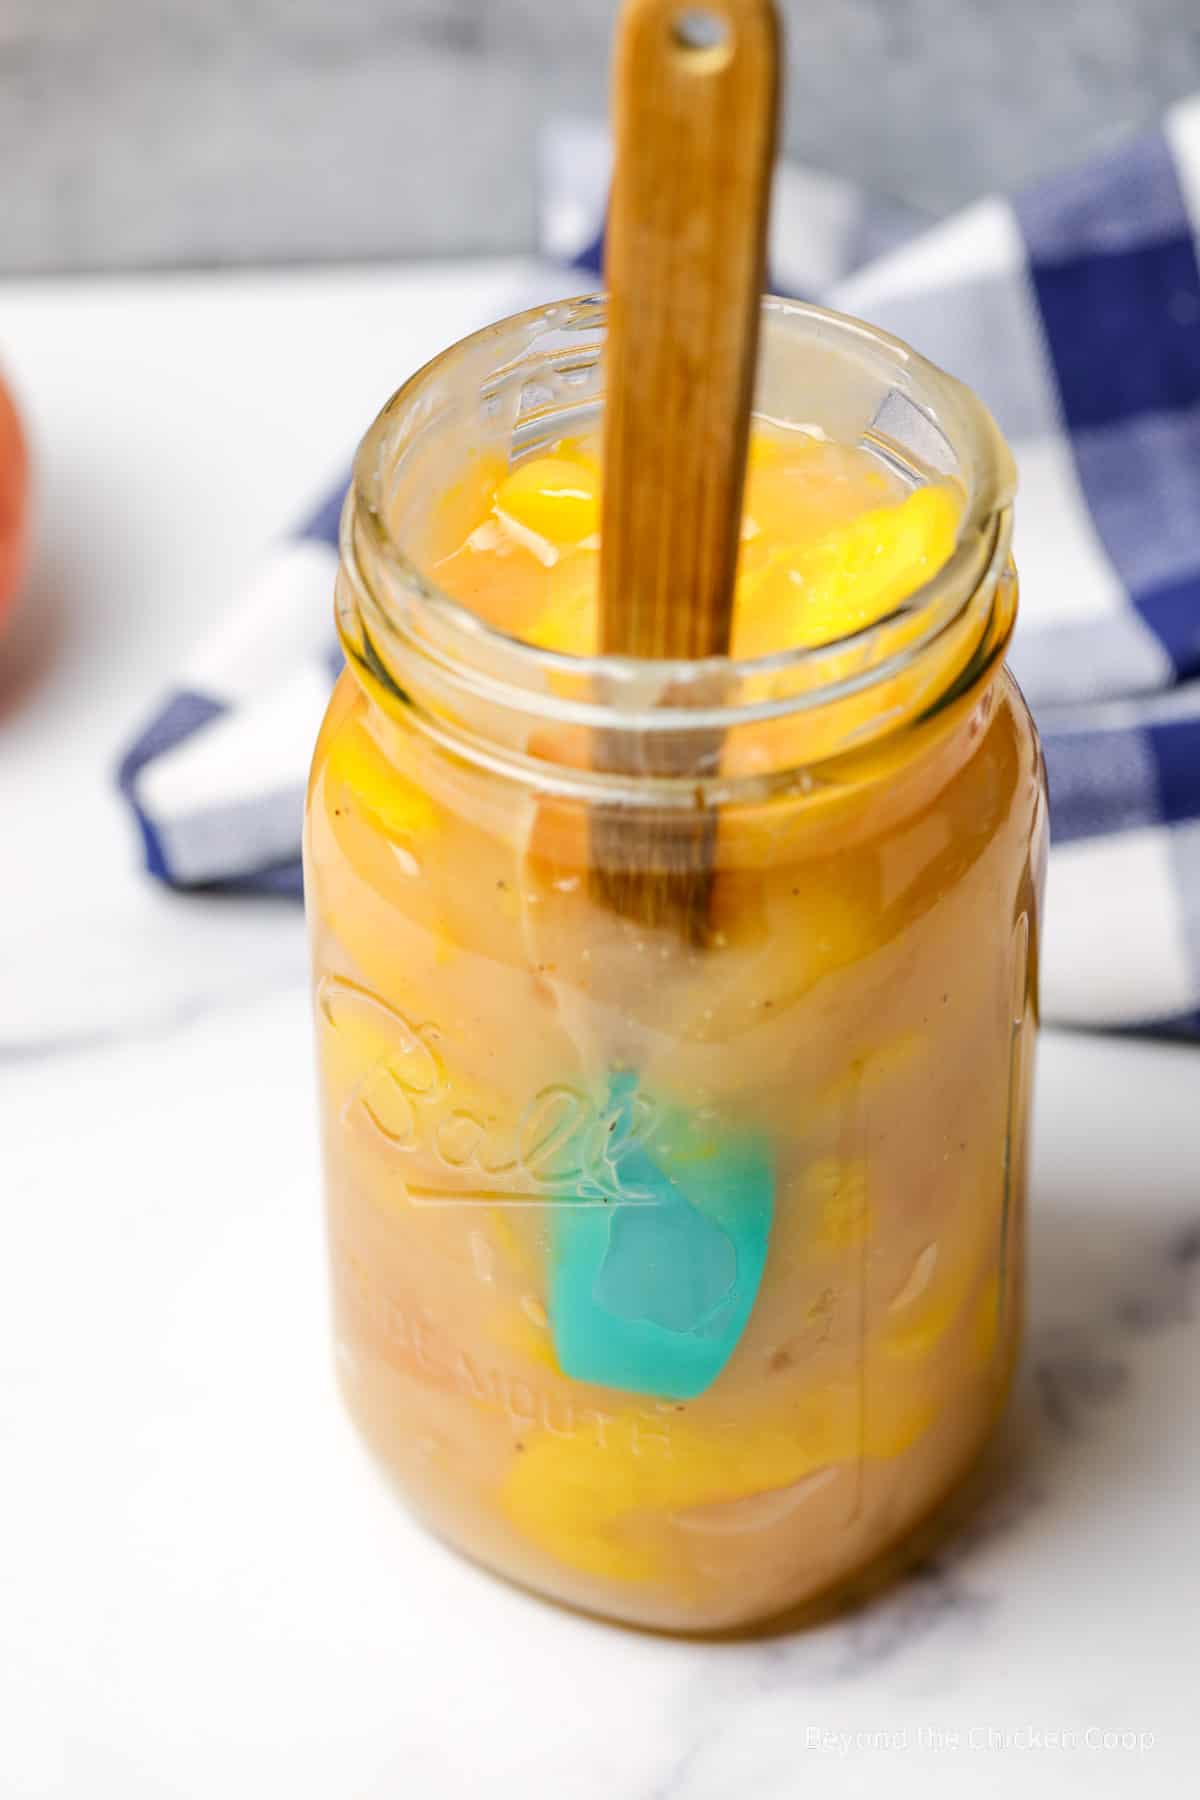
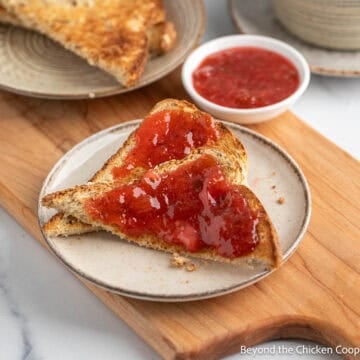
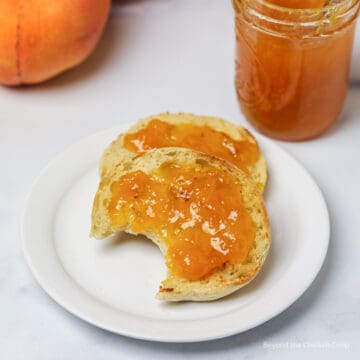
Ready to use pie filling
There's nothing better than a pantry filled with your home canned foods. Adding this peach pie filling is such a great idea!
This pie filling is ready to use and can literally be eaten straight out of the jar! (Not that I would do that!!!) If you're wanting to stock your pantry with more delicious recipes, you'll also want to check out Canning Apple Pie Filling.
Make a homemade pie crust add the filling and bake until the crust is nice and browned. Or use your favorite cobbler topping or crisp topping to make a quick and easy dessert.
This peach pie filling is also delicious on a scoop of vanilla ice cream or even spooned over vanilla yogurt.
If you are new to water bath canning, you'll want to read all about Water Bath Canning before you begin.
Key ingredients
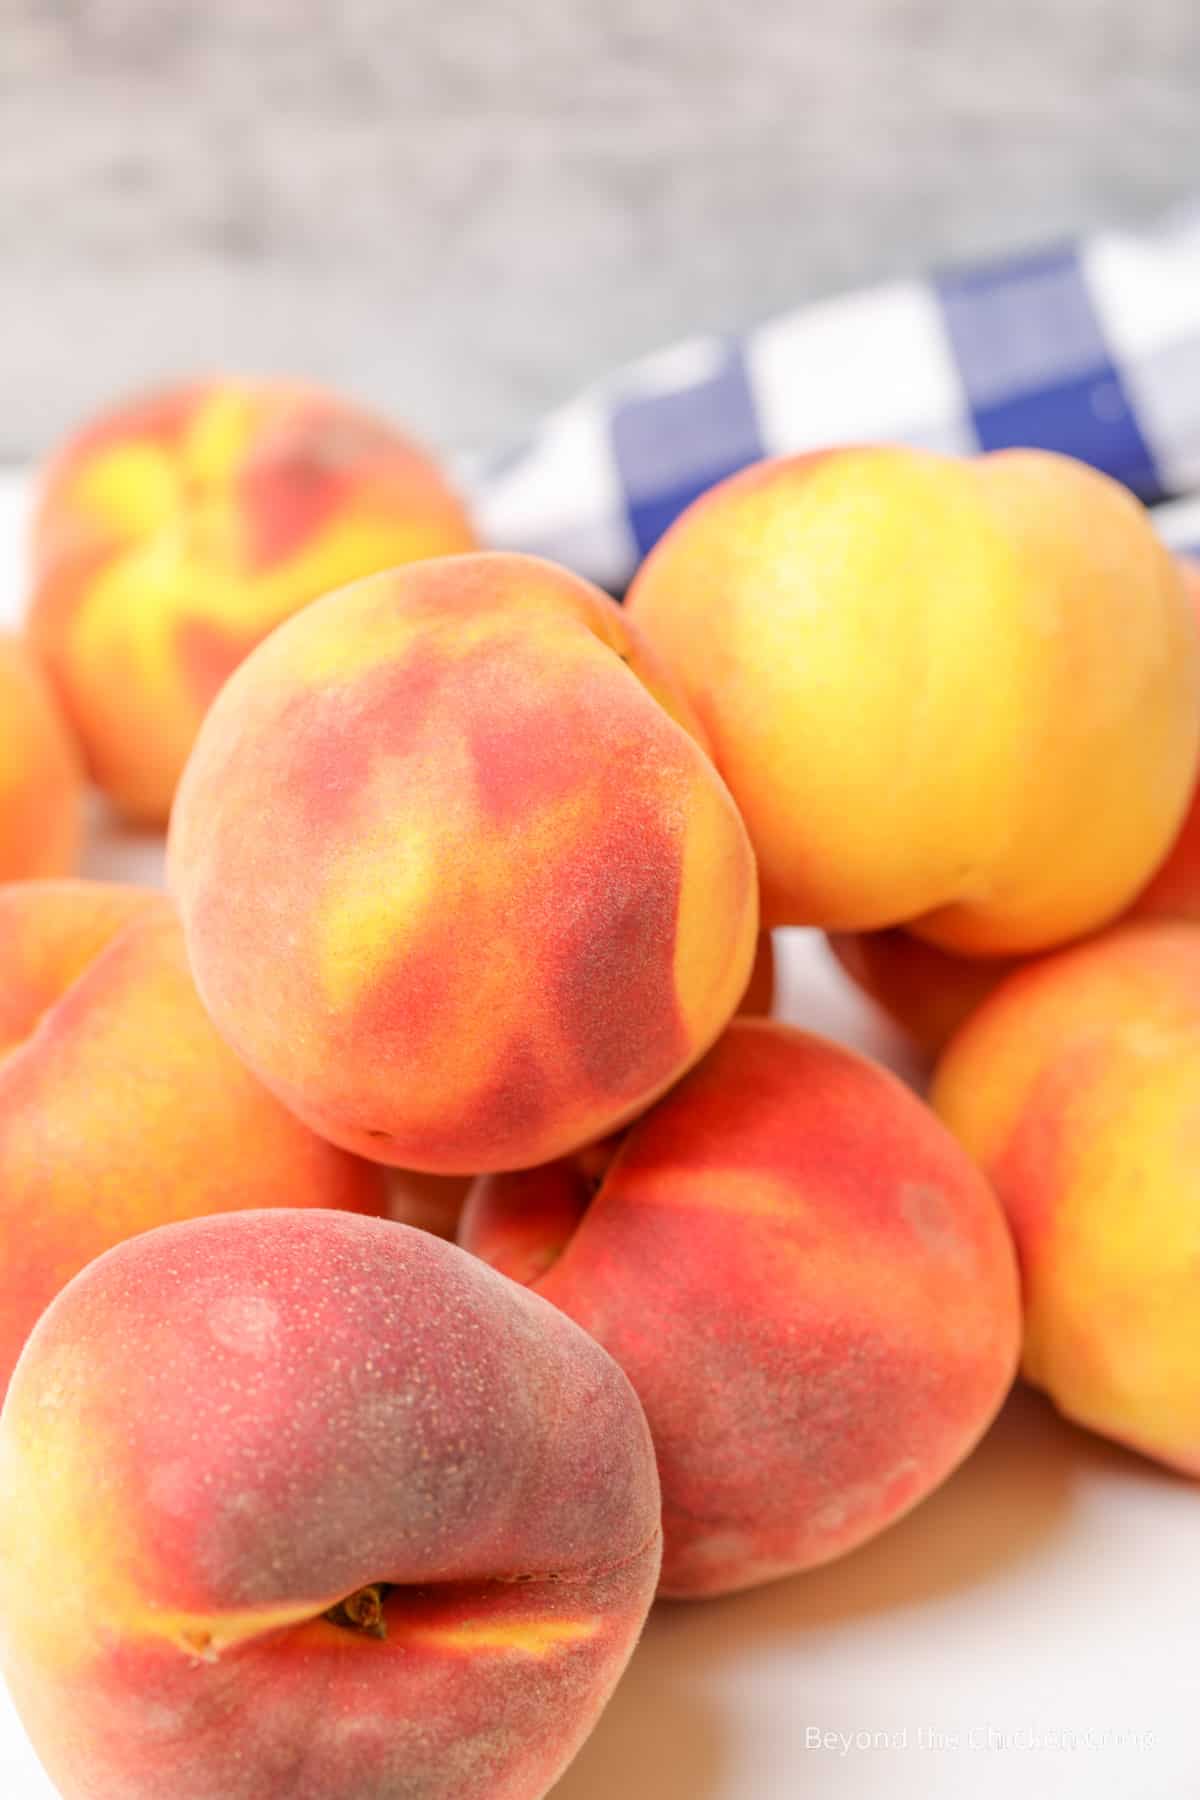
- Fresh Peaches - Find the best quality peaches you can find! Use yellow freestone peaches. White peaches cannot be used in this recipe!
- Sugar - I've reduced the original recipe to five cups of sugar. That seems like a lot, but it's less than a cup of sugar per quart. You can increase the sugar to seven cups, but I wouldn't decrease the amount any further.
- Clear Jel - This is the thickening agent used and is approved for home canning. Clear Jel is a modified cornstarch that can hold up to being heated again and again. Make certain you use regular or cook-type Clear Jel. Do not use instant Clear Jel!
- Lemon Juice - Use bottled lemon juice. The juice is used in two different applications. First, in water to keep the peaches from discoloring. Second, in the filling. Do not eliminate the lemon juice in the filling. It is necessary in order to make the filling safe for water bath canning!
Step by step directions
Peel, core and slice your peaches
- Peel your peaches. Sometimes, you'll get a peach variety that can easily be peeled as soon as the peach is ripe, without blanching the peach. But most peaches need to be blanched first.
- Set a large pot of water on the stove and bring to a boil
- Fill a large bowl with ice water
- Place 3-4 peaches into the boiling water at a time for 30-60 seconds. The time will vary depending on your peaches. Test them out at 30 seconds and if they need more time, just put them back in.
- Place peaches into the ice water bath
- Peel peaches using a paring knife. If the peel is stuck, dunk it back into the boiling water for a bit longer.
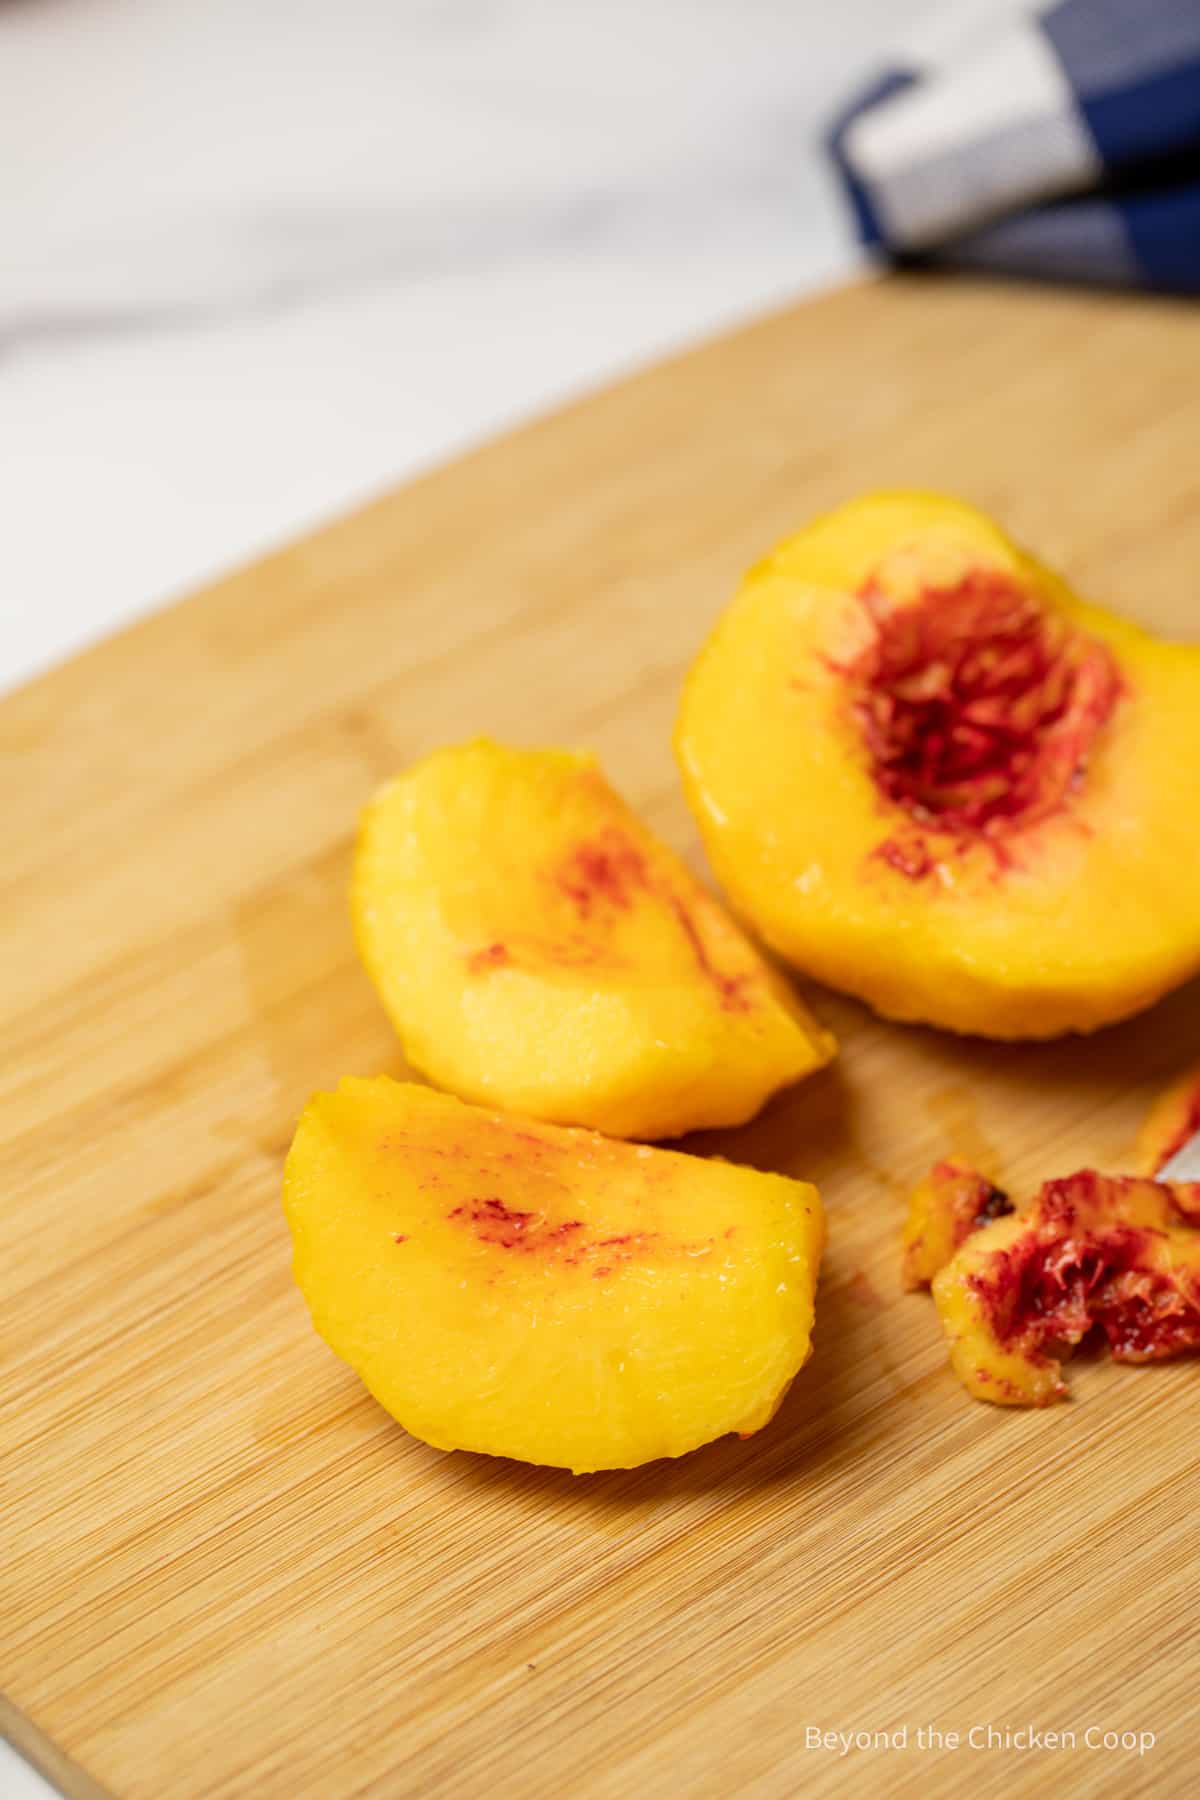
- Cut peaches in half and remove the pit. If your peaches have a rough area around the pit, just trim it off. My peaches were really red around the pit and with a very fibrous layer.
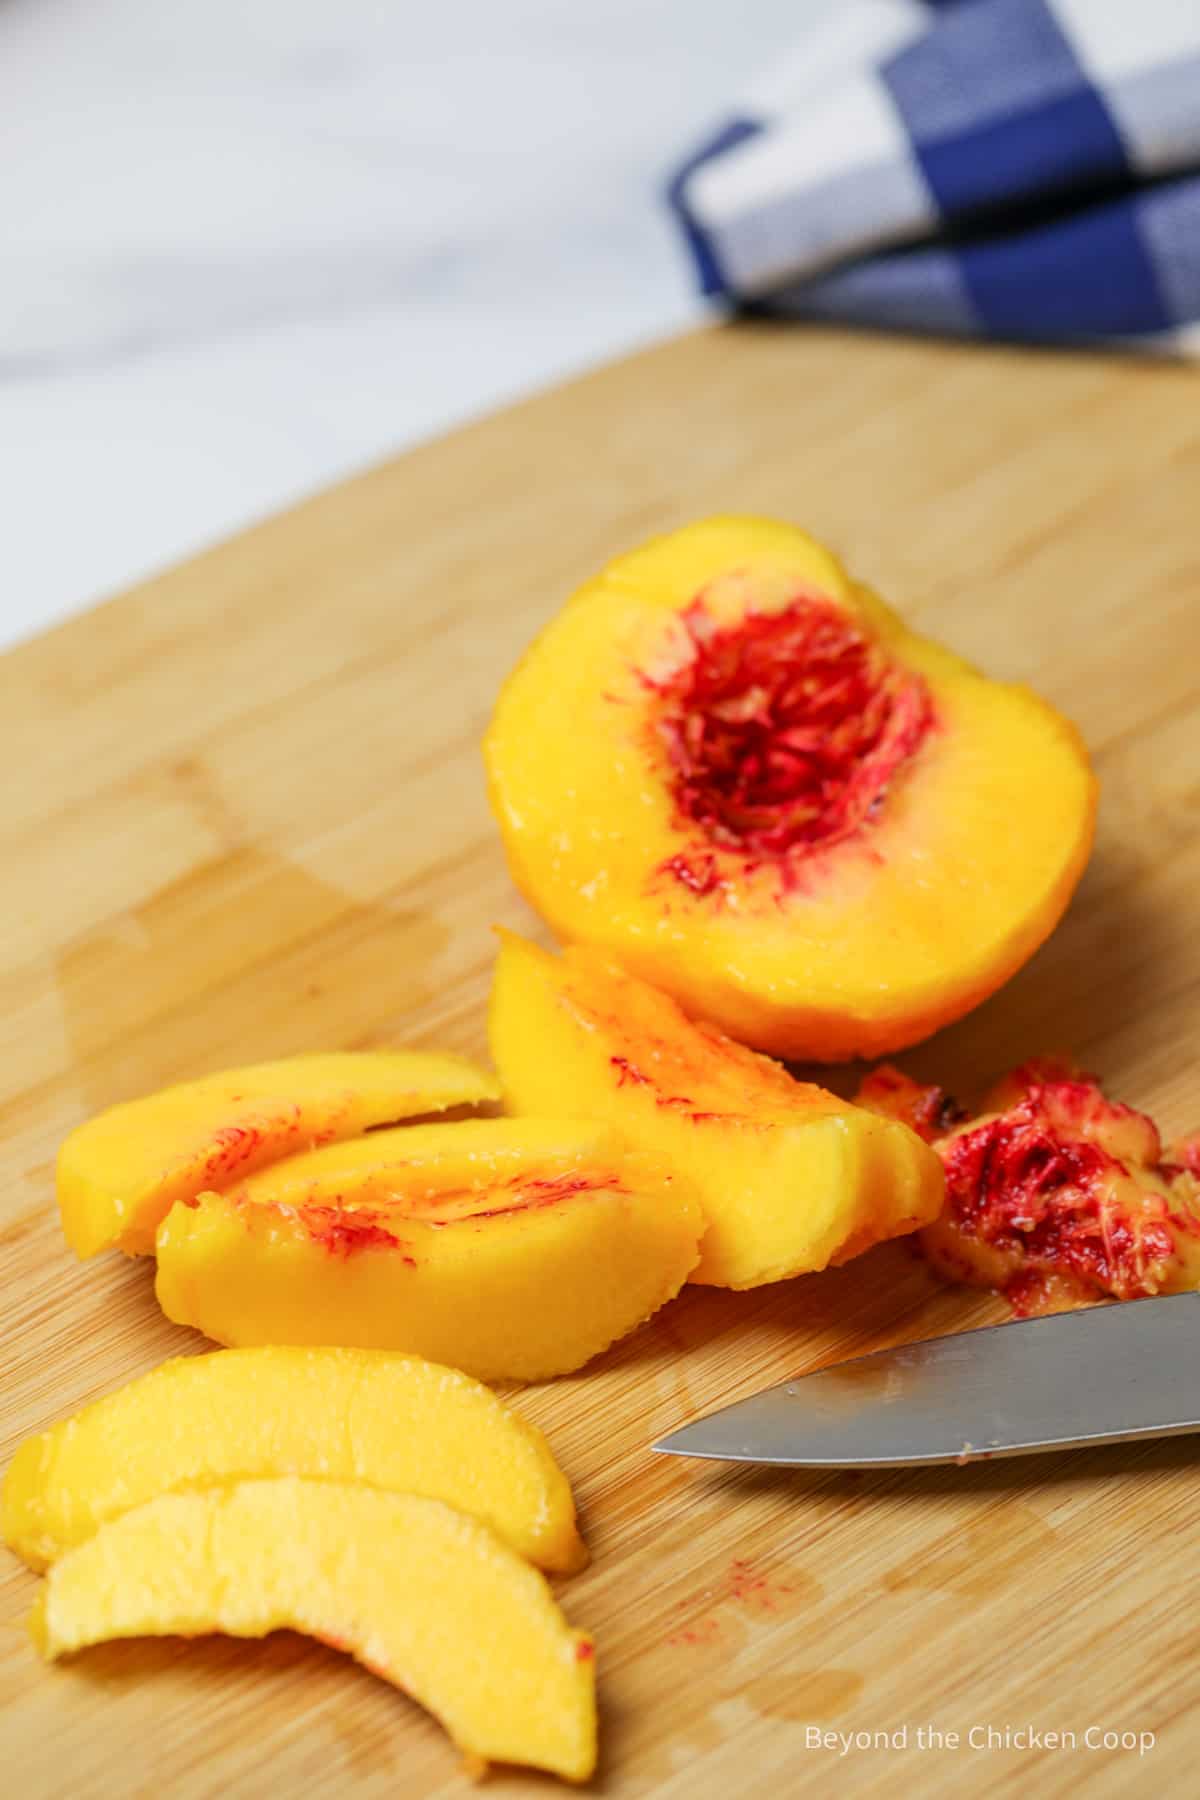
- Slice into small slices. Depending on the size of my peach, I sliced each one into 12ths or 16ths.
- Place slices into another bowl filled with cool water and ¼ cup of lemon juice to prevent the slices from browning.
Boil the peaches
This step helps remove excess air from the peaches.
- Fill a pot with fresh water and bring to a boil
- Add about 6 cups of sliced peaches to the pot. Bring water back up to a boil and boil for one minute.
- Remove slices and place in a bowl
- Repeat with remaining slices, working with just 6 cups at a time
- Keep the peaches warm while making the filling
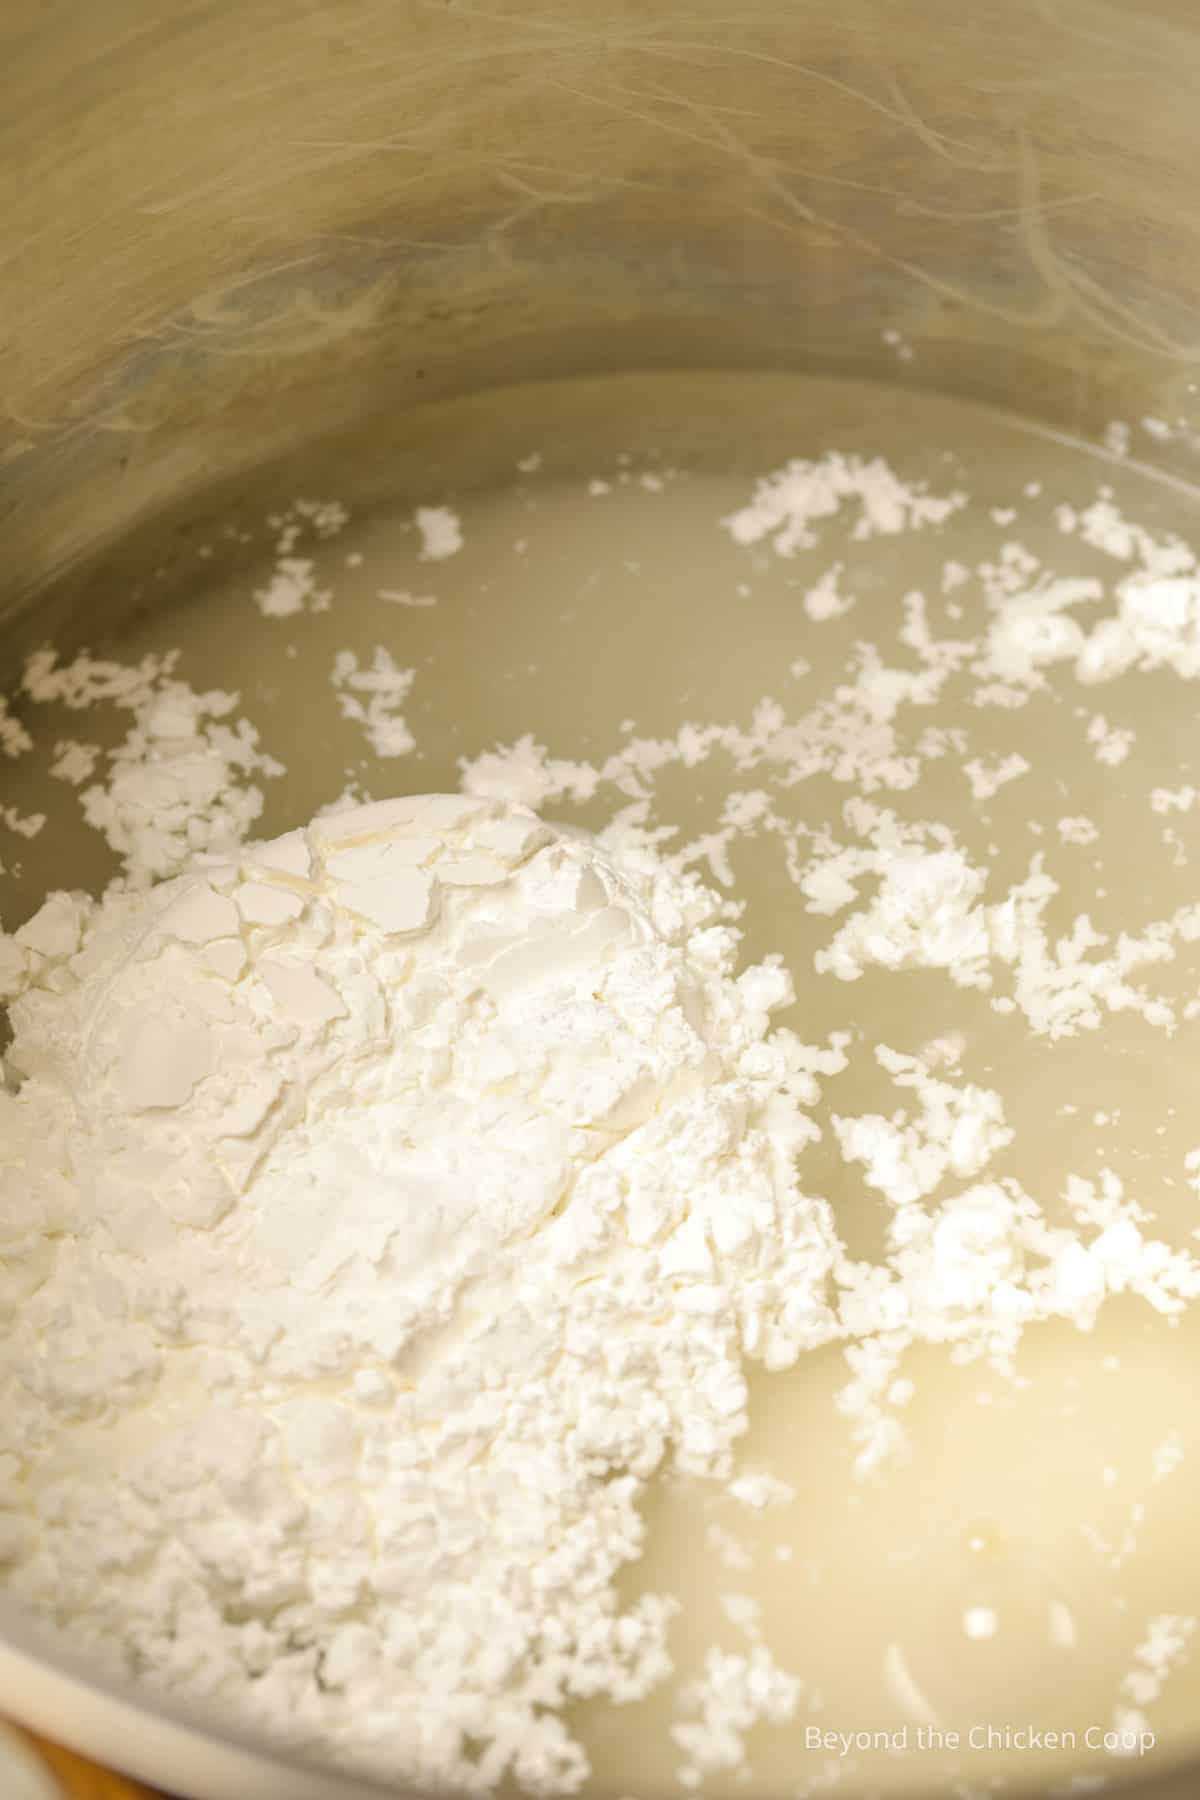
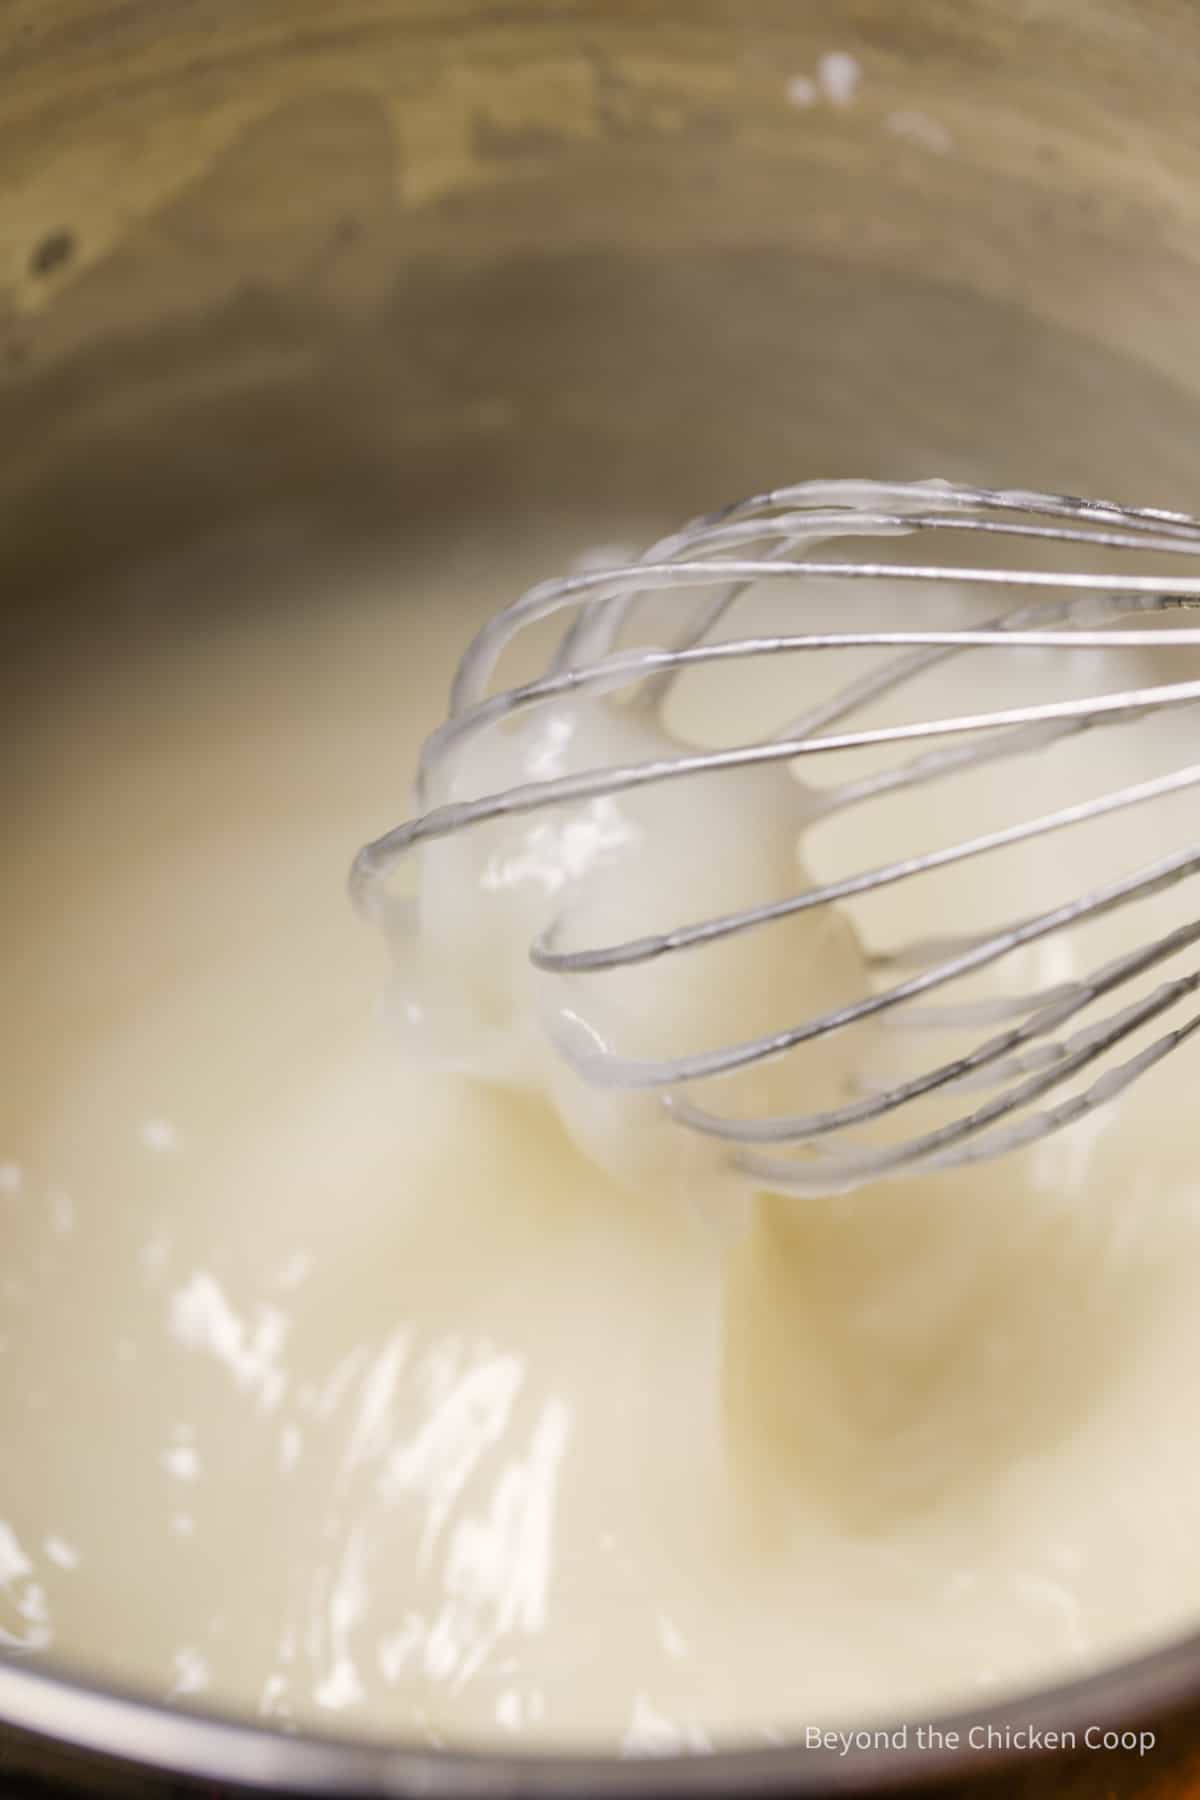
Make the filling
- In a large pot, place sugar, Clear Jel, water and spices together
- Whisk over medium heat until mixture begins to thicken
- Add lemon juice and boil for one minute, stirring constantly
- Add peach slices and fold in using a large wooden spoon or spatula
- Heat for 3 minutes over medium-low heat
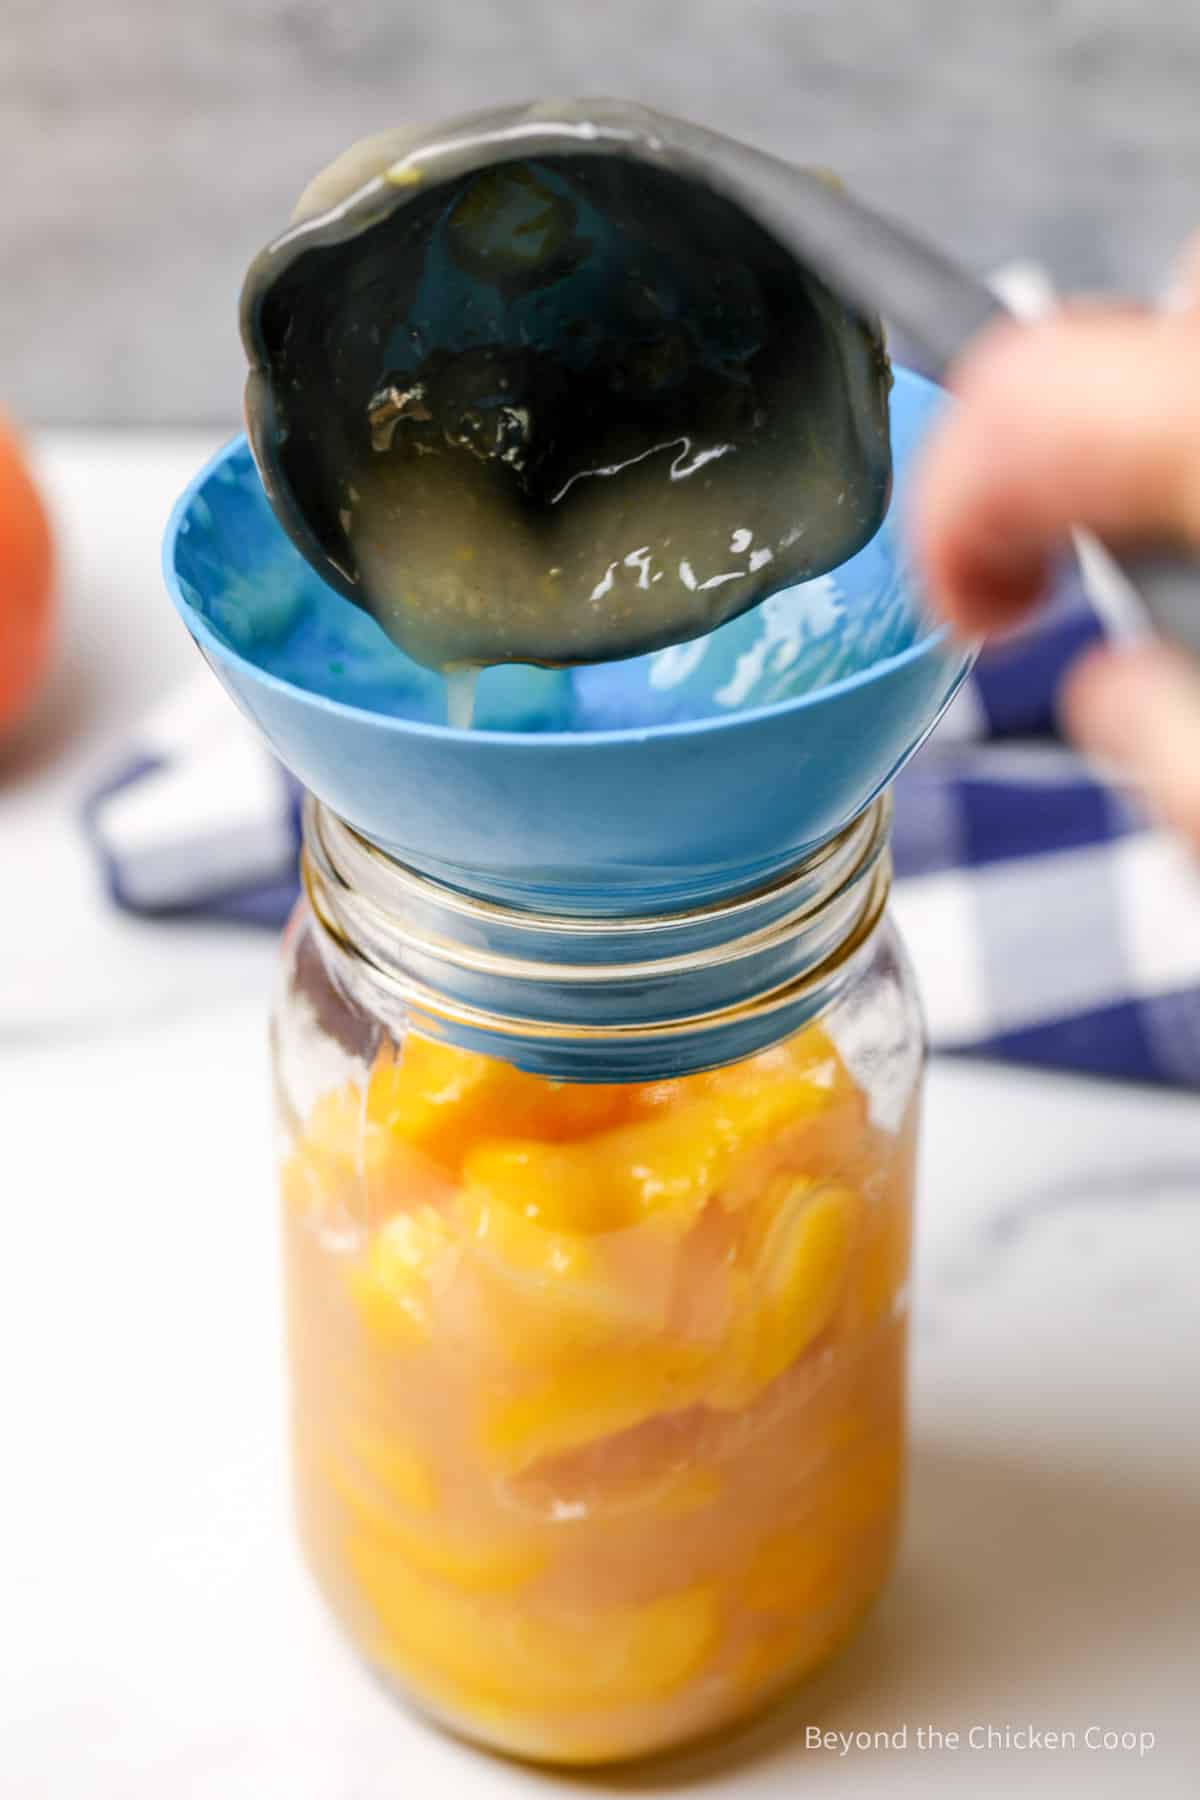
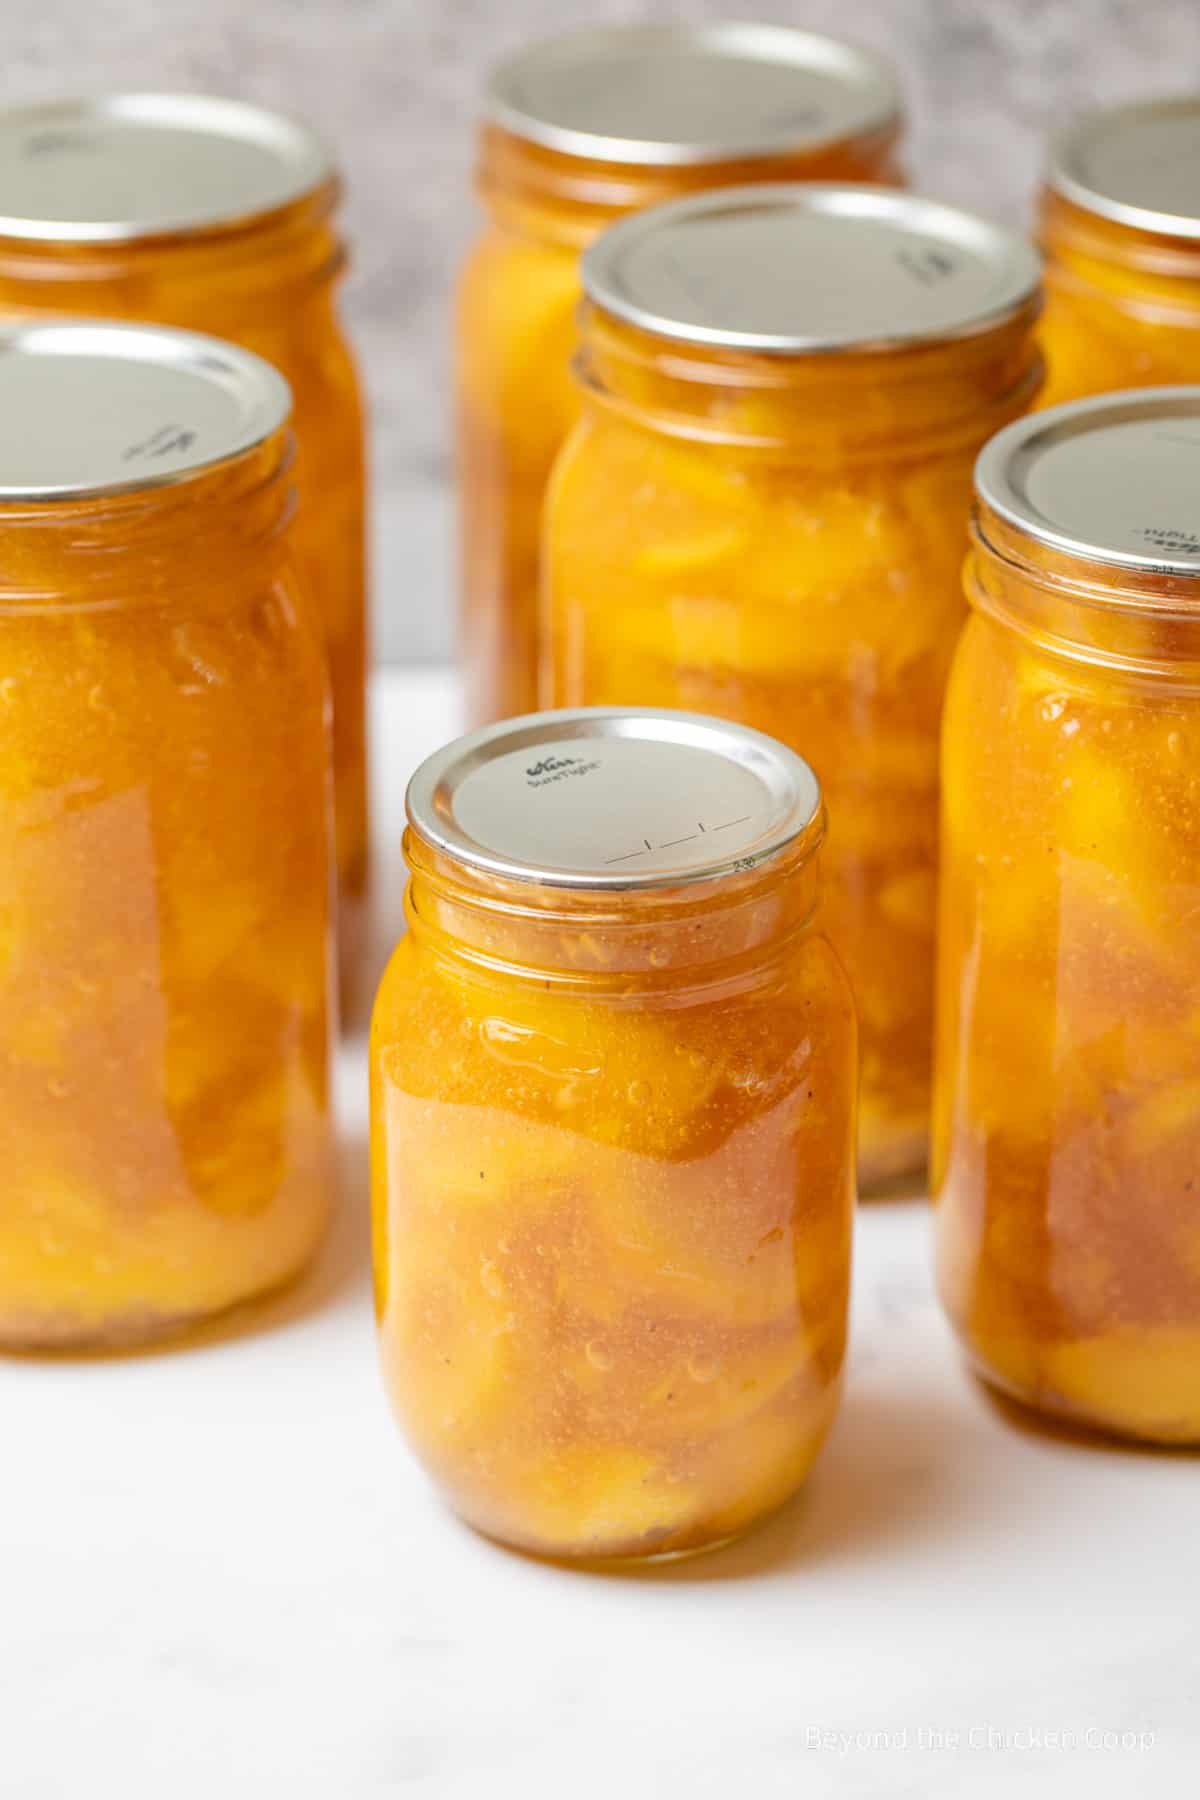
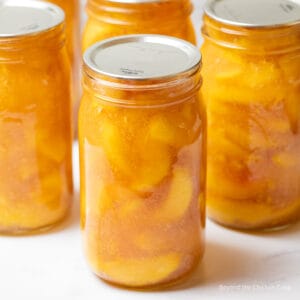
Fill the jars
- Place hot filling immediately into hot pint or quart-sized jars leaving a 1-inch headspace
- Try to remove any large bubbles with a debubbler or a small plastic spatula
- Wipe down rims
- Add lid and ring to jar
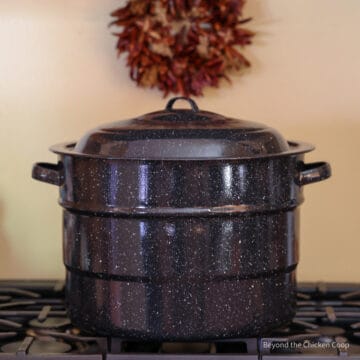
- Place in a water bath canner partially filled with simmering water
- Repeat with remaining jars
Process the jars
- Once all jars are in the canner, add additional hot water if needed. The water level should be 1-2 inches above the top of the jars.
- Place a lid on the canner and turn the heat up to high
- Once the water comes to a full, rolling boil start your timer. Process both pints and quarts for 30 minutes adding additional time for your elevation (see chart below)
- When the time is up, turn off the heat but keep the lid on the pot and keep the jars in the pot for 5 minutes. Remove the lid and keep the jars in for another 5 minutes. This will help prevent siphoning.
- Remove jars and place on a baking rack until jars are fully cool approximately 12-24 hours
- When fully cool, remove bands and check seals
- Wash outside of jars and label jars with the content and date
- Store in a cool dark place for up to 1-2 years
Elevation adjustment
Add the recommended time to your processing time according to your elevation.
| Altitude Feet | Increase Processing Time |
|---|---|
| 1,001- 3,000 3,001- 6,000 6,001- 8,000 8,001-10,000 | 5 minutes 10 minutes 15 minutes 20 minutes |
Recipe tips
- Have all ingredients and equipment set out before you get started with this recipe
- Read through the entire recipe before beginning so you are familiar with the process
- Always plan enough time when canning. Add additional time for water to boil. You don't want to run out of time in the middle of any canning project.
- You'll need a couple of large bowls and pots
- I use a large 12-quart stockpot to make the filling
- When adding the peaches to the filling, it is okay if about 1 - 1 ½ cups of liquid from the peaches is added too. Just stir it into the filling.
Frequently asked questions
For the best quality, use within one year. However, the canned pie filling will still be good for up to two years.
If a jar didn't seal, you can reheat the contents, place in a new jar with a new lid and reprocess. Or you can place in your refrigerator and eat right away!
A Note on Home Canned Food
Improperly home canned food can carry the risk of causing botulism. If eaten, this can cause a serious form of food poisoning that can lead to paralysis or death. Please follow safety procedures and inspect your food before consuming.
- Always inspect your home canned food before eating
- If in doubt, throw it out!!! The FDA recommends throwing out the food and the jar.
- Do not taste if in doubt!
- Throw it out if -
- the can is bulging, leaking or swollen
- the container looks damaged or abnormal
- the container spurts liquid or foam when opened
- the food is moldy, discolored or smells bad
- the seal is no longer intact when you examine the food
How to use pie filling
Peach pie
Prepare double-crust pie dough. Line bottom of pie plate with one crust. Add peach filling. Place top crust on and crimp edges. Cut slits in center of pie to allow steam to vent.
Bake in a preheated 425°F oven for 20-25 minutes until crust is brown and filling is hot.
Two quart-sized jars will be enough to fill a standard 9-inch pie dish. You might end up with a bit of extra filling that doesn't fit into the pie. You can eat this as a snack or spoon over ice cream!
Peach cobbler
Put 2 quarts of filling into a lightly greased baking dish and top with a homemade cobbler topping. Bake in a 350°F oven for 50-55 minutes until the filling is heated through and the topping is lightly browned.
Peach crisp
Put 2 quarts of filling into a lightly greased baking dish and top with a homemade crisp topping. Bake in a 350°F oven for 30-40 minutes until the filling is heated through and the topping is lightly browned.
More canned peach recipes
If you make this recipe, I’d love to hear about it! Leave a comment below and snap a picture and tag me on Instagram @beyondthechickencoop
Be certain to check out all my canning recipes!
Canning Peach Pie Filling
Equipment
- Measuring Cups
- Measuring Spoons
- Large Canning Pot
- Quart Canning Jars
- Large Stockpot (12 quart)
Ingredients
- 6 quarts sliced peaches
- ¼ cup lemon juice (for soaking peaches)
- 5 ½ cups water
- 5 cups sugar
- 2 cups Clear Jel (regular or cook type, not instant)
- 1 ¾ cups lemon juice (use bottled lemon juice)
- 2 teaspoons cinnamon (optional)
- ½ teaspoon nutmeg (optional)
Instructions
Peel and Slice Peaches
- Peel your peaches. Sometimes, you'll get a peach variety that can easily be peeled as soon as the peach is ripe, without blanching the peach. But most peaches need to be blanched first.6 quarts sliced peaches
- Set a large pot of water on the stove and bring to a boil
- Fill a large bowl with ice water
- Place 3-4 peaches into the boiling water at a time for 30-60 seconds. The time will vary depending on your peaches. Test them out at 30 seconds and if they need more time, just put them back in.
- Place peaches into the ice water bath
- Peel peaches using a paring knife. If the peel is stuck, dunk it back into the boiling water for a bit longer.
- Cut peaches in half and remove the pit. If your peaches have a rough area around the pit, just trim it off. My peaches were really red around the pit and with a very fibrous layer.
- Slice into small slices. Depending on the size of my peach, I sliced each one into 12ths or 16ths.
- Place slices into another bowl filled with cool water and ¼ cup of lemon juice to prevent the slices from browning.¼ cup lemon juice
Boil the Peach Slices
- Fill a pot with fresh water and bring to a boil
- Add about 6 cups of sliced peaches to the pot.
- Bring water back up to a boil and boil for one minute.
- Remove slices and place in a bowl
- Repeat with remaining slices, working with just 6 cups at a time. Keep the peaches warm while making the filling
Filling
- In a large pot, place sugar, Clear Jel, water and spices together5 ½ cups water, 2 cups Clear Jel, 1 ¾ cups lemon juice, 2 teaspoons cinnamon, ½ teaspoon nutmeg, 5 cups sugar
- Whisk over medium heat until mixture begins to thicken
- Add lemon juice and boil for one minute, stirring constantly
- Add peach slices and fold in using a large wooden spoon or spatula
- Heat for 3 minutes over medium low heat
Fill the Jars
- Place hot filling immediately into hot pint or quart sized jars leaving a 1 inch headspace
- Try to remove any large bubbles with a debubbler or a small plastic spatula
- Wipe down rims. Add lid and ring to jar.
- Place in a water bath canner partially filled with simmering water
- Repeat with remaining jars
Process the Jars
- Once all jars are in the canner, add additional hot water if needed. The water level should be 1-2 inches above the top of the jars.
- Place a lid on the canner and turn the heat up to high Once the water comes to a full, rolling boil start your timer.
- Process both pints and quarts for 30 minutes adding additional time for your elevation (see chart below)
- When the time is up, turn off the heat but keep the lid on the pot and keep the jars in the pot for 5 minutes. Remove the lid and keep the jars in for another 5 minutes. This will help prevent siphoning.
- Remove jars and place on a baking rack until jars are fully cool approximately 12-24 hours. When fully cool, remove bands and check seals. Wash outside of jars and label jars with content and date.
- Store in a cool dark place for up to 1-2 years
Notes
- Have all ingredients and equipment set out before you get started with this recipe
- Read through the entire recipe before beginning so you are familiar with the process
- Always plan enough time when canning. Add additional time for water to boil. You don't want to run out of time in the middle of any canning project.
- Filling may be canned in quarts or pint sized jars. The processing time is the same for both jars.
- 1,001- 3,000 ft. - add 5 minutes
- 3,001- 6,000 ft. - add 10 minutes
- 6,001- 8,000 ft. - add 15 minutes
- 8,001-10,000 ft. - add 20 minutes
Nutritional Disclaimer:
Nutritional information is provided as a courtesy and should only be construed as an estimate rather than a guarantee. To obtain the most precise nutritional information in a provided recipe, you should calculate the nutritional information with the exact ingredients you are using when preparing the recipe using your preferred nutrition calculator.
Nutrition
Resources -
- Pacific Northwest Extension Publishing - WSU, OSU, U of I
- National Center for Home Food Preservation
Lady Irvine says
I dont usually comment on recipes but i was so impressed with how exact everything turned out, i had to. I just put my full (to the inch!) 7 quarts in the water bath. The consistency and flavor are top notch. The recipe was so easy to get through, step by step. Super happy. Not sure how people ended up with issues. I followed to a "T".
Kathy Berget says
Thanks so much! I appreciate you taking the time to leave a comment. It really does mean a ton! 🙂
Mk says
:(. Hours of work pretty much ruined. Please add to your recipe to add water to your cleargel before adding it to the pot. Like bad gravy, my clearly lumped up. I tried whisking it but it’s still lumpy. Also, too much cleargel. It’s like a clumpy mess. Boiling the peaches has left them bland.just bummed I spent so much money on peaches and jars only to have filling that’s full of lumps. I should’ve known to add water to the starch, but I wasn’t thinking. The flavor is super bland and tastes like cornstarch.
Kathy says
Hi MK,
I'm wondering if you used Instant Clear Jel instead of the cook type. Instant does not work in this recipe. This recipe is based off of a recipe from the National Center for Home Food Preservation, which is the gold standard for home canning. I use their recipes because they are tested and safe for home canning.
Kathy
Mk says
No :). I didn’t use instant, I can see where that could be what happened! But I used the cooking kind. I think it was not adding water to make a slurry before adding it to the sugar and water.
Kathy says
Thanks for letting me know. I'm sorry this didn't work out for you.
Kathy
Sherry Paddock says
Im on my 3rd batch of pie filling, love love love, I have also made apple pie filling with recipe from your website. It is very crucial to use the cook type of sure jel , thanks I give a lot of my pie fillings as gifts. ♥️
Kathy says
Hi Sherry,
Thanks so much! I'm so glad you have access to great peaches and are making this pie filling! The cook type is absolutely necessary. I accidentally used the quick type once and it was apparent right away. The quick type behaves very differently and will not work for canning.
Kathy
Debbie A says
This is the second year in a row I have used this recipe ! Last year it was so delicious - and what a treat to be able to just get out a jar and make a pie or a crisp really quickly and have the fresh summery taste of peaches! Your instructions were spot on and even my first time making and canning pie filling it was a success! I had to do it again this year as well and it turned out just as good! I peeled and sliced the peaches and measured out 8 quarts of peaches - when they were all boiled for one minute I ended up with 6 quarts of peaches and I think that was just the right amount of peaches, I felt like last year I could have had more peaches in the filling. So I think this year is just perfect! This amounted to about 17 pounds of raw peaches before peeling and slicing. Hope this is helpful - because I was thrown off last year by the 6-7 pound comment.
Kathy says
Hi Debbie,
Thanks so much! I'm so glad you're enjoying the peach pie filling! Thank you letting us know exactly how many peaches you used. I'm sure this will be helpful for others!
Kathy 🙂
FSethman says
I used 35 peaches and got 7 full qt of pie filling! I’m so glad to have found- and used your recipe today. Thank you
Kathy says
Thanks so much! 🙂
Wayne says
WITH ALL THE ADS ALL OVER THE SCREEN I COULD SEE THE RECIPE, WHAT A WASTE!
Kathy says
Hi Wayne,
The ads allow me to provide FREE recipes to you! I spend hours developing recipes, taking photos, writing up the recipes so you can have FREE recipes. 🙂
Robyn Hovey says
The filling is delicious, but my poor peaches were swimming in the glaze. I had to strain them out before I could can them. I weigh everything in my kitchen for accuracy. I seriously don't believe the 6 lbs of peaches was correct. I would venture at least 8 lbs next time.
I wish I had read the comments first, so I wouldn't have made the same mistake as others. It would be most helpful to anyone else who happens upon your site if you could update your recipe accordingly.
I now how 2 quarts of glaze I strained off, and that's after leaving quite a lot in the jars. Any idea what to do with it?
Thank you for sharing the recipe. I'll be making it again with the appropriate weight change.
Kathy says
Hi Robyn,
The recipe calls for 6 quarts of sliced peaches. Your best bet is to peel and slice your peaches and then measure them. I have removed the approximate weight from the recipe so that doesn't throw people off.
Thank you,
Kathy
Kelci says
I only got 5 quarts. Why is my yield so off?
Kathy says
Hi Kelci,
I'm not certain what happened. Did you start with 6 quarts of sliced peaches?
Kelci says
Thank you for your response. I think that’s where I went wrong. I weighed them and had a little more than 6 lbs. Other recipes I’ve read said 6 quarts weighs approx 7-8 lbs. I don’t think I had enough peaches which is a bummer because I’m drowning in them haha. Easy to follow recipe. Thank you!
Karen says
I have never used Clear Jel and I want to try your recipe, I see that it is a powder do you mix it with water to make the 2 cups you need if so how much powder do you use?
Kathy says
Hi Karen,
The powdered Clear Jel is not mixed with any liquid until it is added to the mixture. You need 2 full cups of the powder. I have step-by-step photos in the post that might be helpful for you. One thing to note, make certain you aren't using instant or quick Clear Jel.
Let me know how it turns out!
Gwen says
I tried this recipe today and it was the first time I’ve ever used Clear jel. I ended up with a very gelatinous mess that tastes more lemony than peachy. Taste good though if one can get past the texture. What ever did I do wrong? I have read over the recipe about 20 times and I did everything correctly.
I’m an experienced canner so I’m terribly disappointed. Reaching out here…… not being critical.
Kathy says
Hi Gwen,
Was the Clear Jel instant or cook? The instant does not react the same way at all.
Kathy
Arlene Harrell says
O. My. Goodness. I am currently waiting for my pie filling to finish the water bath. I got 6 1/2 quarts. It is so good and exactly the kind of recipe I was looking for, just plain peach pie filling. Not over seasoned or oversweetened. Thank you, thank you, thank you for sharing this recipe.
Kathy says
Yay!!! Enjoy! 🙂
Katie says
How much sugar is in this recipe? In the filling part it says add sugar but not sure how much
Kathy says
Oh my goodness!!! I left the sugar off the recipe!!! Thanks so much for letting me know...I used 5 cups of sugar. Going in now to update the recipe!
Thanks so much!
Kathy 🙂
David @ Spiced says
Your timing here is impeccable, Kathy - it's almost like you read my mind! We are heading to South Carolina on a day trip again this weekend, and we were talking about picking up more peaches. I'd love to save some of 'em for a cold winter day!