
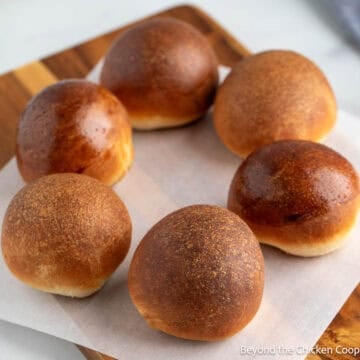
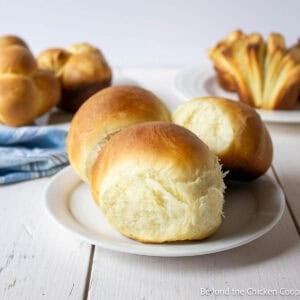
Soft, fluffy, and perfectly golden, these Homemade Dinner Rolls are a must-have for any meal. Made with simple ingredients, these rolls are easy to prepare and have a deliciously light texture.
Whether you're serving them for a holiday feast or a casual family dinner, these warm, buttery rolls will have everyone reaching for seconds!
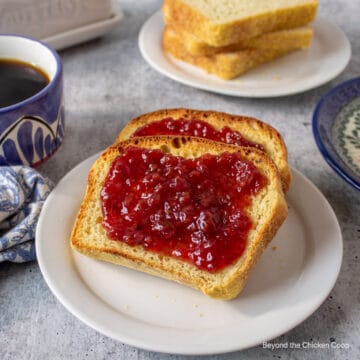
Soft homemade rolls
Nothing beats the taste of warm, freshly baked Homemade Dinner Rolls straight from the oven. With their soft, pillowy texture and buttery flavor, these rolls are a perfect addition to any meal. Whether served with a hearty soup, a holiday feast, or simply enjoyed with a pat of butter, they are sure to be a favorite at the table. Making them from scratch is easier than you might think, and the results are well worth the effort!
Tips for Making the Best Dinner Rolls:
- Use fresh yeast – Make certain your yeast is fresh and not expired for the best rise. Always proof the yeast before adding the other ingredients.
- Knead the dough well – Kneading until the dough is smooth and elastic helps create the perfect soft texture.
- Allow proper rising time – Let the dough rise in a warm, draft-free area until doubled in size for the fluffiest rolls.
- Brush with butter – A light coating of melted butter after baking adds flavor and gives the rolls a beautiful golden sheen. If you prefer a different glaze, check out bread glazes.
Ingredients for dinner rolls
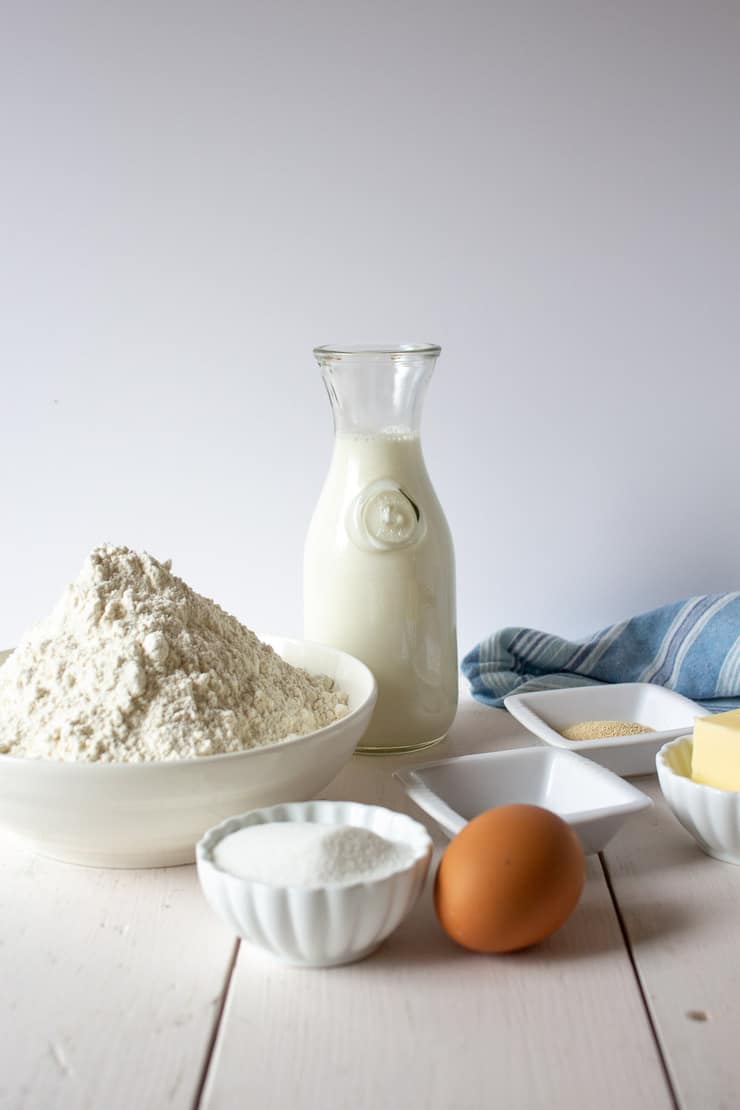
- Flour - Use all-purpose flour or bread flour.
- Milk - I like to use whole or 2% milk. It adds flavor and helps develop a nice crumb.
- Yeast - Active Dry Yeast
- Butter - I use salted butter in this recipe.
- Sugar - Used to activate the yeast and to sweeten the dough.
- Egg - Adds richness to the dough.
Shaping dinner rolls
Usually, when I make homemade dinner rolls, I shape the rolls into a nice rounded shape. This time I decided to make a few different variations. I still made the round classic dinner rolls, but I also made a cloverleaf dinner roll and a fan-shaped dinner roll.
I used the same bread dough for all so the taste doesn't change, just the shape.
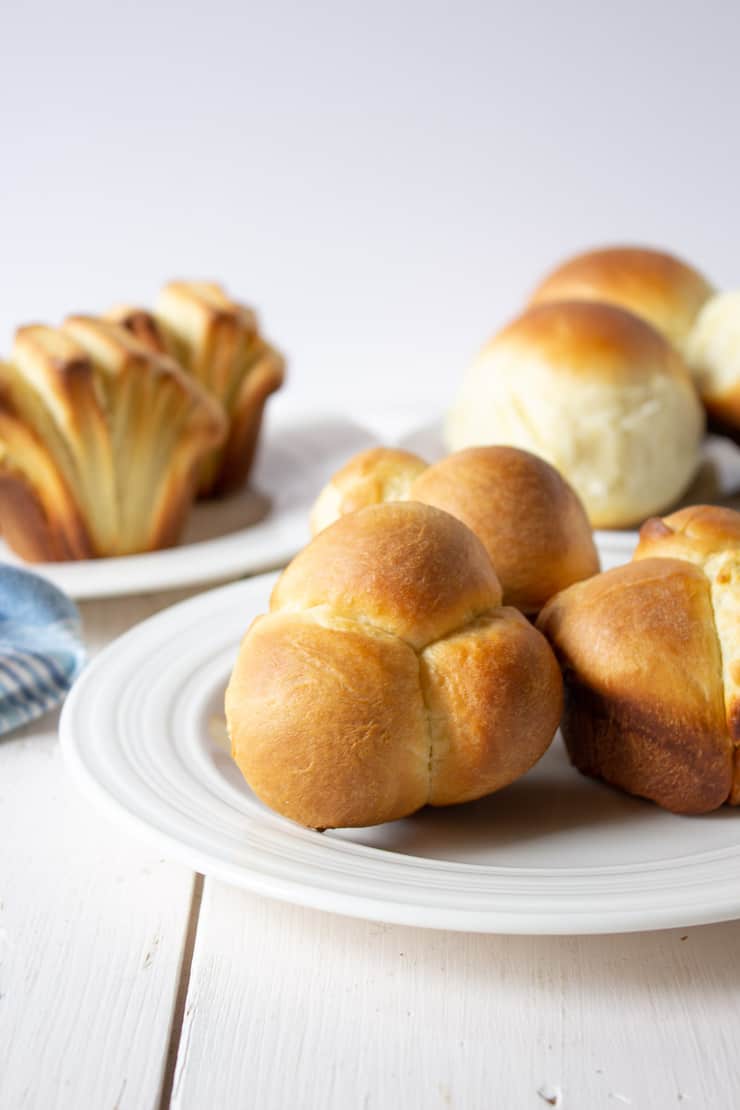
To Make Classic Dinner Rolls
- Divide dough in half
- Then divide into 16 equal portions.
- Cup your hand around one portion. With dough on a countertop, make a circular motion until a round dough is formed.
- Set on a greased baking sheet ¼ - ½ inch apart.
- Repeat with the remaining dough.
To Make Cloverleaf Rolls
- Divide dough in half
- Work with one-half at a time. Cut the dough into 8 equal portions.
- Take one portion and divide it into thirds. Roll each third into a small ball.
- Place the three balls into one greased cup of a cupcake pan. The three balls form one roll.
- Repeat with the remaining dough.
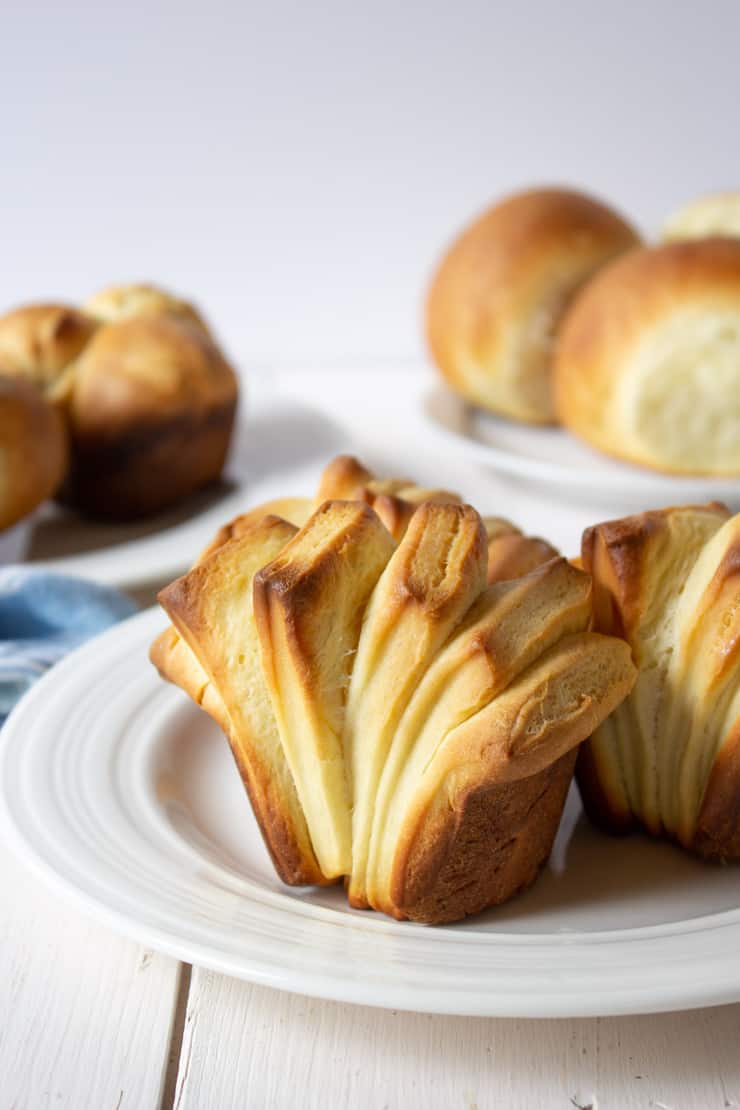
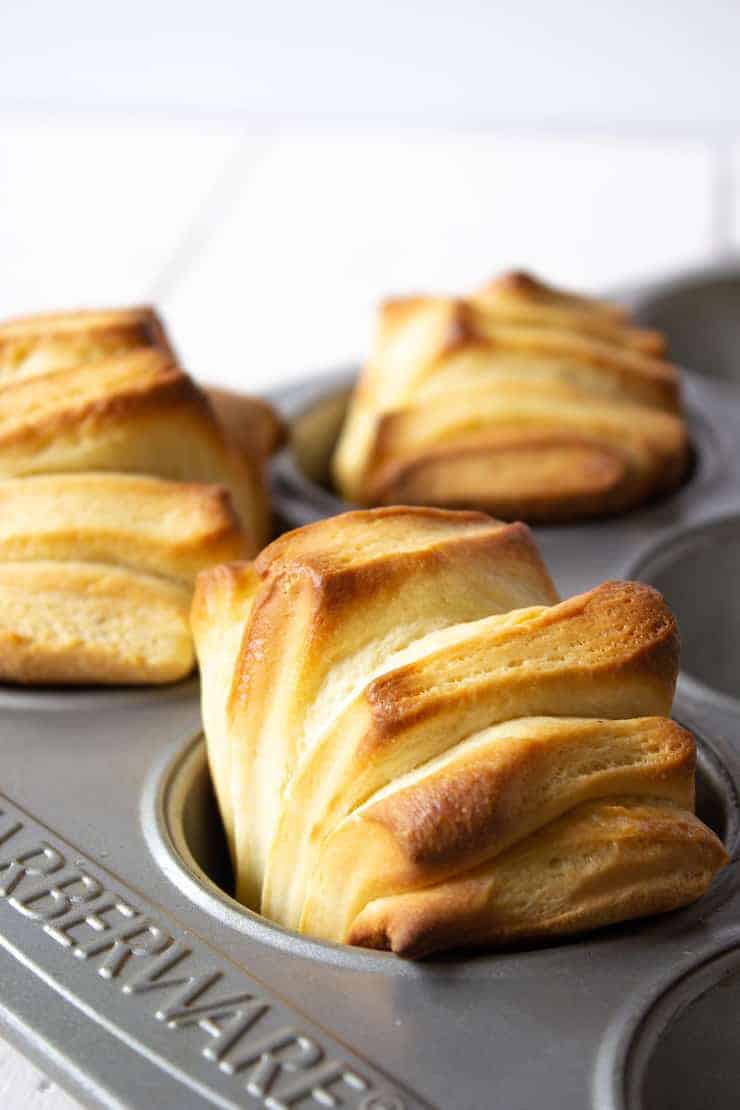
To Make Fan Shaped Rolls
- Divide dough in half.
- Work with one-half at a time.
- Roll dough out into a rectangular shape approximately 6" x 10"
- Use a pizza cutter to trim off uneven sides.
- Cut dough with a pizza cutter into 2-inch squares.
- Stack 6 squares together and place in a greased cupcake pan. Place stacked squares on their sides.
- Repeat with the remaining dough.
If you make this recipe, I’d love to hear about it! Leave a comment below and snap a picture and tag me on Instagram @beyondthechickencoop
Check out all my bread recipes!
Homemade Dinner Rolls Recipe
Video
Equipment
- Measuring Cups
- Measuring Spoons
- Cookie Sheet
Ingredients
- 1 cup whole milk (warmed to 100-120°F)
- ¼ cup granulated sugar
- 2 ¼ teaspoons active dry yeast (or 1 packet)
- ¼ cup butter (salted butter) (melted)
- 1 teaspoon salt
- 1 egg
- 3 ½ cups all purpose flour (may need an additional ¼ cup flour)
- ¼ cup butter (salted butter) (melted, brush on dough just before baking)
Instructions
- In a large bowl, combine milk, sugar and yeast. Stir lightly and let sit for 5 minutes until mixture is bubbly.1 cup whole milk, ¼ cup granulated sugar, 2 ¼ teaspoons active dry yeast
- Mix in butter, salt egg and 2 cups of flour. Add additional flour ½ cup at a time until the dough forms a ball. Add up to ¼ more flour if needed.¼ cup butter (salted butter), 1 teaspoon salt, 1 egg, 3 ½ cups all purpose flour
- Knead with a stand mixer for about 5 minutes or knead by hand for 10 minutes.
- Place dough into a greased bowl and cover. Let rise until doubled, approximately 1 - 1 ½ hours.
- Gently punch dough down. Divide dough in half and then each half into eighths. Shape dough into rolls.
- Place rolls on a greased baking sheet. Cover and let rise for 30-45 minutes.
- Just before baking brush the tops lightly with melted butter.¼ cup butter (salted butter)
- Bake in a preheated 400°F oven for 12-18 minutes until golden and fully baked through.
- Optional - brush with melted butter when the rolls are finished baking.
- Remove from baking sheet and let rolls cool on a baking rack.
Notes
- Read through the entire recipe before beginning. Gather all your ingredients to make certain you have everything you need.
- Add the flour in ½ cup to 1 cup batches. You may need to add an additional ¼-½ cup of flour. You want your dough tacky, but not sticky.
- Rise time will vary depending on the temperature of your kitchen. Check your dough throughout the rising time to see if it is ready.
- Be careful to not let your dough over-rise or overproof on the second rise. Overproofed dough will deflate in the oven and will bake up flat.
Nutritional Disclaimer:
Nutritional information is provided as a courtesy and should only be construed as an estimate rather than a guarantee. To obtain the most precise nutritional information in a provided recipe, you should calculate the nutritional information with the exact ingredients you are using when preparing the recipe using your preferred nutrition calculator.
Nutrition
Robinn says
I love how you answer everyone's question's!! That is really nice! Thank You
Kathy says
Oh! Thank you!!! 🙂
Joy says
This may be a silly question. But how do you warm your milk? I’ve tried it on the stove, but I feel like I always make it too warm.
Thanks!
Kathy says
Hi Joy,
Not a silly question, at all! Warming on the stove works or you could warm in the microwave. I usually place mine in a large glass measuring cup and warm in the microwave. It will take 45 -60 seconds, depending on your microwave. If the milk becomes too hot, just let it cool a bit. It it's too hot, it will kill your yeast.
I hope this helps!
Kathy 🙂
allie says
Hi Kathy - these dinner rolls look great. I've never seen the fan rolls- very clever. I've made the traditional shape and the cloverleaf, so pretty and delicious. Great photos and video - extra mouth watering! I just found a jar of homemade cherry preserves in the back of the pantry -- thinking that would be INCREDIBLE with these rolls. Hope all is well at your house - snow here and the wind is whistling to beat the band.
Kathy says
Cherry preserves would be delicious with homemade rolls! Stay warm in that storm!
annie@ciaochowbambina says
So homey and delicious! Great video - I might actually get it right with your instruction! Thank you!!
Kathy says
You can do it!!!
judy says
Those look yummy. The video makes it look easy.
Dawn - Girl Heart Food says
I LOVE baking and especially love bread, but have never made my own dinner rolls! Such a great guide, Kathy and love the different styles. I bet these are amazing fresh outta the oven smeared with lots of butter 🙂
Kathy says
They are delicious right out of the oven!
Mary Ann | The Beach House Kitchen says
You are the queen of breads Kathy! I'm so envious. Everything you make always looks amazing. I'll need to test my skills with this one!
Kathy says
Ahhhh....Thanks, Mary Ann!
Fred G says
Three for one. What a good idea for rolls.
Kathy says
Thanks! 🙂
Fran @ G'day Souffle' says
Hello Cloverleaf rolls! I have never made them before, but will put them on my list! I clicked on your video, which played nicely on my 'side bar'. Thanks!
Kathy says
Thanks, Fran! The cloverleaf are fun to make and super fun to eat. I tend to pull of one section at a time and I have all those wonderful soft sides!
Stacey @ The Sugar Coated Cottage says
These rolls look amazing, love the variation in shapes, the fan is my favorite! Take care.
David @ Spiced says
Kathy, I've got a confession to admit. I didn't make homemade rolls for Thanksgiving this year. We just ran out of time, so I skipped it. And I regretted it all day long...and the next day, too, since Thanksgiving leftovers on a sliced homemade roll are just amazing. This post just confirms that I need to go make some rolls. Better late than never, right?? 🙂
Kathy says
Sometimes it's tough to make everything. We went to my in-laws so all I was in charge of was the rolls!