If you love to fish and end up with a surplus of fish, knowing how to can fish is a great skill. These step-by-step directions for canning fish are perfect for salmon, trout, and kokanee.
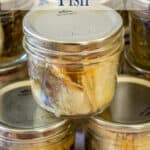
Stock your pantry with this shelf-stable fish!

Why can your own fish
If you're into canning your own food for food preservation, canning fish is a perfect item to add to your pantry.
Home-canned fish is perfect if you have access to freshly caught, really delicious fish. We fish for kokanee fish, which is a landlocked salmon. We often end up with a surplus of fish and that's when we can up a batch to use all year long.
In addition to canning this fish, we also smoke fish and can the smoked fish. A variety in our pantry is a good thing! We like having options.
This recipe is also really great for canning salmon and trout.
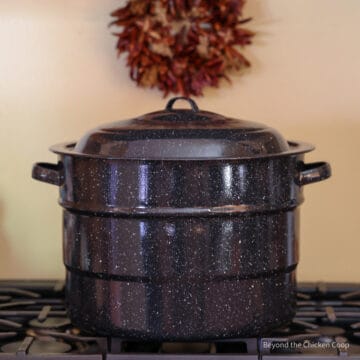
Canning fish requires a pressure canner. This is not the same as an instant pressure cooker. You need one that is designed for home canning. We use one that is a 16-22 quart pressure canner.
Canning and preserving your own food is not only rewarding, but you have a supply of the most amazing food. You know what's in it and you know exactly how it's been handled and processed.
If you haven't used a pressure canner before, you'll want to read How to Use a Pressure Canner.
Key ingredients
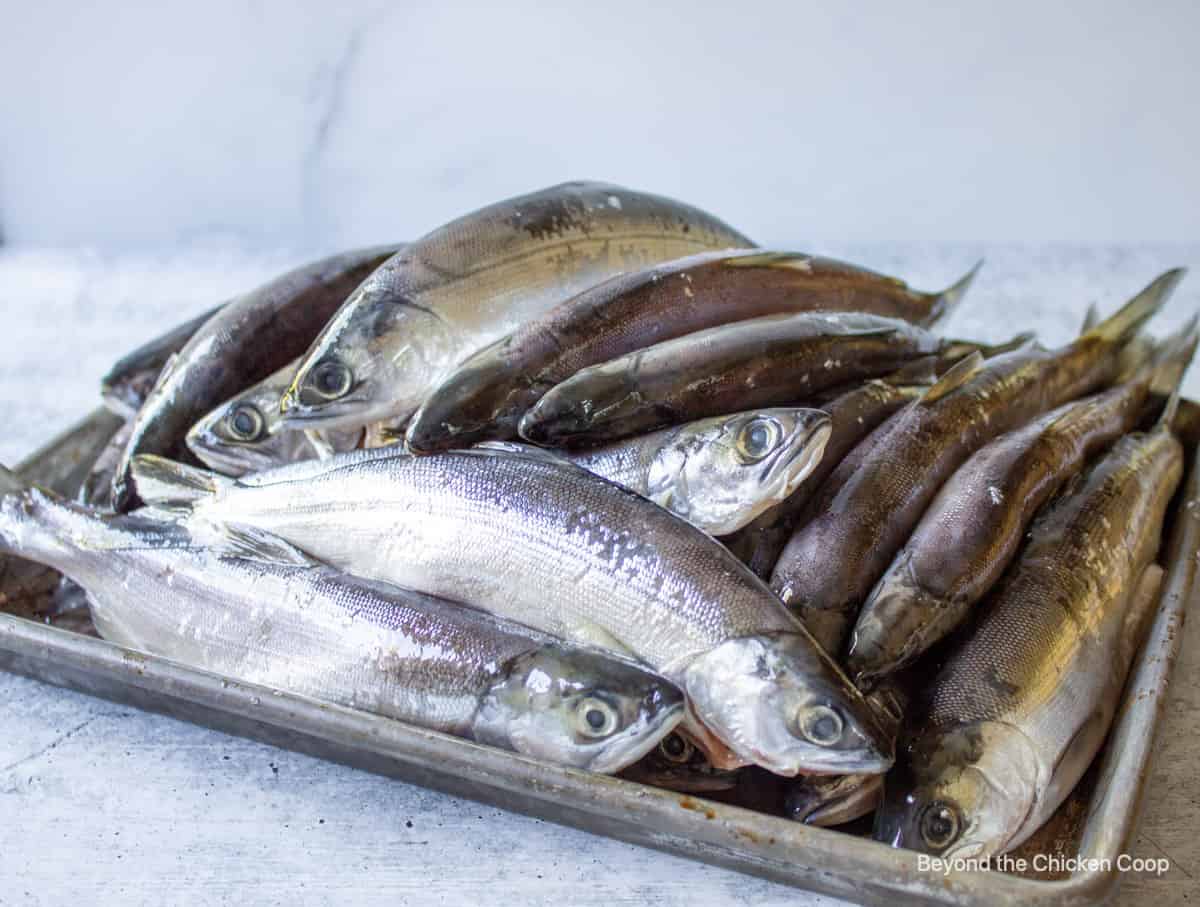
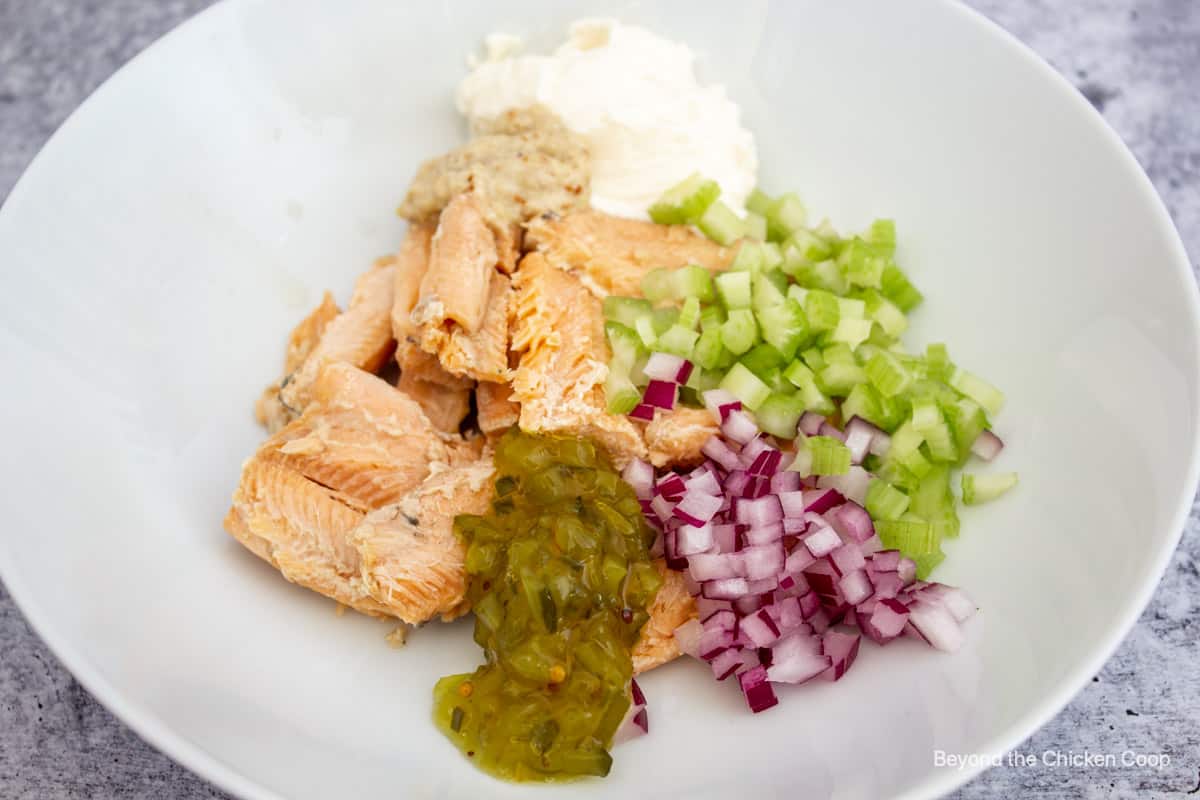
- Fish - we use kokanee, but salmon or trout works well too. Fresh fish can be used right after it's caught, but we often don't have time to can the fish right away. The cleaned fish can be frozen and then thawed when you're ready to can.
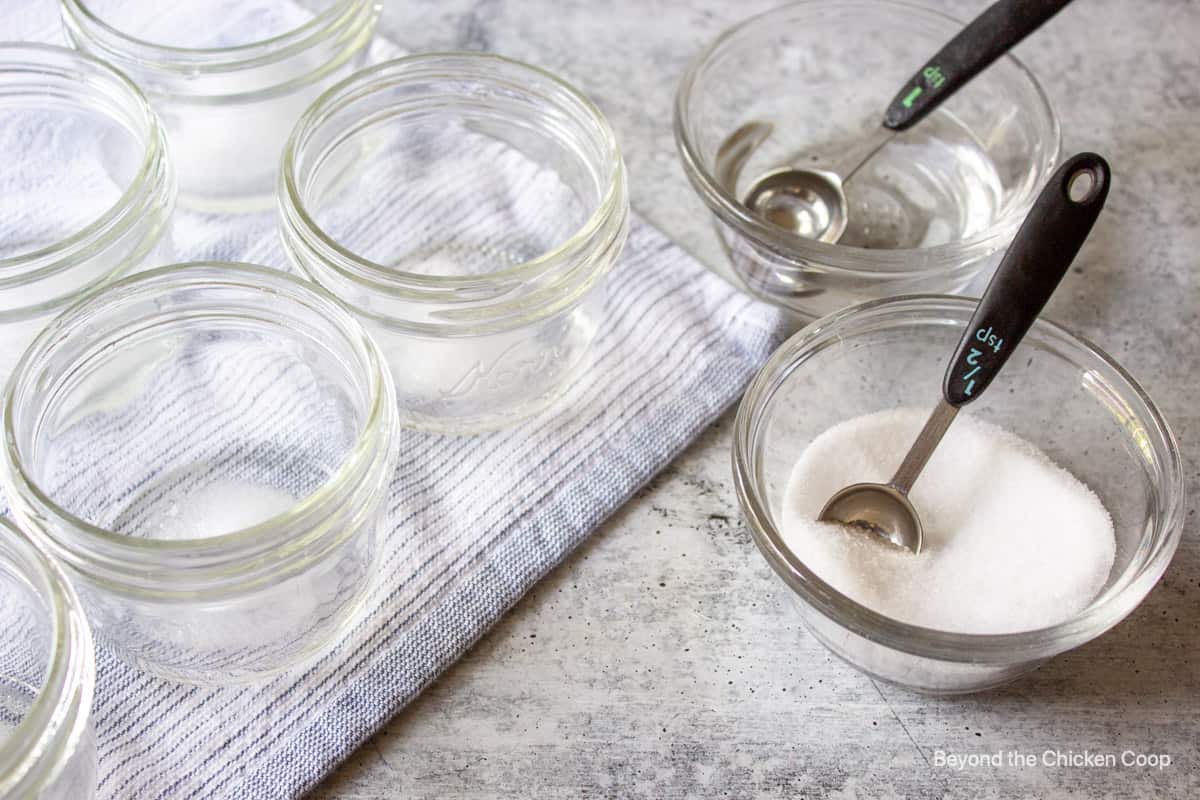
- Vinegar - white distilled vinegar. The vinegar helps dissolve some of the smaller bones. The bones add calcium to the processed fish.
- Salt - use canning salt or kosher salt. Table salt is not recommended. It often has iodine and an anti-caking agent.
Step by step directions
In this section, I share step-by-step photos, cooking methods, techniques, and a general overview. For detailed instructions, temperatures, and timing, check the printable recipe card below.
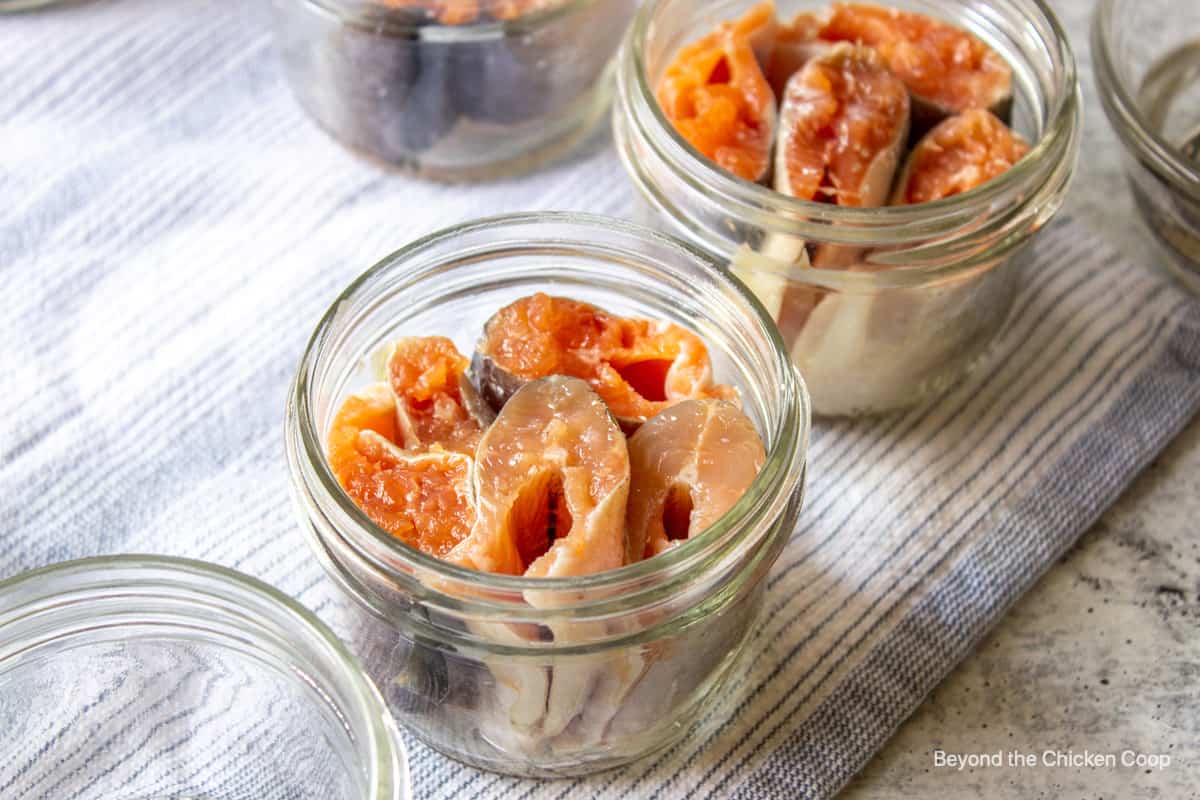
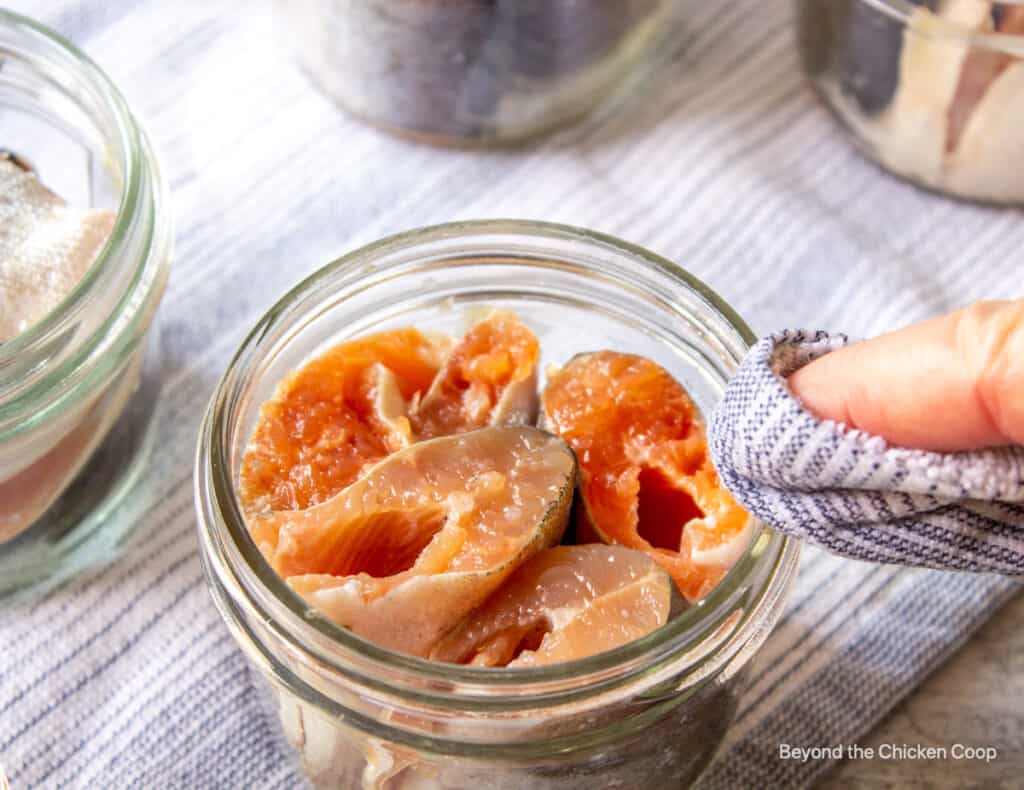
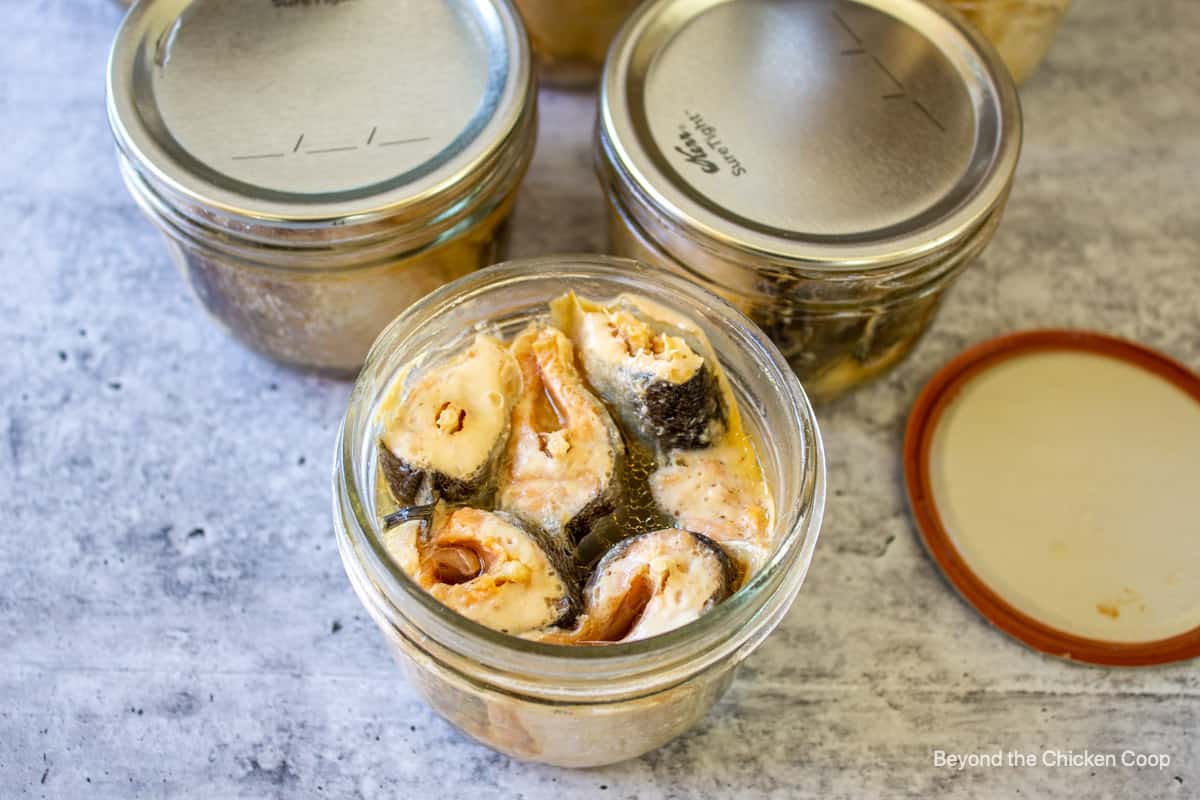
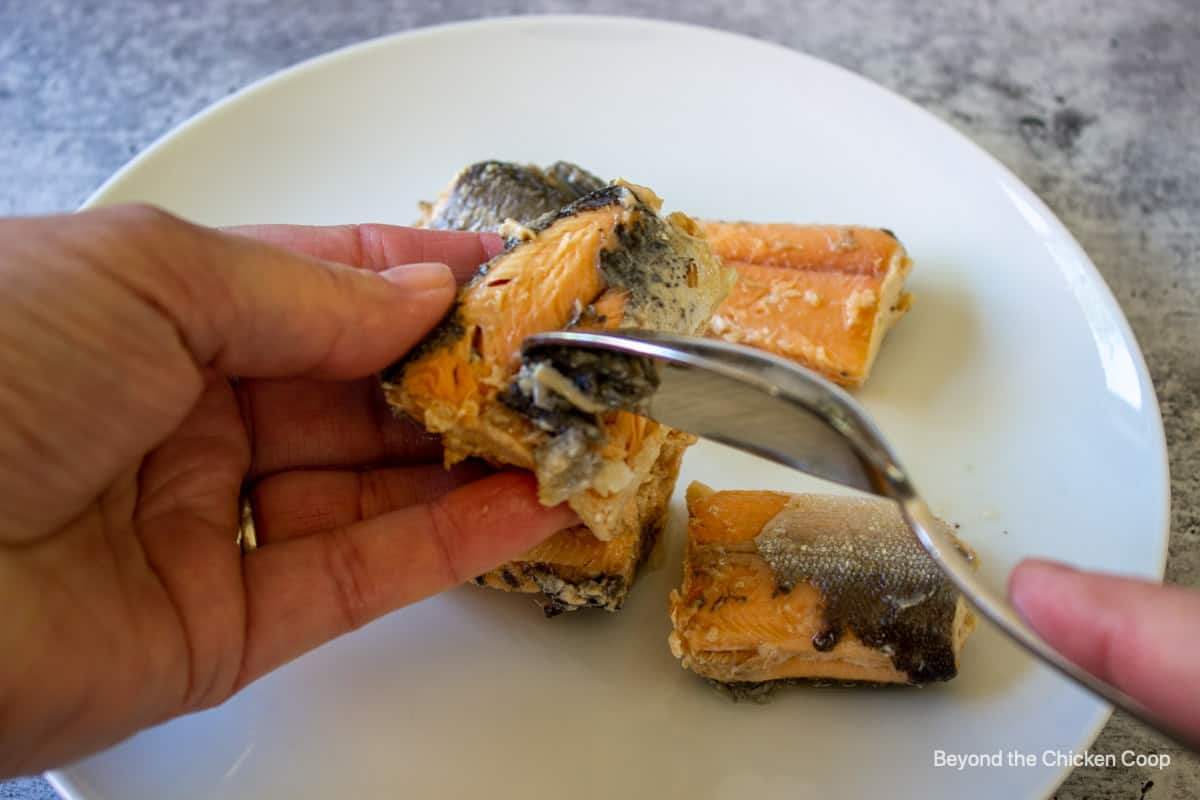
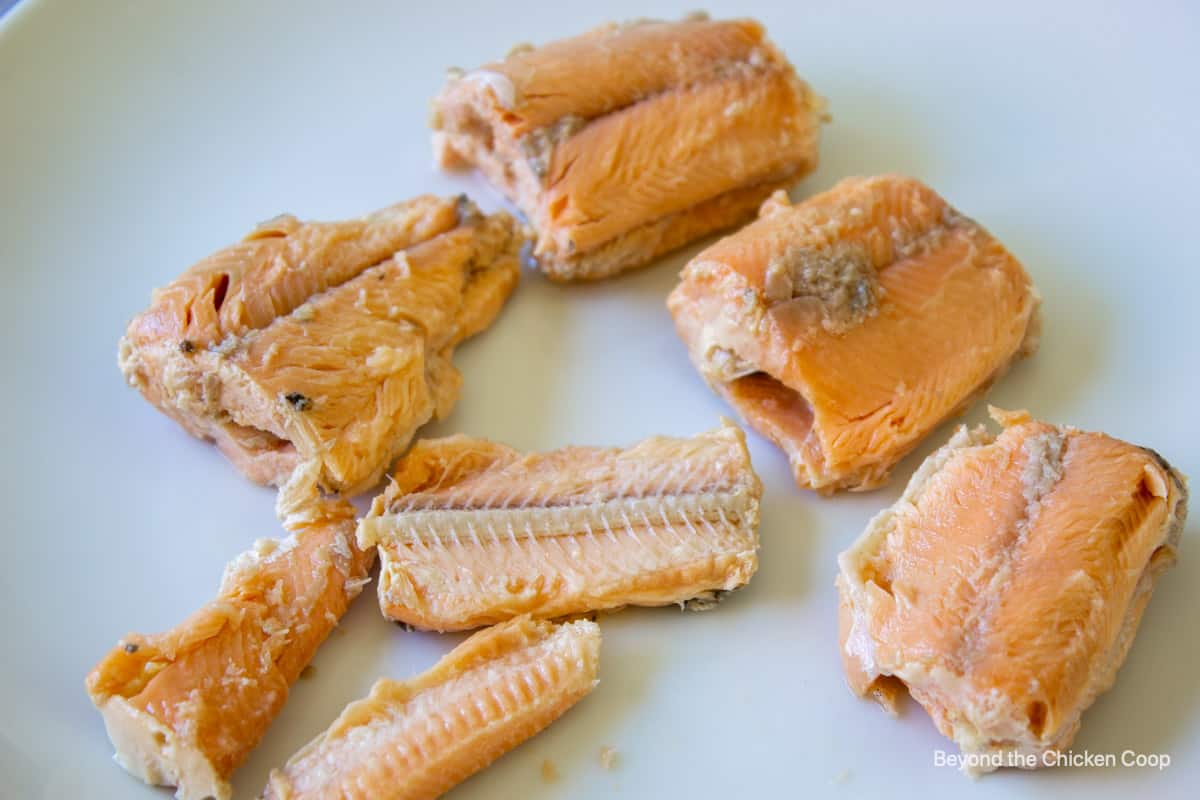
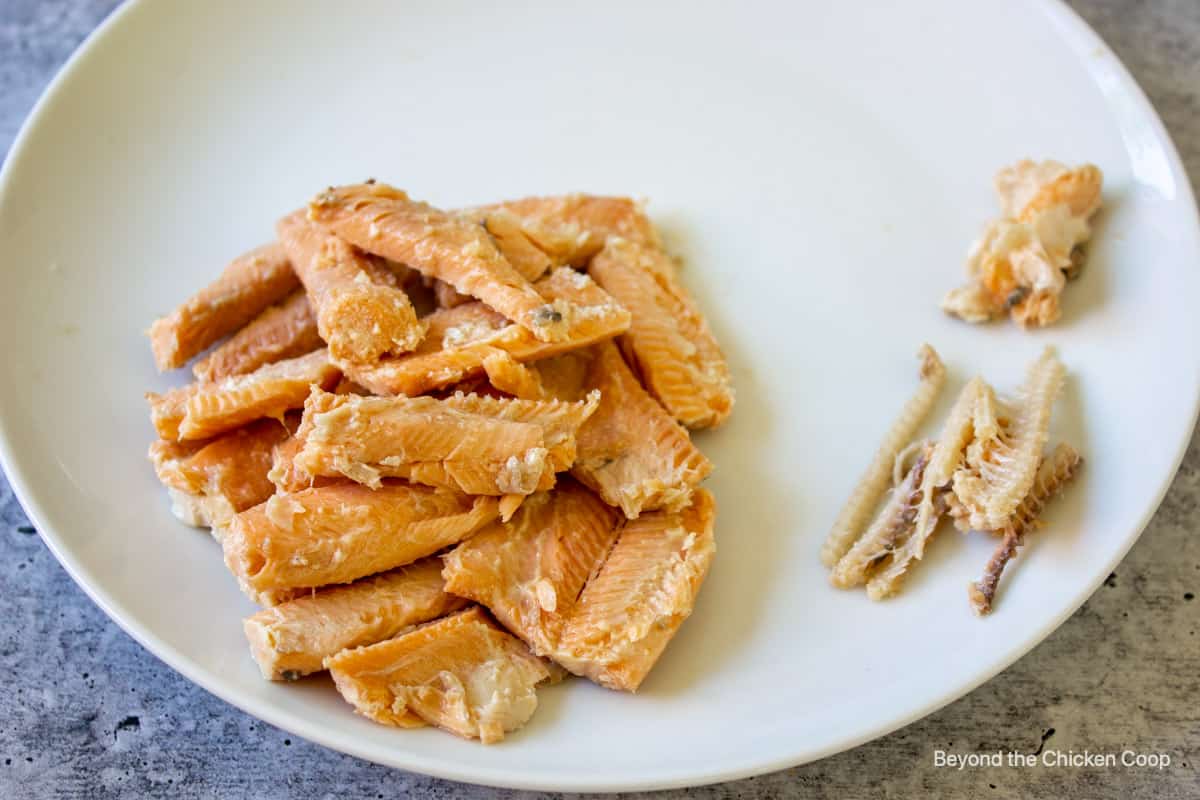
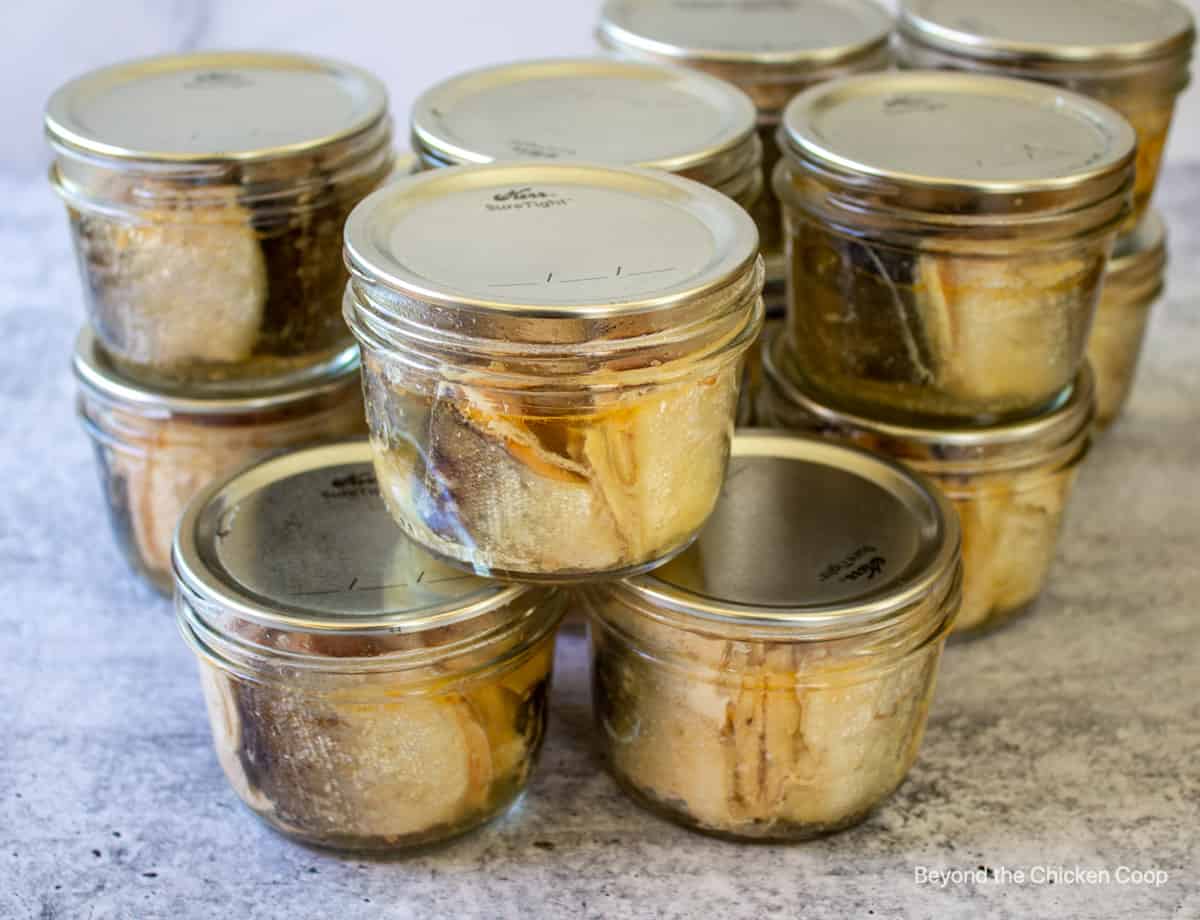
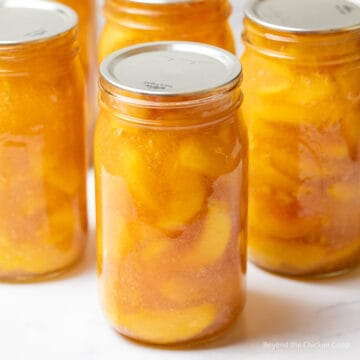
- Cut off head and tails of fish. Cut into chunks that will fit into your jar. Plan on leaving at least 1 inch of headspace in jar. For half-pint jars cut pieces into 1 ½ inches.

- Add vinegar and salt to each jar
- Add cut fish to each jar
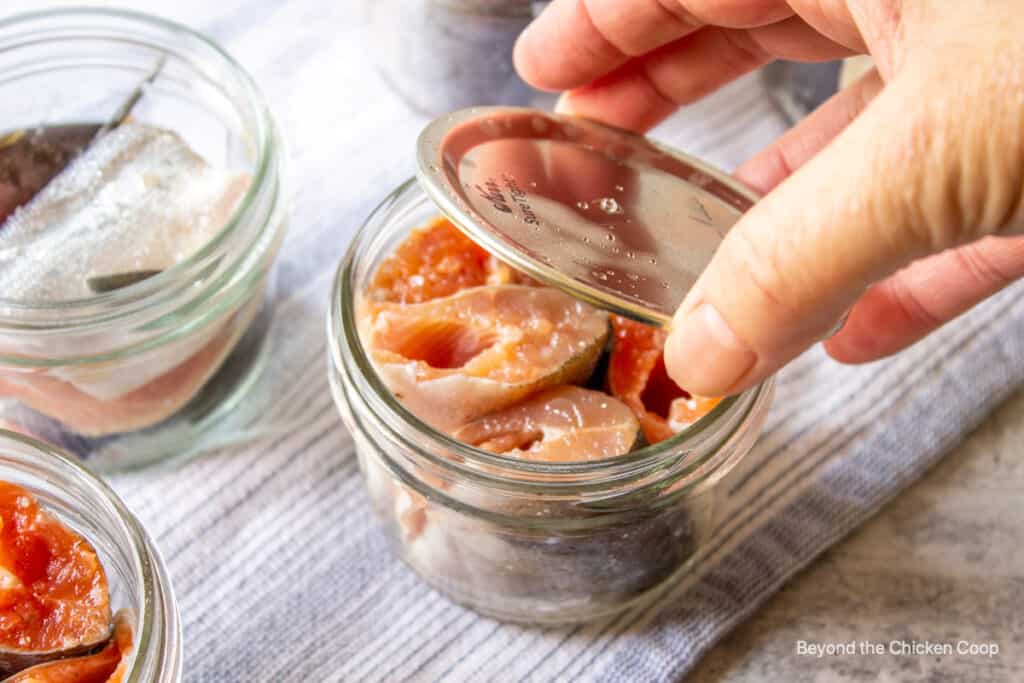
- Wipe jars with a clean cloth
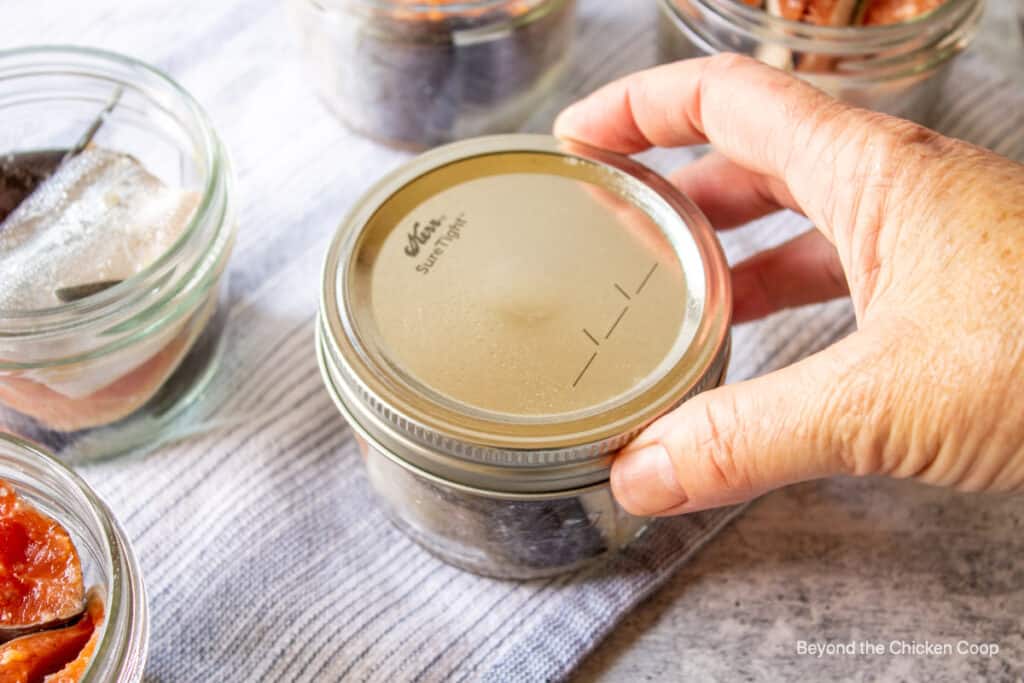
- Add lid and ring
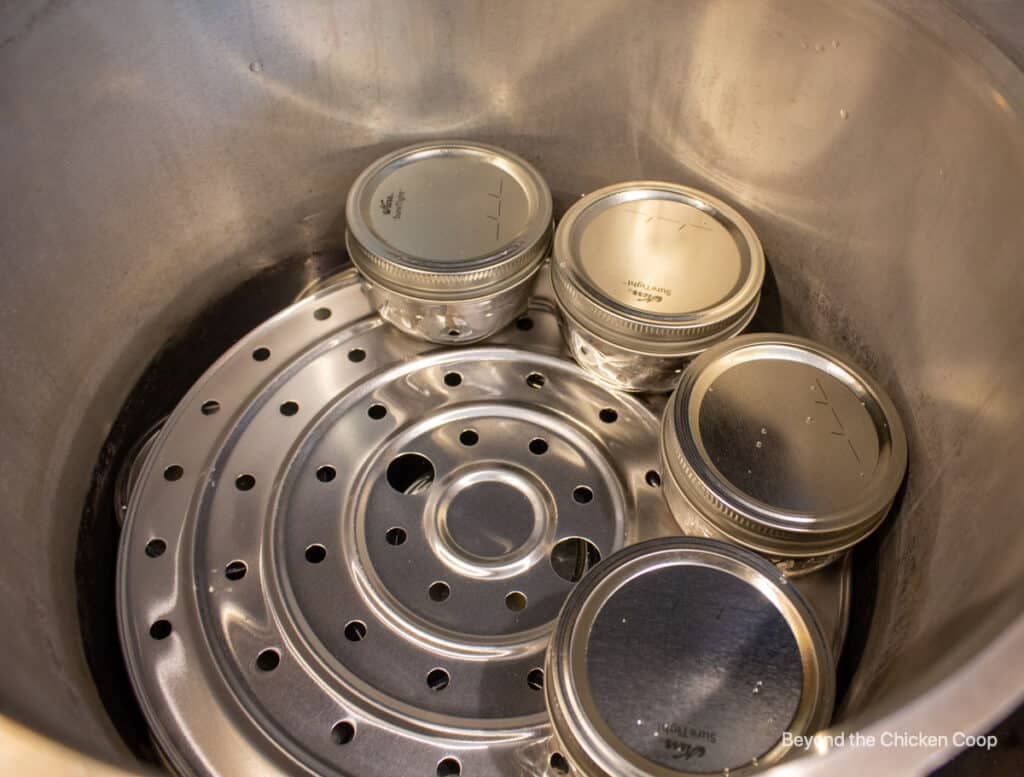
- Place jars in a pressure cooker filled with 4 inches of water
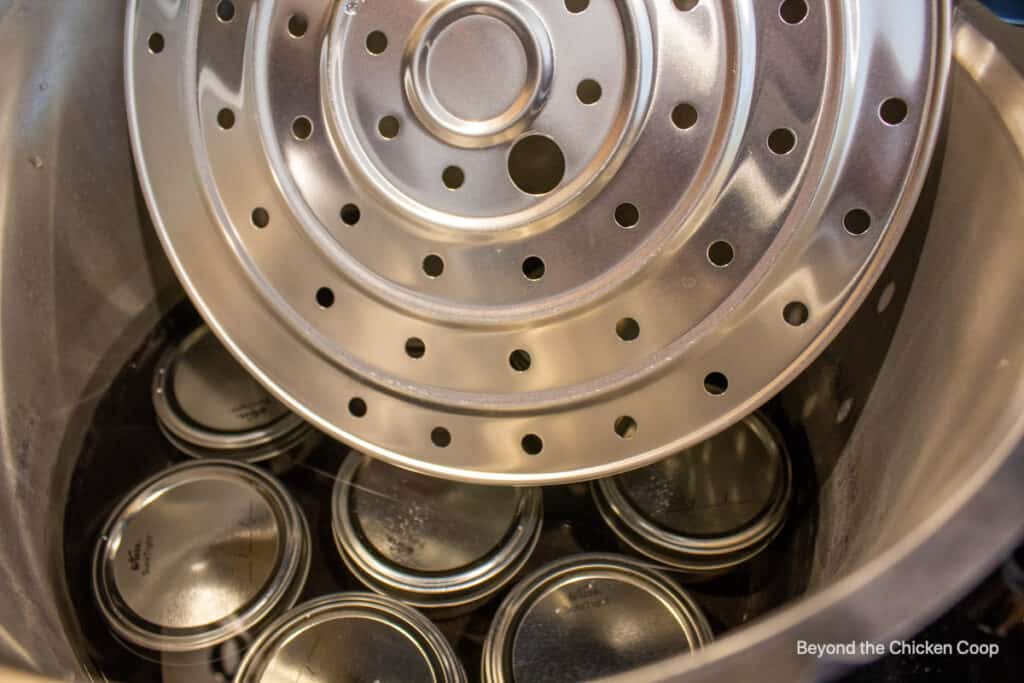
- It is okay to double stack as long as you have a divider between each stack
- Place lid and lock lid into place. Make certain stem vent is uncovered
- Turn heat on high until pot begins to steam
- Once steam is at a steady stream, set timer for 10 minutes. Allow steam to continue to vent during this time.
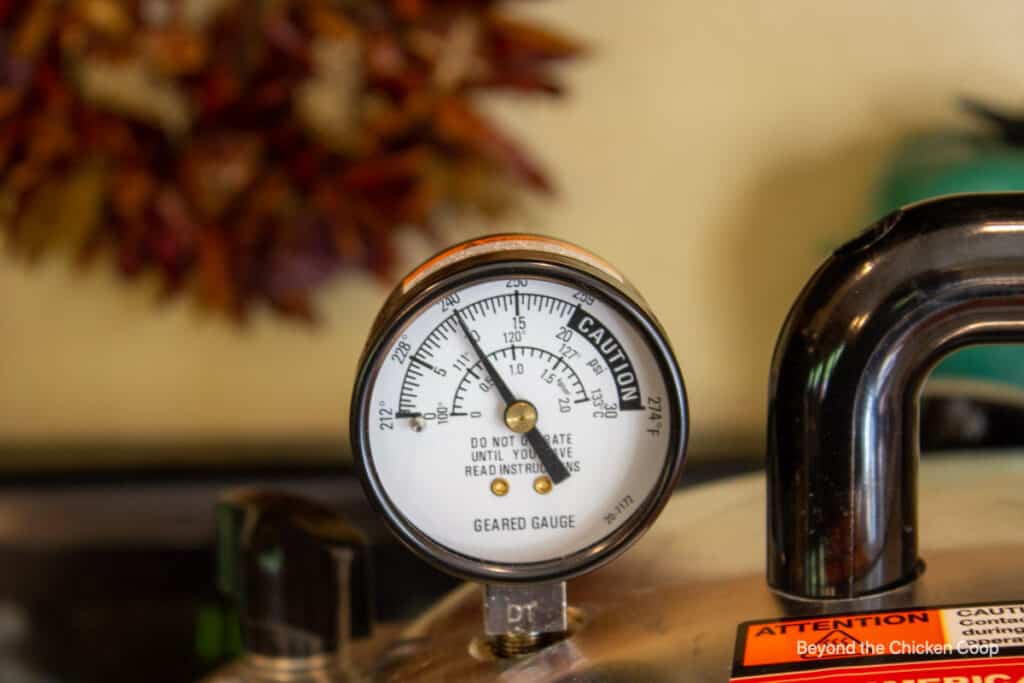
- Add cover to stem vent. The pressure will begin to climb. Once you hit 10 pounds of pressure (or your pressure for your elevation - see chart below) turn heat down and maintain the pressure for 100 minutes.
- After 100 minutes, turn off heat and leave pressure cooker alone, and do not remove vent cover until the pressure has fully returned to zero
- Remove jars and place on a cooling rack and let jars rest until fully cooled (8 - 12 hours)
- Remove rings and check to make certain jars are sealed. Wash jars with warm soapy water.
- Add date and label contents
- Store in a dry, cool place
Elevation adjustment for pressure canning
| Altitude Feet | Pounds of Pressure |
|---|---|
| 1,001- 2,000 2,001- 3,000 3,001- 6,000 6,001 - 8,000 8,001-10,000 | 11 pounds 12 pounds 13 pounds 14 pounds 15 pounds |
Canning tips
- Follow safe canning practices. Read and reread steps, especially venting times, processing times and pressure settings.
- Inspect your jars before using. Don't use it if cracked or chipped.
- Wash jars and lids with warm soapy water. Rinse well with hot water. Allow jars to air dry.
- Plan enough time for canning. You'll need approximately 30 minutes to fill the jars, 30-60 minutes for the pressure cooker to reach full pressure, 100 minutes of processing time and 30-45 minutes for the canner to depressurize.
- Do not reuse canning lids. Purchase new lids every time. Wash lids in hot soapy water before using. The lids do not need to be boiled (this was a practice that was recommended many years ago.)
- This recipe works for canning pint or half-pint-sized jars. The processing times and pressure remains the same. Do not use quart-sized jars.
- Inspect canned fish before using. If in doubt, throw it out. Do not taste anything to determine if it's good.
Recipe Faqs
According to USU.edu, home-canned fish has a shelf life of one year and should be consumed within two years.
A shelf life means the product is still edible and the quality has been maintained. After one year, it is still edible, but some of the quality may be reduced.
It is best to store jars of canned fish without the screw band rings. Store jars in a clean, cool, dark, dry place. The ideal temperature is between 50 - 70 °F.
Removing the screw band ring is optional. We remove them because you can easily tell if a jar has become unsealed.
Safety tips for using a pressure canner
- Follow instructions carefully for your pressure canner
- Inspect the rubber gasket in the lid (not all models have a rubber gasket). If it's bent, cracked or brittle, it needs to be replaced.
- Make certain the vent is clear from debris
- Have your lid, along with the pressure gauge tested for accuracy regularly. Most county extension offices will offer to test.
- Know your altitude - you need to adjust the pressure depending on your altitude
- Be precise - don't start timing your canning until the pressure cooker has reached full pressure
- If the pressure falls below your required pressure, you need to start your timing over
- Keep an eye on your pressure canner. You want to keep a consistent pressure - not to high and not too low. Make small adjustments to your stove temperature as needed.
- Do not open your pressure canner or remove the vent cover until the pressure has fully returned to zero. This is an important part of the process!
A Note on Home Canned Food
Improperly home canned food can carry the risk of causing botulism. If eaten, this can cause a serious form of food poisoning that can lead to paralysis or death. Please follow safety procedures and inspect your food before consuming.
- Always inspect your home canned food before eating
- If in doubt, throw it out!!! The FDA recommends throwing out the food and the jar.
- Do not taste if in doubt!
- Throw it out if -
- the can is bulging, leaking or swollen
- the container looks damaged or abnormal
- the container spurts liquid or foam when opened
- the food is moldy, discolored or smells bad
- the seal is no longer intact when you examine the food
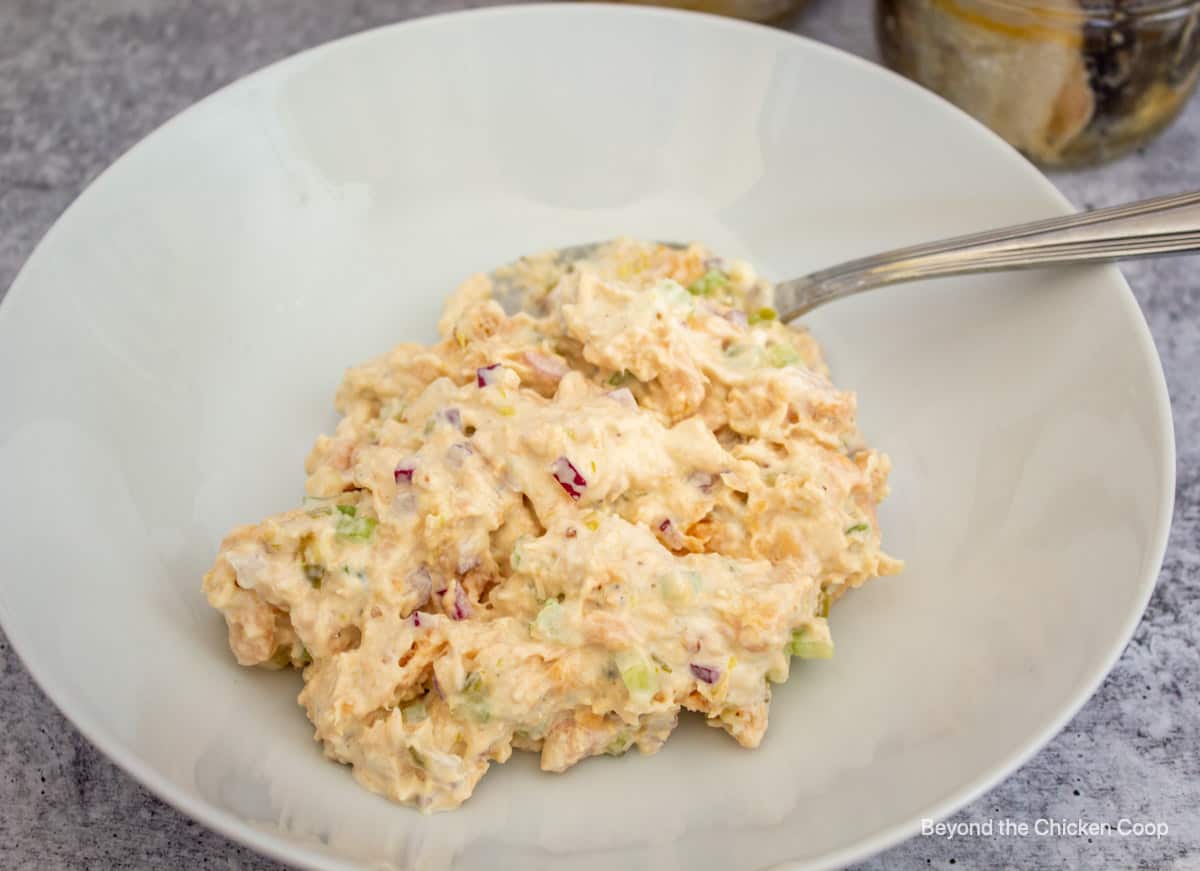
Using canned fish
We use our canned fish the same way we'd use canned tuna fish. You can make a fish salad, fish cakes or add to a salad or in a casserole.
Open the jar and remove the fish. Discard any liquid that came from the processing of the fish.
Sometimes there will be some whitish substance on top of the fish. This is called albumin and it comes from the proteins within some fish, especially salmon. Just scrape it off and discard it.
- Use a spoon or a knife to gently scrape away the skin
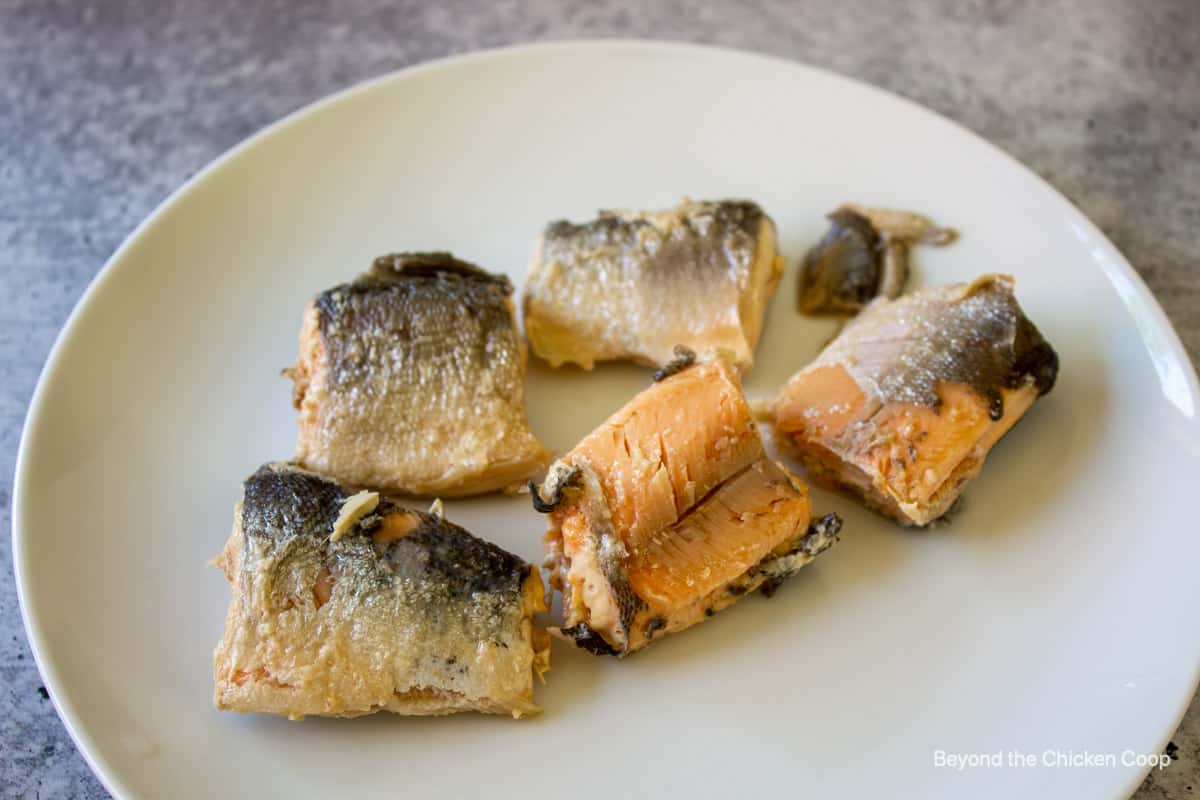
- Open fillets and remove the backbone and any other remaining bones
- Break fish into chunks and use as desired
More canning recipes
- How to Can Dried Beans
- Canned Smoked Fish
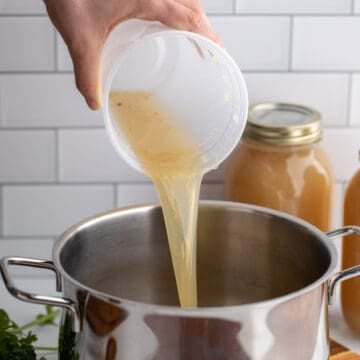
- Canning Chicken Stock
- Canned Tomatoes
- Canned Tomato Sauce
- Green Tomato Relish
If you make this recipe, I’d love to hear about it! Leave a comment below and snap a picture and tag me on Instagram @beyondthechickencoop
Be certain to check out all my canning recipes!
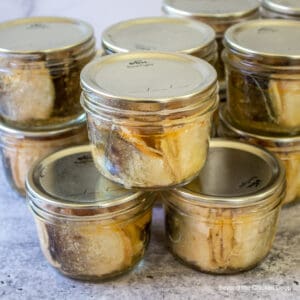
Canning Fish
Equipment
- Measuring Spoons
- Half-Pint Wide Mouth Jars
Ingredients
- 6-8 pounds fish (Kokanee, Salmon, Trout)
- ½ teaspoon pickling salt (per half pint jar)
- 1 teaspoon white vinegar (per half pint jar)
Instructions
- Cut off head and tails of fish. Cut into chunks that will fit into your jar. Plan on leaving at least 1 inch of headspace in jar. For half-pint jars cut pieces into 1 ½ inches6-8 pounds fish
- Add vinegar and salt to each jar½ teaspoon pickling salt, 1 teaspoon white vinegar
- Add cut fish to each jar. Leave bones and skin intact.
- Wipe jars with a clean cloth
- Add lid and ring
- Place jars in a pressure cooker filled with 4 inches of water
- It is okay to double stack as long as you have a divider between each stack
- Place lid and lock lid into place.
- Make certain stem vent is uncovered
- Turn heat on high until pot begins to steam. Once steam is at a steady stream, set timer for 10 minutes. Allow steam to continue to vent during this time.
- Add cover to stem vent. The pressure will begin to climb. Once you hit 10 pounds of pressure (or your pressure for your elevation - see chart below) turn heat down and maintain the pressure for 100 minutes.
- After 100 minutes, turn off heat and leave pressure cooker alone and do not remove vent cover until the pressure has fully returned to zero
- Remove jars and place on a cooling rack and let jars rest until fully cooled (8 - 12 hours)
- Remove rings and check to make certain jars are sealed. Wash jars with warm soapy water. Add date and label contents. Store in a dry, cool place
Notes
- 1000-2000 feet - 11 pounds of pressure
- 2001-3000 feet - 12 pounds of pressure
- 3001-6000 feet - 13 pounds of pressure
- 6001- 8000 feet - 14 pounds of pressure
- 8001-10000 feet - 15 pounds of pressure
- Follow safe canning practices. Read and reread steps, especially venting times, processing times and pressure settings.
- Inspect your jars before using. Don't use it if cracked or chipped.
- Wash jars and lids with warm soapy water. Rinse well with hot water. Allow jars to air dry.
- Plan enough time for canning. You'll need approximately 30 minutes to fill the jars, 30-60 minutes for the pressure cooker to reach full pressure, 100 minutes of processing time, and 30-45 minutes for the canner to depressurize.
- Do not reuse canning lids. Purchase new lids every time. Wash lids in hot soapy water before using. The lids do not need to be boiled (this was a practice that was needed many years ago.)
- This recipe works for canning into pint or half-pint-sized jars. If using pint-sized (16 oz) double the salt and vinegar for each jar. The processing times and pressure remain the same. Do not use quart-sized jars. This has been deemed unsafe!
- Inspect canned fish before using. If in doubt, throw it out. Do not taste anything to determine if it's good.
Nutritional Disclaimer:
Nutritional information is provided as a courtesy and should only be construed as an estimate rather than a guarantee. To obtain the most precise nutritional information in a provided recipe, you should calculate the nutritional information with the exact ingredients you are using when preparing the recipe using your preferred nutrition calculator.
debora says
I received 2 trout and thinking about canning them …..My brother once canned trout and told me his turned out really greasy……by taking off the skin do you think this might help
Kathy says
Hi Debora,
Yes, removing the skin will help. You will still have some oil from the trout, but it isn't an oily fish so you should only find a small amount of oil at the bottom of the jar after canning.
Kathy
Dawn says
I've read multiple fish canning recipes and I'm STILL reluctant to leave the bones in.. does this also apply to the backbone? I am very much a "not one bone can be handled" fish eater.. don't give me grief, they actually make me stop the meal immediately. How big a fish is too big for them to completely "dissolve" and should bigger fish be fileted to take the backbone out? Are you positive all other bones will disappear? I appreciate your help. I don't want to give gifts with bones in it.
Kathy says
Hi Dawn,
Good question. I'd suggest you completely remove the bones before canning. Even with these small kokanee fish we are canning, a portion of the backbone still remains, but most ribs all dissolve. You can see this in the pictures in the post itself. The larger the fish, the larger the bones but it's also easier to cut large filets from the fish.
I hope this helps,
Kathy
Marty Kuysten says
Hi Just found your site while searching for an answer to a question about how long do I have to wait to try the canned fish after I've canned it? Most sites tell me that the canned fish should be consumed within one year, but none of them tell me how long I must wait to do a taste test! Help! I'm dying to taste the Northern pike that I just canned.
Kathy says
You can open and taste a can as soon as the can has fully cooled. No need to wait any longer than that! Enjoy 🙂
Grandma Carol says
Wanted to teach my son how to can fish and found your site. I used to can fish years ago and remember how good they are. We are close to the Mississippi River and catch large carp and buffalo which are known for lots of bones. Most people just discard them. But when cut into fillets and processed in a canner, the meat is wonderful and the bones dissolve. Much better than the white tuna in a can. We have a lot of fishermen in the family and have an abundance of fish. Much goes to waste. I see that the recommendations have changed in processing. It used to be 90 minutes and I always used quarts. Never a problem. But will update our procedure. Thanks for your instructions.
Kathy says
Thanks so much! Your son is lucky to have you teach him the process. Canning seems to continually change as researchers learn more. I always refer to the National Center for Home Food Preserving to stay up to date! Keep up the good work on using all that fish!
Kathy 🙂
Kaleb says
Hi Kathy,
Where I live, I catch and keep a lot of panfish, pike, walleye etc. No trout really. Will this process/recipe work for fish that are not salmonids? Thanks!
Kathy says
Hi Kaleb,
This process works on Blue, Mackerel, Salmon, Steelhead, Trout, and other Fatty Fish Except Tuna. According to SDSU Extension, " Panfish such as crappies, perch and bass, walleye and other pike are much better preserved by freezing." These fish might break down too much while processing, however they would be safe to process.
Kathy
Andy says
I have a larger pressure canner and wondered if it's safe to triple-stack the jars?
Kathy says
Hi Andy,
I have only heard of double stacking the jars, but not directly on top of each other. I use a divider between the layers, but some people off-set the jars.
Kathy
Theresa Capri says
You said recipe for 4 oz, then in the recipe it says to use 1/2 pints. 1/2 pint = 8 oz. 1 pint = 16 oz.
Kathy says
You are correct! Thanks for letting me know! 🙂 I'll make the correction now.
Raymund | angsarap.net says
Thanks for this tips, really helpful
Kathy says
Thank you! 🙂
Laurie says
I found your site Googling canned fish safety. I'll confess I've never canned meat, however we were given some canned salmon. I'm used to canning jam where you leave just a tiny headspace. The salmon we received has a couple of inches of empty space above the fish. No liquid, just space. Is that safe?
Kathy says
Hi Laurie,
Liquid doesn't have to be added for canning fish. As far as headspace, the content can change while the jars/food is being processed. Sometimes food expands. Sometimes it shrinks. Is your salmon safe??? There are so many factors involved in making home canned food safe - How long did they process? Did they use a pressure canner? Did they adjust the amount of pressure according to their specific altitude... There is no way of knowing if a jar is safe just by looking at it.
Kathy
Valentina says
Okay, you must have a 2nd (and 3rd!) pantry. I want to shop at your house! A friend of mine just gave me a can of salmon from a fishing trip last year, and it's amazing. 🙂 ~Valentina
Kathy says
We do have 2 pantries, one upstairs near our kitchen and one in the basement...I'll have to start thinking about a 3rd one though!;)
David @ Spiced says
Interesting! I'll be honest that I've never even thought about canning fish. What a cool concept - and this post really walks you through the steps. It's perfect! And I totally agree with you that a variety of options in the pantry is always a good thing. 🙂
Kathy says
Thanks!!! Canning is something that I grew up with my mom doing and my grandmother doing and so it's something that I've done too!