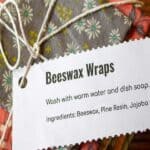
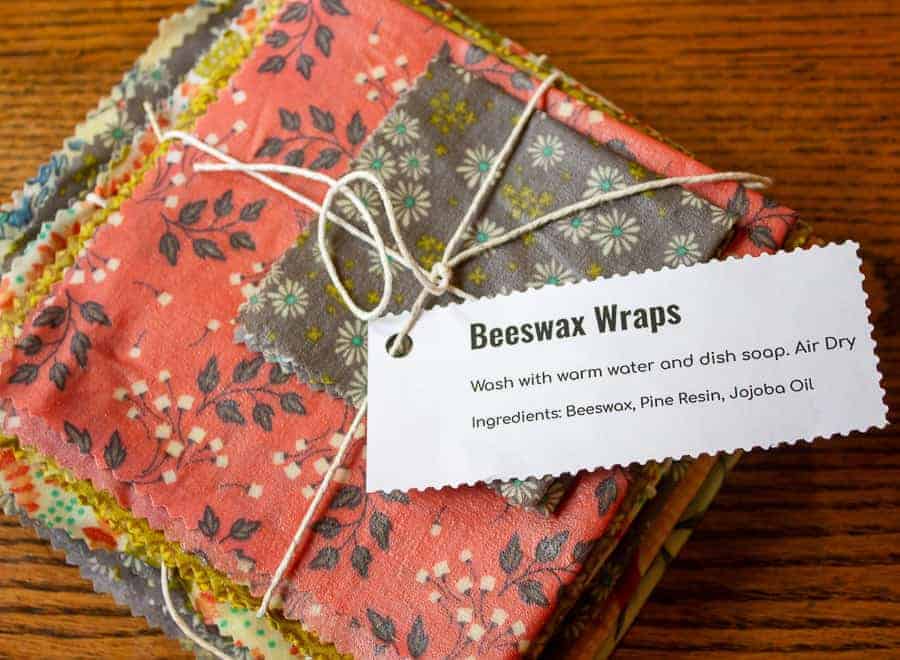
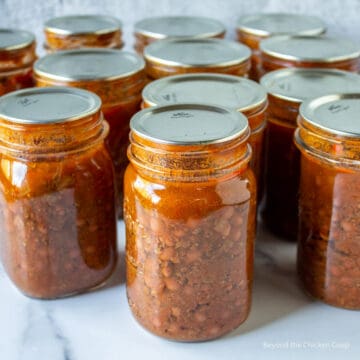
Beeswax Wraps are a DIY (Do it Yourself) beeswax wrap made with beeswax, pine resin and jojoba oil. These wraps are perfect for covering a bowl filled with food or wrapping a sandwich for your lunchbox.
I started keeping honey bees about 12 years ago. It's been a huge learning curve but the past couple of years I have been able to harvest honey, render beeswax, make beeswax lip balm and now make beeswax wraps. I wanted to raise bees for many reasons - have pollinators, harvest honey and learn something new.
I never even thought about beeswax before and all its uses. Now that I'm into beekeeping, I keep looking for more ways to use beeswax. These DIY beeswax wraps are a great, useful project. This is a project that anyone can do - even if they aren't a beekeeper. All the supplies can easily be purchased.
What are beeswax wraps?
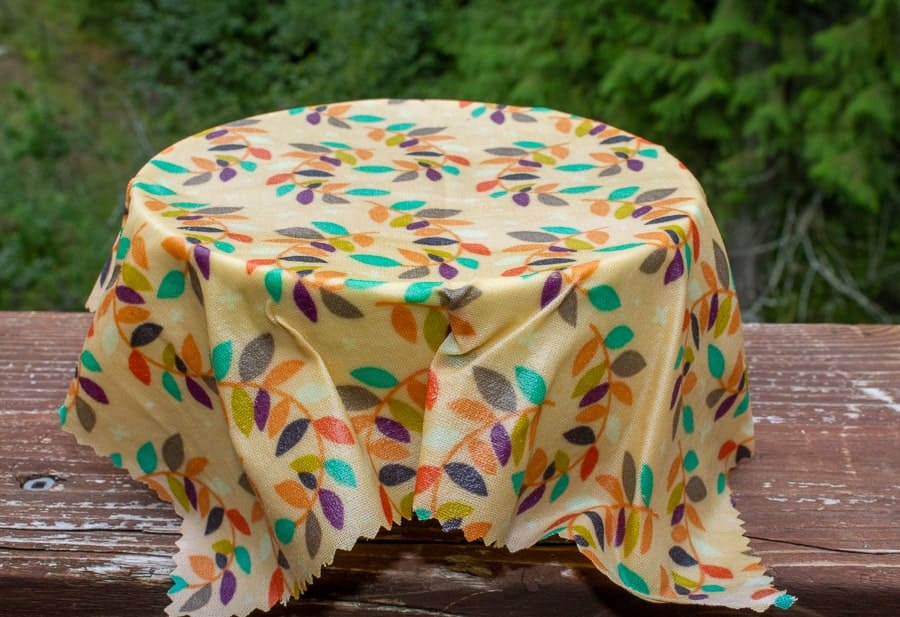
Beeswax wraps are a cotton cloth saturated with a beeswax mixture that when cooled are waterproof and pliable. These are used in just about any place you'd use plastic wrap or plastic baggies.
I use them to cover a bowl filled with leftovers, wrap a sandwich for lunch or wrap cut fruit or veggies.
What do I need to make the wraps?
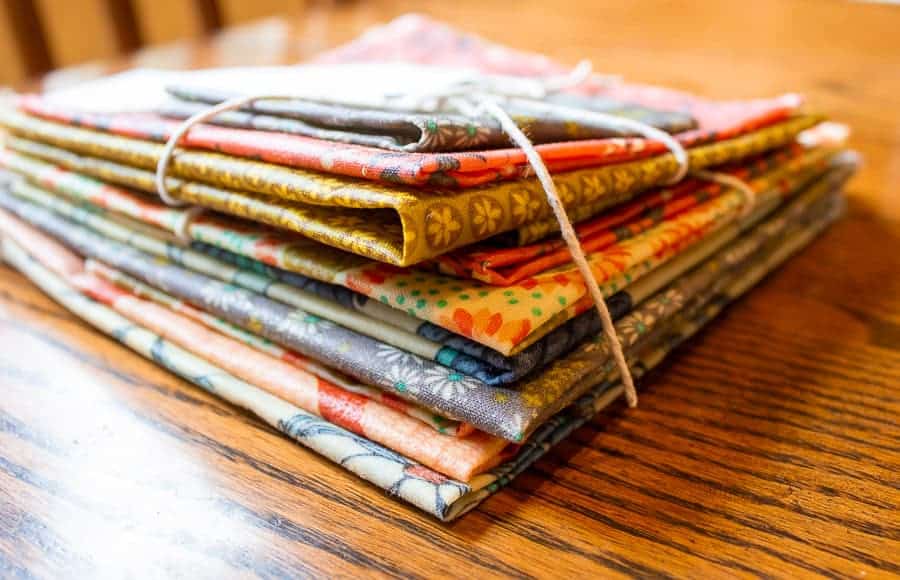
- Cotton material - I buy quilting fat quarters which often come in a mixed bundle of different fabrics and are cut into 18 inch squares.
- Beeswax - Use your own homegrown beeswax or buy beeswax.
- Pine Resin
- Jojoba Oil
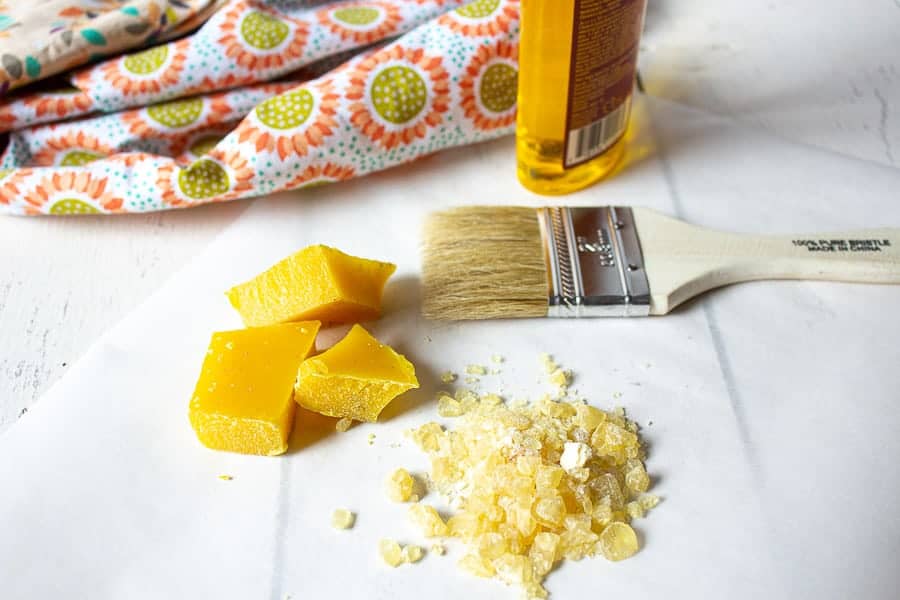
You will also need a disposable paint brush, pinking shears, scale and parchment paper.
Use a set of equipment that you can dedicate just to melting beeswax. I used an old baking sheet, a small pot I picked up at a thrift store, an old glass measuring cup and a cheap wooden spoon. Once used for wax, it's tough to remove all the wax from the equipment. Don't use your favorite pot or equipment.
You will need to have a space where you can hang a string to work as a temporary clothesline. The wraps will not drip wax, but you do need to hang them until they fully cool and the wax sets.

My inspiration for these food wraps game from an article in Mother Earth News. I followed the author's recipe and steps for creating these wraps.
Why use pine resin and jojoba oil?
Beeswax by itself is too hard and not pliable. The beeswax is very firm and will crack if used by itself on the fabric. The pine resin helps the wraps stick to bowls and to itself when folded over and the jojoba oil helps keep the wraps pliable.
How do I care for the beeswax food wraps?
Once used, wash the wraps in soapy warm water and air dry. Do not expose the wraps to heat, or the wax may melt! The wraps can be folded and stored flat in a drawer or cupboard.
How long do the wraps last?
I have just started using the food wraps and so far they are not showing wear and tear. Longevity will depend on your actual usage and cleaning of the wraps.
Tips for making Beeswax Wraps
- Wash your fabric before using. Don't worry if the fabric is wrinkled. The wrinkles will disappear when you add the wax.
- Use pinking shears when cutting the fabric so the edges don't fray
- Use a digital scale to measure ingredients
- Use a small stirrer when stirring the wax. I use the handle of a wooden spoon. A chopstick would also work well
- Don't try to stir the mixture until most of the contents are melted
- Melt time will vary depending on your stove and the size of your beeswax. I use large chunks and it takes about 40 minutes to melt the entire mixture. If you buy small pellets of beeswax, your melt time may be less.
- Use caution with the melted wax mixture. It is hot and will burn and stick when contact is made.
- If the wrap begins to stick to the parchment paper, just pop back into the oven for another minute.
Other great DIY projects
If you make this recipe, I’d love to hear about it! Leave a comment below and snap a picture and tag me on Instagram @beyondthechickencoop
If you loved this project you'll LOVE all the others in this category. Check out all my homesteading articles here!

Beeswax Wraps
Equipment
- Pinking Shears
- Scale
- Baking Tray
- Pot
- Glass Jar - Heat safe
- Wooden Spoon
- Disposable paint brush
- Twine
- Clothes pins
Ingredients
- Cotton material - I buy quilting fat quarters which often come in a mixed bundle of different fabrics and are cut into 18 inch squares.
- Beeswax 2 ounces - Use your own homegrown beeswax or buy beeswax.
- Pine Resin 2 ounces - Make certain it's food quality resin.
- Jojoba Oil ½ ounce
Instructions
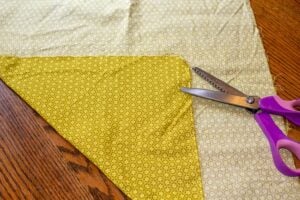
- Cut material into squares using pinking shears so edges don't fray

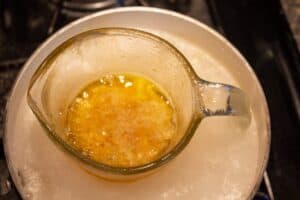
- Measure out 2 ounces of beeswax, 2 ounces of pine resin and ½ of an ounce of jojoba oil into a heat proof glass jar or measuring cup
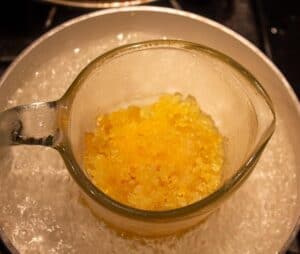
- Place glass jar into pot and fill pot with water. Place pot over high heat until water begins to boil. Monitor boiling water and contents in jar. Add more water to pot as water evaporates.

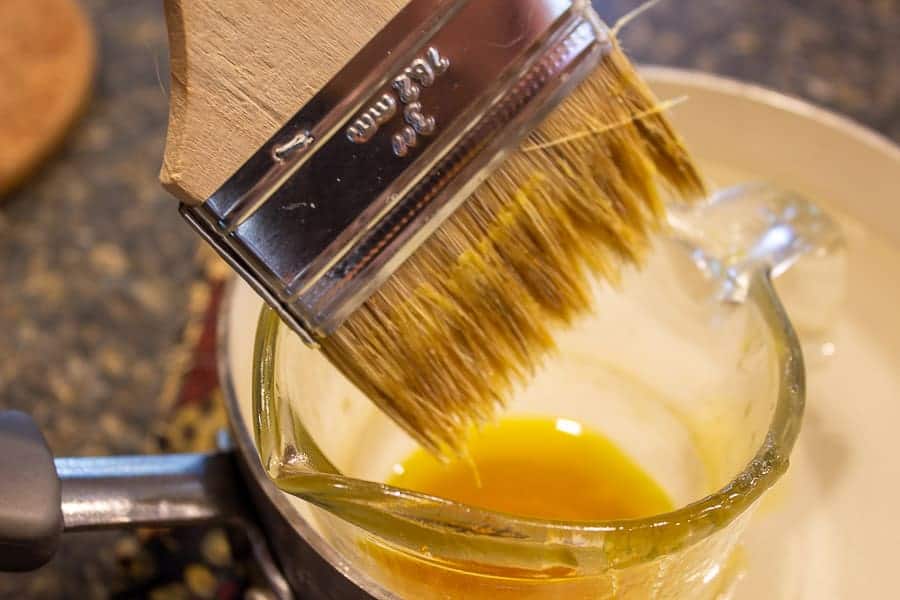
- When the beeswax and resin begins to melt, stir occasionally with the thin handle of a wooden spoon or a wooden chop stick.
- When fully melted, give a good stir and remove from heat
- Place a piece of parchment paper on an old baking sheet.
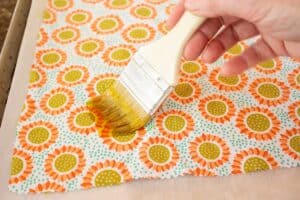
- Place one piece of fabric on top of parchment paper.
- Dip paintbrush into melted wax mixture and spread on fabric, covering fabric completely
- Place baking sheet with fabric into a preheated 300 degree oven for 1 minute
- Remove from oven and brush back over fabric with brush to help smooth out any extra wax
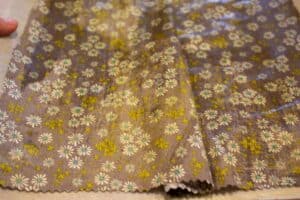
- Lift fabric from baking sheet and hang from clothesline until cool
- Repeat with remaining fabric. If beeswax mixture begins to thicken, place back on stove


Notes
- Recipe can be doubled, but keep proportions the same
- Wash your fabric before using. Don't worry if the fabric is wrinkled. The wrinkles will disappear when you add the wax.
- If fabric is too large for baking sheet, spread wax on half of the fabric. Fold fabric in an "S" shape in the center and cover other half with wax.
- Make beeswax cloths any size that fits your needs. I made mine in 10 squares and 8 inch squares.
- To easily cut a square, fold material in a triangle and cut unfolded sides
- Use pinking shears when cutting the fabric so the edges don't fray
- Use old equipment for making these wraps. Once they are covered with beeswax, it's difficult to remove wax. I dedicate a set to just this task and nothing else.
- Use a digital scale to measure ingredients
- Use a small stirrer when stirring the wax. I use the handle of a wooden spoon. A chopstick would also work well
- Don't try to stir the mixture until most of the contents are melted
- Melt time will vary depending on your stove and the size of your beeswax. I use large chunks and it takes about 40 minutes to melt the entire mixture. If you buy small pellets of beeswax, your melt time may be less.
- Use caution with the melted wax mixture. It is hot and will burn and stick when contact is made.
- If the wrap begins to stick to the parchment paper, just pop back into the oven for another minute.
Dawn Guillemette says
Hi Kathy,
I just used your recipe to make beeswax wraps for myself and it worked fantastic! I love the fact that it’s so easy to make. The only difference I did was once the “wax” was melted, I left my glass jar in the pot of water with the burner still on, but more of a simmer boil, this way my “wax” never hardened.
Thank you for sharing because I’ve purchased beeswax wraps in the past, which were ridiculously expensive, and they never really sealed around bowls etc. GRRR!!!! Not really sure what their recipe was, but it didn’t work! Your recipe and tips made me believe in beeswax wraps again!!!
Cheers!
Dawn
Kathy says
Thanks so much and I appreciate your tips! 🙂
Marcia T says
I am having trouble getting the pine resin to melt properly. It stays thick like taffy in the bottom of the jar. Any ideas what I am doing wrong?
Kathy says
Hi Marcia,
How long is it taking? The time could vary, but it could take 30-60 minutes for it to melt.
Kathy
Marcia T says
I have let it go way over an hour to see if it would melt, stirring regularly with a wooden craft stick. Using a glass canning jar inside a pot, or inside a double boiler. Same results both times.
Kathy says
That should be more than enough time. I'm afraid I don't know why it's not melting.
Wanda Hoffman says
Hello,
I made several but I did mine a bit differently. I heated everything in a crockpot and then used a griddle to lay the fabric on and the warmth helps to keep everything workable while coating the fabric. The first & second batches worked well but after that my mixture "gummed" up on me and I could not get it to smooth out. I am now wondering if stirring before everything was melted well was my mistake. If you have any thoughts please let me know.
Kathy says
Hi Wanda,
Did you keep the mixture warm in the crockpot while applying it the to the fabric?
Lea says
My resin is only sinking and not actually mixing into the wax… why might this be?
Thanks!
Kathy says
Hi Lea,
What type of resin are you using?
Kathy
Kay cockrill says
I made wraps and followed the recipe. The wraps are very sticky and have a chemical odor. I washed them with a mild dish soap to see if that will take some of the smell out of it. Do you know what could have caused this issue?
Kathy says
Hi Kay,
If your wraps smell chemically, it could be because you used a low-quality beeswax that might be contaminated with paraffin wax, which has a distinct chemical odor, or you may have used a non-food safe resin or oil in the mixture. The stickiness may be a result of applying too thick of a layer of the mixture.
Kathy
Kay says
My husband uses the beeswax for cutting boards. They do not smell. Why would they be so sticky? The resin was advertised for making beeswax wraps. What can I do about the stickyness? Thank you
Kathy says
Hi Kay,
I'm not certain what would cause the wraps to smell especially if you used the correct materials. As far as stickiness, you could try popping one wrap back into the oven and once warmed, use a brush to wipe off any excess wax mixture.
Kathy
Connie says
I use a very clean glass jar that I was going to throw out anyway. Then when cool put the lid on for storing.
Dorothy says
Can I use almond oil in place of the jojoba oil?
Kathy says
Hi Dorothy,
Almond oil is not recommended because it can become rancid.
Kathy
Dorothy says
Thank you, that makes sense...Would that be true of olive oil too?
Kathy says
I'm afraid I don't have an answer on how olive oil would work.
Emily G says
I am so happy I found this because I spent too many hours with just beeswax to learn that it doesn’t stick or become malleable unless you use it with the resin/oil like you do. Do you have any suggestions on how to heat and rework my batch of wax wraps and incorporate the other ingredients or start over without wasting all my old wraps? I put a lot of time and money into them. I look forward to this new method now that I have supplies on the way to give it a go again. I am so thankful you published this and I am inspired by your blog. I hope to keep bees someday also. Thank you!
Kathy says
Hi Emily,
I'm glad you found my site. While I don't have any direct experience with your issue, I think it's worth experimenting a bit. Mix up a batch of the beeswax/resin mix (you could do a half batch just as a sample.) Then place one or two of your finished wraps on a baking sheet in a 300°F oven just until they are soft and pliable. Try to scrape off as much of the wax as possible. I'm not certain how thick the coating is. You might not be able to scrape any off. Then finally, while the sheets are still warm, add a layer of the new wax mixture and then place back into the oven.
Again, I'm not certain this will work, but if you can get the old wax to mix a bit with the new mixture you might have success.
Keep me posted and good luck!
Kathy 🙂
Emily G says
Thank you! I will post my experience after to let you know how it goes. 🙂
Kathy says
👍
Soil to sink says
Put your wraps in a large pot that you use for wax. Boil off the wax off the material. then you can use them again. Weight them down and keep them submerged until cool. The wax from the material will float to the top. Collect it and you can use the wax again.
Kathy says
Thanks for your suggestion.
Loub says
If i collected the resin from the wild and needed to clean it would i just use the amount of jojoba in the recipe and strain that? And maybe top it off with the recipe amount of oil.
Kathy says
I'm not certain I fully understand your question. I don't think it would be a problem to use wild resin you collected, but it shouldn't change the rest of the recipe. You'll still need to use beeswax and the jojoba oil.
Irene says
Are the waxed bowl covers supposed to be sticky after they are dried?
Kathy says
They should be tacky so they stick to the bowls. The tackiness will vary depending on the temperature in your house. The warmer it is, the stickier they will feel.
Raani says
How many clothes does one batch make?
Kathy says
Hi Raani,
This will depend on the size you cut your fabric and the thickness of your fabric. The thicker fabric tends to take a bit more wax. Plan on about 2 yards of material.
Kathy
Sharon Davis says
Should I coat both sides of the wrap? Thanks!
Kathy says
Hi Sharon,
It depends on your material. Start with one side. It will usually penetrate through to the other side. If not, add a second coat to the other side. Most of mine were able to be done with just a coat on one side.
Kathy
Terry says
I just made my wraps and they aren’t sticking to my dishes! What do I need to do next?
Kathy says
Try scrunching each wrap up like you would when wadding paper. Then smooth out and place over a bowl. Use the warmth of your hands to smooth over the bowl. Let me know if that works.
Kathleen says
My son has bees. What do I do with the raw wax to be able to use for this?
Kathy says
Hi Kathleen,
The beeswax needs to be rendered before using it. Here's a link to an article I've written on how I render beeswax.