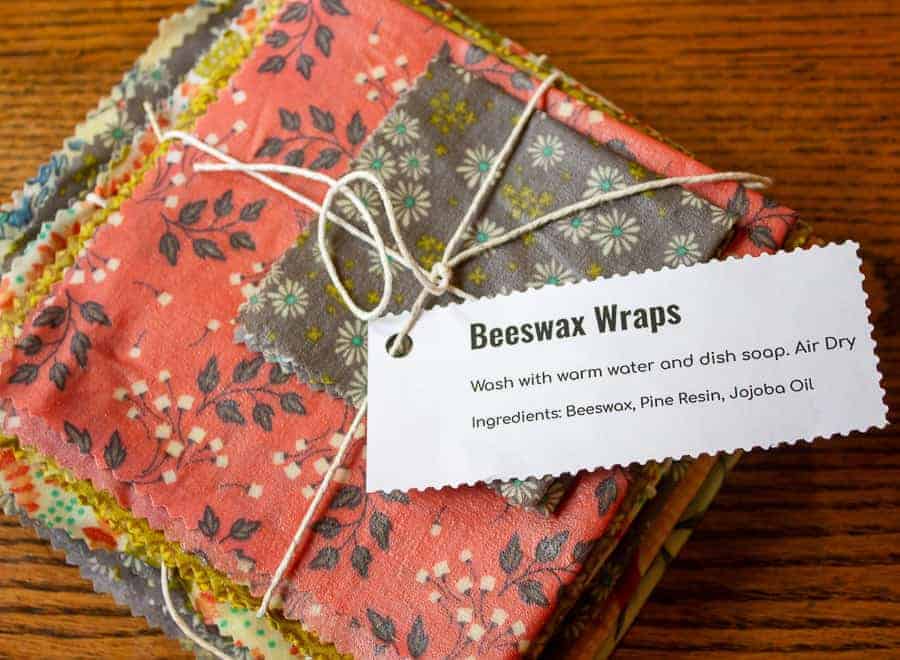
Beeswax Wraps are a DIY (Do it Yourself) beeswax wrap made with beeswax, pine resin and jojoba oil. These wraps are perfect for covering a bowl filled with food or wrapping a sandwich for your lunchbox.
I started keeping honey bees about 12 years ago. It's been a huge learning curve but the past couple of years I have been able to harvest honey, render beeswax, make beeswax lip balm and now make beeswax wraps. I wanted to raise bees for many reasons - have pollinators, harvest honey and learn something new.
I never even thought about beeswax before and all its uses. Now that I'm into beekeeping, I keep looking for more ways to use beeswax. These DIY beeswax wraps are a great, useful project. This is a project that anyone can do - even if they aren't a beekeeper. All the supplies can easily be purchased.
What are beeswax wraps?
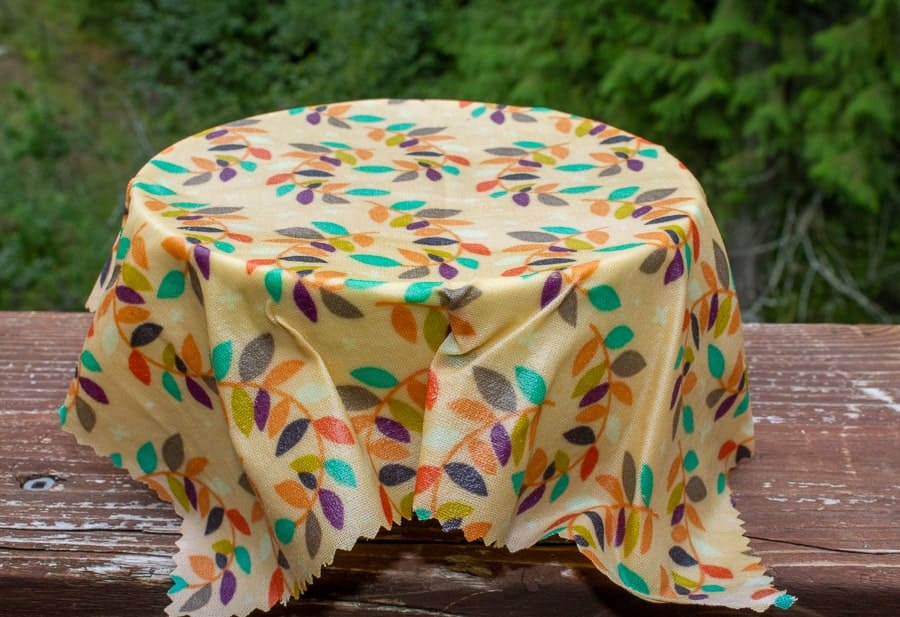
Beeswax wraps are a cotton cloth saturated with a beeswax mixture that when cooled are waterproof and pliable. These are used in just about any place you'd use plastic wrap or plastic baggies.
I use them to cover a bowl filled with leftovers, wrap a sandwich for lunch or wrap cut fruit or veggies.
What do I need to make the wraps?
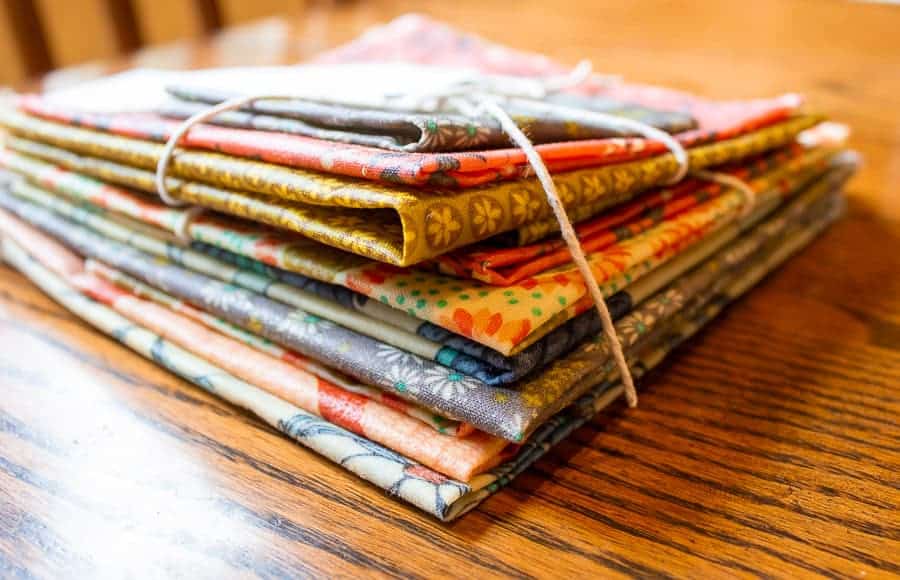
- Cotton material - I buy quilting fat quarters which often come in a mixed bundle of different fabrics and are cut into 18 inch squares.
- Beeswax - Use your own homegrown beeswax or buy beeswax.
- Pine Resin
- Jojoba Oil
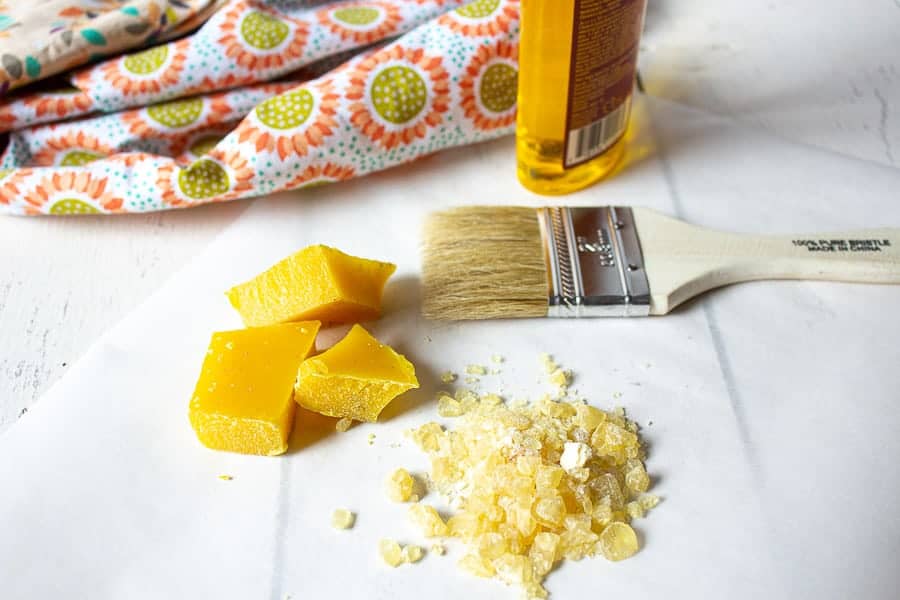
You will also need a disposable paint brush, pinking shears, scale and parchment paper.
Use a set of equipment that you can dedicate just to melting beeswax. I used an old baking sheet, a small pot I picked up at a thrift store, an old glass measuring cup and a cheap wooden spoon. Once used for wax, it's tough to remove all the wax from the equipment. Don't use your favorite pot or equipment.
You will need to have a space where you can hang a string to work as a temporary clothesline. The wraps will not drip wax, but you do need to hang them until they fully cool and the wax sets.

My inspiration for these food wraps game from an article in Mother Earth News. I followed the author's recipe and steps for creating these wraps.
Why use pine resin and jojoba oil?
Beeswax by itself is too hard and not pliable. The beeswax is very firm and will crack if used by itself on the fabric. The pine resin helps the wraps stick to bowls and to itself when folded over and the jojoba oil helps keep the wraps pliable.
How do I care for the beeswax food wraps?
Once used, wash the wraps in soapy warm water and air dry. Do not expose the wraps to heat, or the wax may melt! The wraps can be folded and stored flat in a drawer or cupboard.
How long do the wraps last?
I have just started using the food wraps and so far they are not showing wear and tear. Longevity will depend on your actual usage and cleaning of the wraps.
Tips for making Beeswax Wraps
- Wash your fabric before using. Don't worry if the fabric is wrinkled. The wrinkles will disappear when you add the wax.
- Use pinking shears when cutting the fabric so the edges don't fray
- Use a digital scale to measure ingredients
- Use a small stirrer when stirring the wax. I use the handle of a wooden spoon. A chopstick would also work well
- Don't try to stir the mixture until most of the contents are melted
- Melt time will vary depending on your stove and the size of your beeswax. I use large chunks and it takes about 40 minutes to melt the entire mixture. If you buy small pellets of beeswax, your melt time may be less.
- Use caution with the melted wax mixture. It is hot and will burn and stick when contact is made.
- If the wrap begins to stick to the parchment paper, just pop back into the oven for another minute.
Other great DIY projects
If you make this recipe, I’d love to hear about it! Leave a comment below and snap a picture and tag me on Instagram @beyondthechickencoop
If you loved this project you'll LOVE all the others in this category. Check out all my homesteading articles here!

Beeswax Wraps
Equipment
- Pinking Shears
- Scale
- Baking Tray
- Pot
- Glass Jar - Heat safe
- Wooden Spoon
- Disposable paint brush
- Twine
- Clothes pins
Ingredients
- Cotton material - I buy quilting fat quarters which often come in a mixed bundle of different fabrics and are cut into 18 inch squares.
- Beeswax 2 ounces - Use your own homegrown beeswax or buy beeswax.
- Pine Resin 2 ounces - Make certain it's food quality resin.
- Jojoba Oil ½ ounce
Instructions
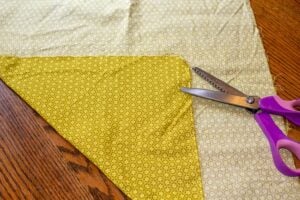
- Cut material into squares using pinking shears so edges don't fray
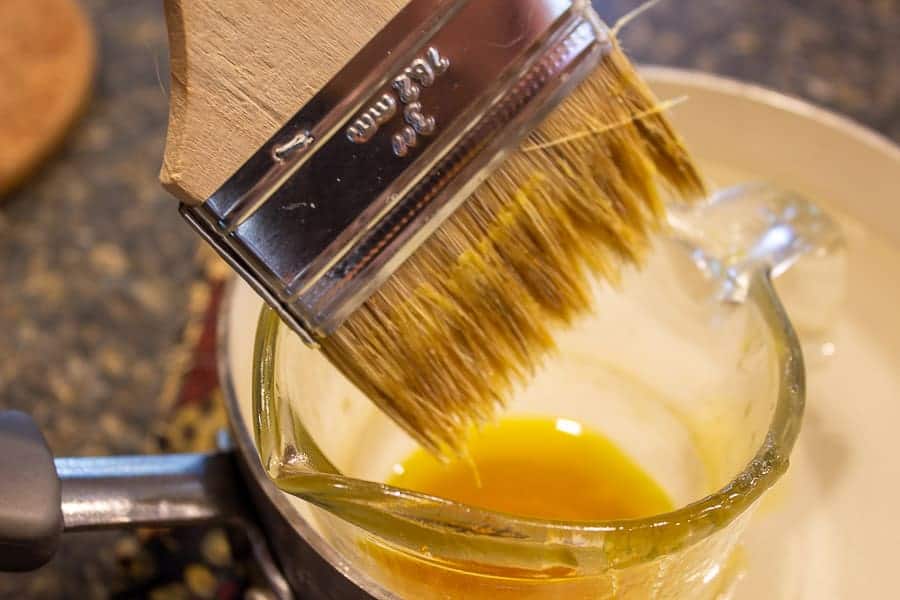
- Measure out 2 ounces of beeswax, 2 ounces of pine resin and ½ of an ounce of jojoba oil into a heat proof glass jar or measuring cup

- Place glass jar into pot and fill pot with water. Place pot over high heat until water begins to boil. Monitor boiling water and contents in jar. Add more water to pot as water evaporates.
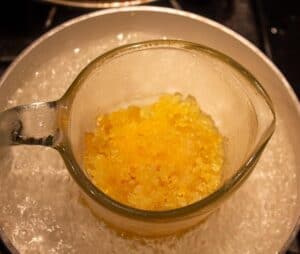
- When the beeswax and resin begins to melt, stir occasionally with the thin handle of a wooden spoon or a wooden chop stick.
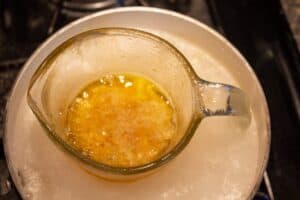
- When fully melted, give a good stir and remove from heat
- Place a piece of parchment paper on an old baking sheet.
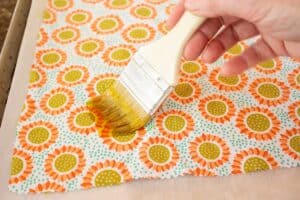
- Place one piece of fabric on top of parchment paper.
- Dip paintbrush into melted wax mixture and spread on fabric, covering fabric completely
- Place baking sheet with fabric into a preheated 300 degree oven for 1 minute
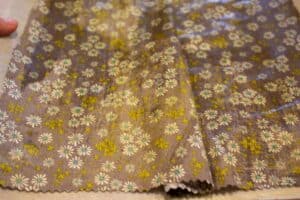
- Remove from oven and brush back over fabric with brush to help smooth out any extra wax
- Lift fabric from baking sheet and hang from clothesline until cool

- Repeat with remaining fabric. If beeswax mixture begins to thicken, place back on stove
Notes
- Recipe can be doubled, but keep proportions the same
- Wash your fabric before using. Don't worry if the fabric is wrinkled. The wrinkles will disappear when you add the wax.
- If fabric is too large for baking sheet, spread wax on half of the fabric. Fold fabric in an "S" shape in the center and cover other half with wax.
- Make beeswax cloths any size that fits your needs. I made mine in 10 squares and 8 inch squares.
- To easily cut a square, fold material in a triangle and cut unfolded sides
- Use pinking shears when cutting the fabric so the edges don't fray
- Use old equipment for making these wraps. Once they are covered with beeswax, it's difficult to remove wax. I dedicate a set to just this task and nothing else.
- Use a digital scale to measure ingredients
- Use a small stirrer when stirring the wax. I use the handle of a wooden spoon. A chopstick would also work well
- Don't try to stir the mixture until most of the contents are melted
- Melt time will vary depending on your stove and the size of your beeswax. I use large chunks and it takes about 40 minutes to melt the entire mixture. If you buy small pellets of beeswax, your melt time may be less.
- Use caution with the melted wax mixture. It is hot and will burn and stick when contact is made.
- If the wrap begins to stick to the parchment paper, just pop back into the oven for another minute.
Melissa Mossbrooks says
I love your site and am curious is you sell your merchandise?
Kathy says
Hi Melissa,
Thank you! I do not sell any merchandise. Thanks for asking! 🙂
Kelly says
Hi! I’m going to make these this week and just wanted to confirm if the 1 ounce measurement for the jojoba oil is 1 fluid ounce? Or did you weight the oil on a scale?
Thanks!
Kathy says
Hi Kelly,
I used a scale to measure the jojoba oil.
Thank you,
Kathy
Angela says
I’ve just made some wraps, for the first time, and they seem to have come out well. I have a large sheet measuring 19”x22” (for bread) and 6 10”x10” squares from a Layer Cake. I had looked at other ‘recipes’ which only coated one side of the fabric and so I did this with yours. The wax seems to have penetrated through the fabric perfectly. My first square was a little on the thick side but the others feel just like the one shop bought one I have. I’m looking forward to using them. Everything I’ve touched feels waxy though 😂!
Claire S says
Hello! Thank you for this. I made them today and it was so easy. However, they came out really sticky. What can I do next time to prevent this?
Also, do you coat one side, bake, then coat the other side, bake? Or do you coat both sides before putting into the oven?
Thanks!
Kathy says
Hi Claire,
I coat both sides before putting into the oven. The second side doesn't seem to need as much because a lot soaks through. I do brush quickly as soon as I remove it from the oven. That helps even out the wax and removes any excess.
The wraps are slightly sticky, however not overly so. If your kitchen is overly warm, that may add to the stickiness. I've made these a couple of different times, and one batch seems to be a bit stickier than the other and I followed the exact same steps. I'm not certain what to do to prevent it. I am planning on making another batch in the next couple of weeks. If I come up with any additional tips, I'll let you know.
Thanks,
Kathy 🙂
Lorri says
How many cloths does this recipe make?
Kathy says
Hi Lorri,
It depends on the sizes of you wraps. I can usually get 4-5 wraps from each batch. I do a few large and some small ones too.
Kathy
Susan Hohlt says
Do they smell like pine resin ?
Kathy says
Nope. They do smell like beeswax.
D says
I want to make these and I found beeswax with a “cosmetic grade” in their description. Will that work for this project?
Kathy says
Updated: Cosmetic grade beeswax is okay to use on these food wraps.
Eileen ONeal says
Hi Kathy, just getting my materials together, so excited to make these but did notice on your affiliate link (I just ordered everything through your links) that the linked beeswax also says cosmetic grade? Not sure what other grade there is, maybe food grade also?
Kathy says
Hi Eileen,
I am sorry for the confusion. This beeswax does say it is okay for products like lip balm, which would come in contact with the mouth. After further research, I have found that cosmetic grade is okay to use cosmetic grade beeswax on food products.
Thank you,
Kathy
Jill B Bailey says
Do you brush the mixture on both sides of the fabric or just one side?
Kathy says
Hi Jill,
I brush on both sides. Let me know how they turn out!
Kathy
Alice says
I’m interested in making a beeswax planner. Will I still need to use all the same materials you used?
Kathy says
Hi Alice,
I'm not certain what a beeswax planner is. Can you give me a bit more information?
Thanks,
Kathy
susan says
Love this idea and plan to make some wraps soon. The recipe call for 1/2 oz Jabola Oil - Is that weight or capacity? Thanks
Kathy says
Hi Susan,
I measured by weight. The important part is to maintain the ratio given. Let me know how they turn out. 🙂
Cheryl says
I would suggest rubber gloves, if you get it on your fingers it is hard to remove. Hot water is not enough. I used bio oil, hot water and a wash cloth. Cooking oil might work.
Sue says
Can you store and left over mixture and re-heat and re-use for another batch?
Kathy says
Hi Sue,
I haven't tried saving and reheating, but I believe you should be able to do it without any problem. I always have a bit left in my heating container and I just let it cool and add new to it the next time. Let me know how it works out!
Kathy 🙂
Teresa says
About how many wraps would one batch make if you cut the fabric into 8 inch squares. Thank you for the detailed recipe. I can’t wait to make some.
Kathy says
Hi Teresa,
I would plan on 6-8 wraps. Let me know how they turn out! 🙂
Elsje Barnard says
Dear Kathy,
I would like to use this at my little guesthouse. I have smaller omes but need bigger sizes. You dont give amounts for the ingredients ? How much oil and pine resin in relation to the bees wax?
Kind regards
Elsjé
Kathy says
Hi,
Thank you for your email. Here are the amounts: 2 ounces of beeswax, 2 ounces of pine resin and 1/2 of an ounce of jojoba oil
I am going to adjust the instructions so the amounts are easier to find.
Thank you and let me know how they turn out!
Kathy says
Hi Kathy - these look so pretty and practical. Plan on making some for my daughters and myself (and perhaps some for gifts if all goes well!) One question I had was do you apply the beeswax and resin mixture to both sides of the fabric or just the right side? Thanks
Kathy says
I've been making them and giving as gifts too! When brushing on the mixture, I've only applied to one side. It fully penetrates through to the other side. If your fabric was thick and it didn't go through, you'd want to do both sides. Have fun and let me know how they turn out! 🙂
Dawn - Girl Heart Food says
Love these Kathy! And would absolutely love to make some! So environmentally friendly too. Plus, how cute would they be for a homemade gift?? Such great instructions too 🙂
David @ Spiced says
I recently got some smaller beeswax wraps that I've been using to wrap bowls of leftovers and such. I love the idea! (I hadn't heard of beeswax wraps until just a couple weeks ago.) I love that you made these at home! Yet another reason that I need to start keeping bees! 🙂
Valentina says
I had no clue how this process was done. Very cool! And they're so pretty, too. It's so awesome you've been keeping bees for so long and doing so much with the honey. I love it! 🙂 ~Valentina
Alexandra @ It's Not Complicated Recipes says
This is a fantastic idea, Kathy! I have always been interested in keeping bees, and would love to do so in the future (when I am living in a house and not an apartment!)
Kathy says
Beekeeping in an apartment would be rather challenging! Hopefully one day!
Kelly | Foodtasia says
Kathy, these beeswax wraps are so cool! How I'd love to keep bees! And all the things you can do with their wax and honey!
Kathy says
The bees are pretty fascinating. I'm still learning about them.