
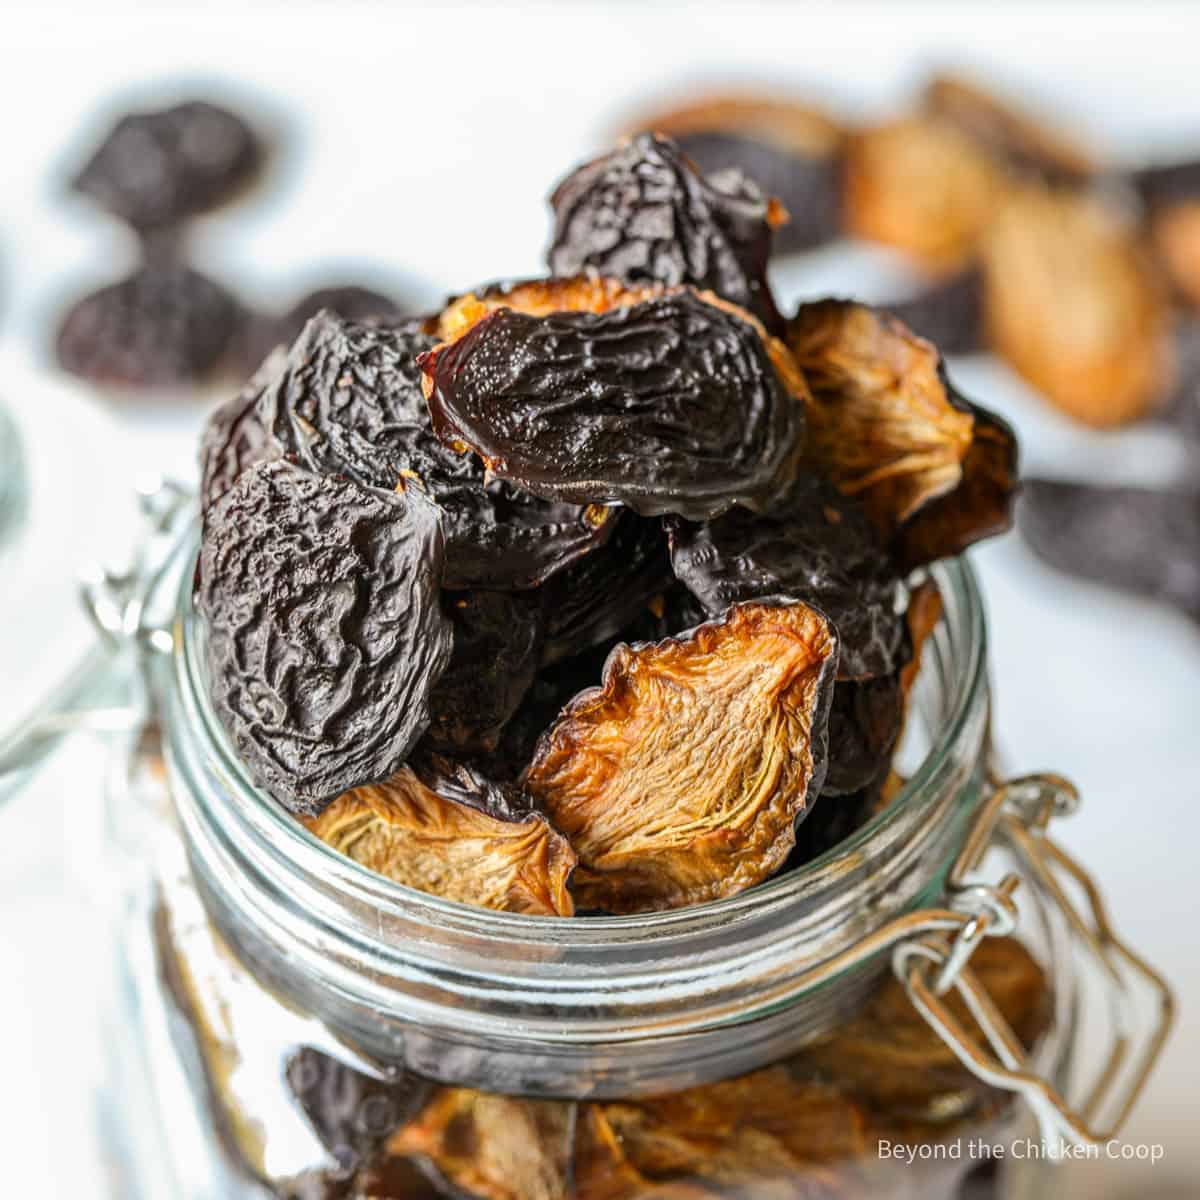
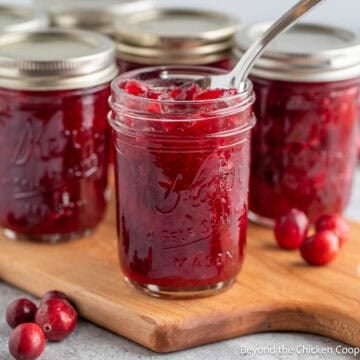
Drying an Italian Prune Plum makes delicious dried prunes. Learn How to Dry Plums to make a delicious and nutritious snack.
Dried prunes are perfect for having on hand to nibble on at any time.
What type of plum makes a prune?
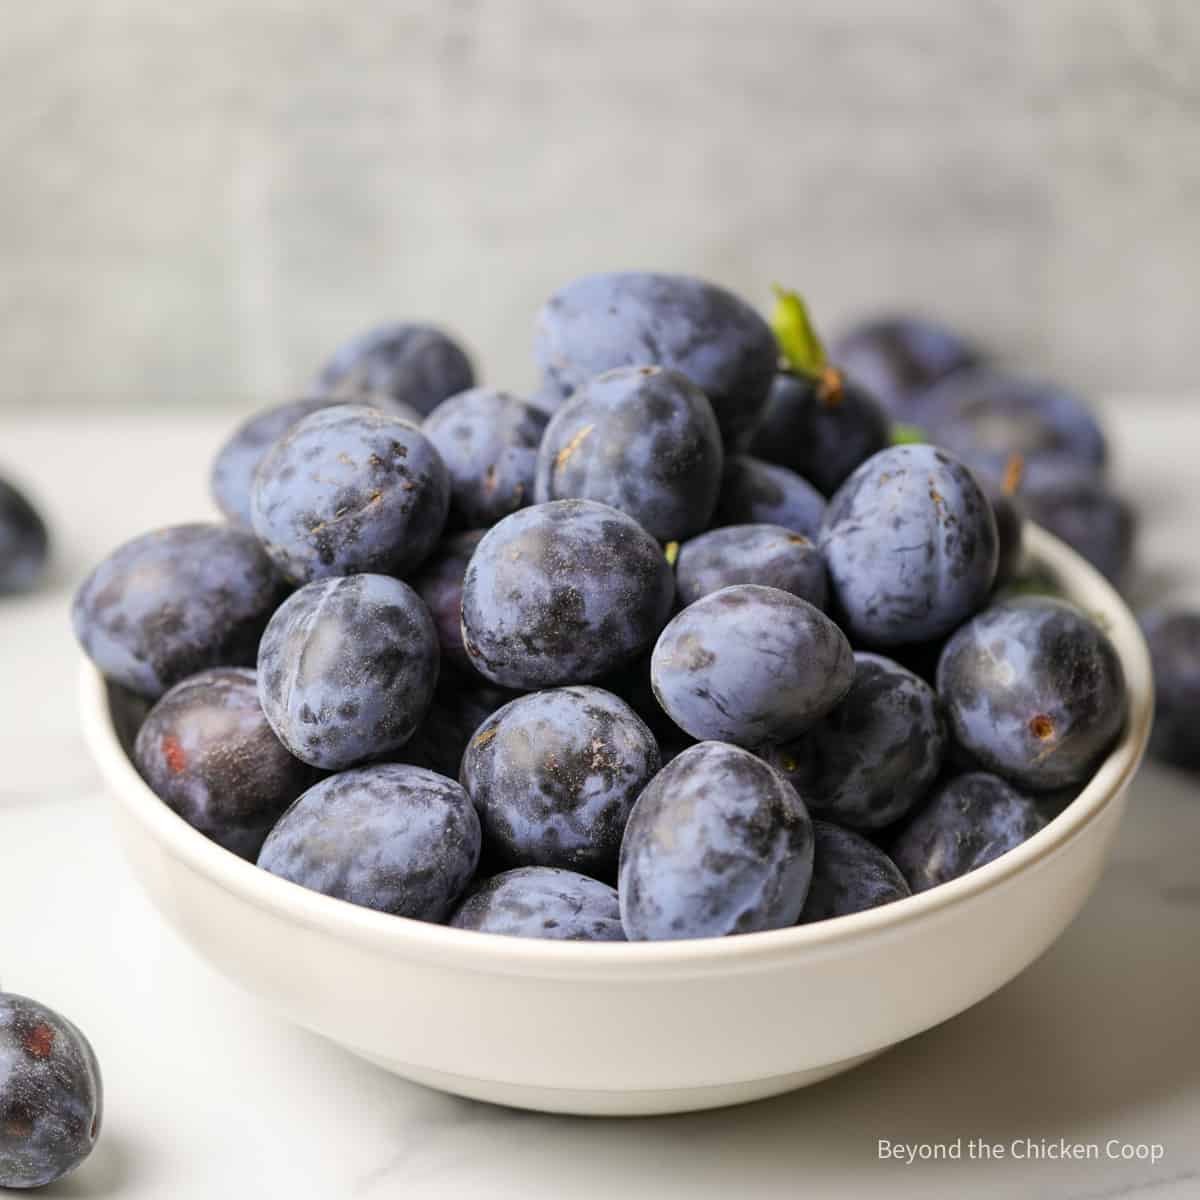
Prunes are simply dried plums, but not just any type of plum can be called a prune!
There are several varieties of plums ranging from yellow, to red to dark purple. They also range in size and shape. You can find plums that are perfectly round and the size of a tangerine or you can find smaller oblong-shaped plums.
Every type of plum can be dried and made into dried plums, but only one type of plum can actually be called a prune.
A prune is a variety of plum also called an Italian plum or Italian prune plum. They are also referred to as a European plum. These plums are blueish purple in color and are an oblong shape about the size of an egg.
They are perfect for drying because they have a low moisture content and firm fruit. The seed is easily removed and when dried, the fruit is wonderfully sweet with just a bit of tartness.
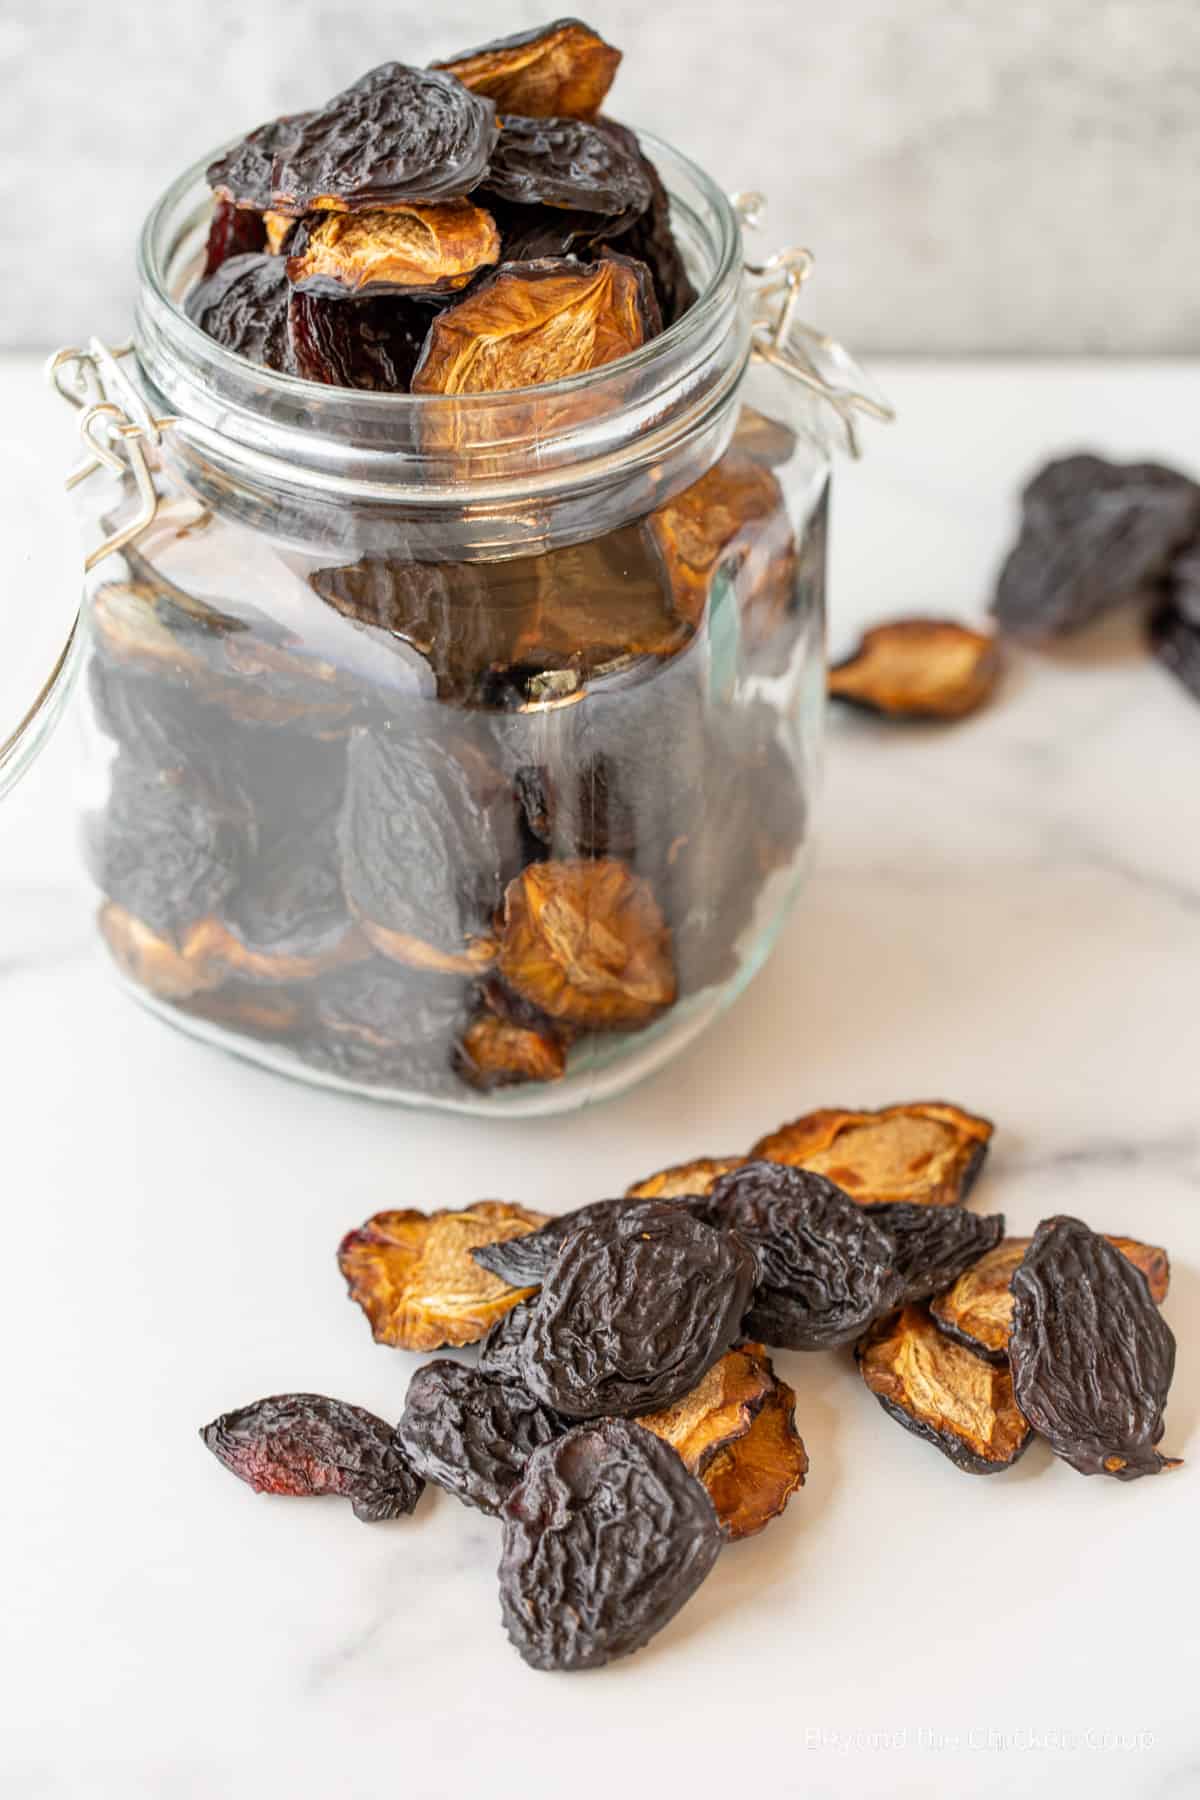
I prefer these home-dried prunes over store-bought prunes. I like them dryer than you find at the store. To me, those store-bought ones are just too soft!
We grow another type of plum which is a red plum. It's super juicy and the seed is a cling seed, not freestone. Those plums are better for juicing rather than drying. They are delicious plums, but the flesh is very soft and with all the juice in those plums, they'd take days to dry.
Step by step directions
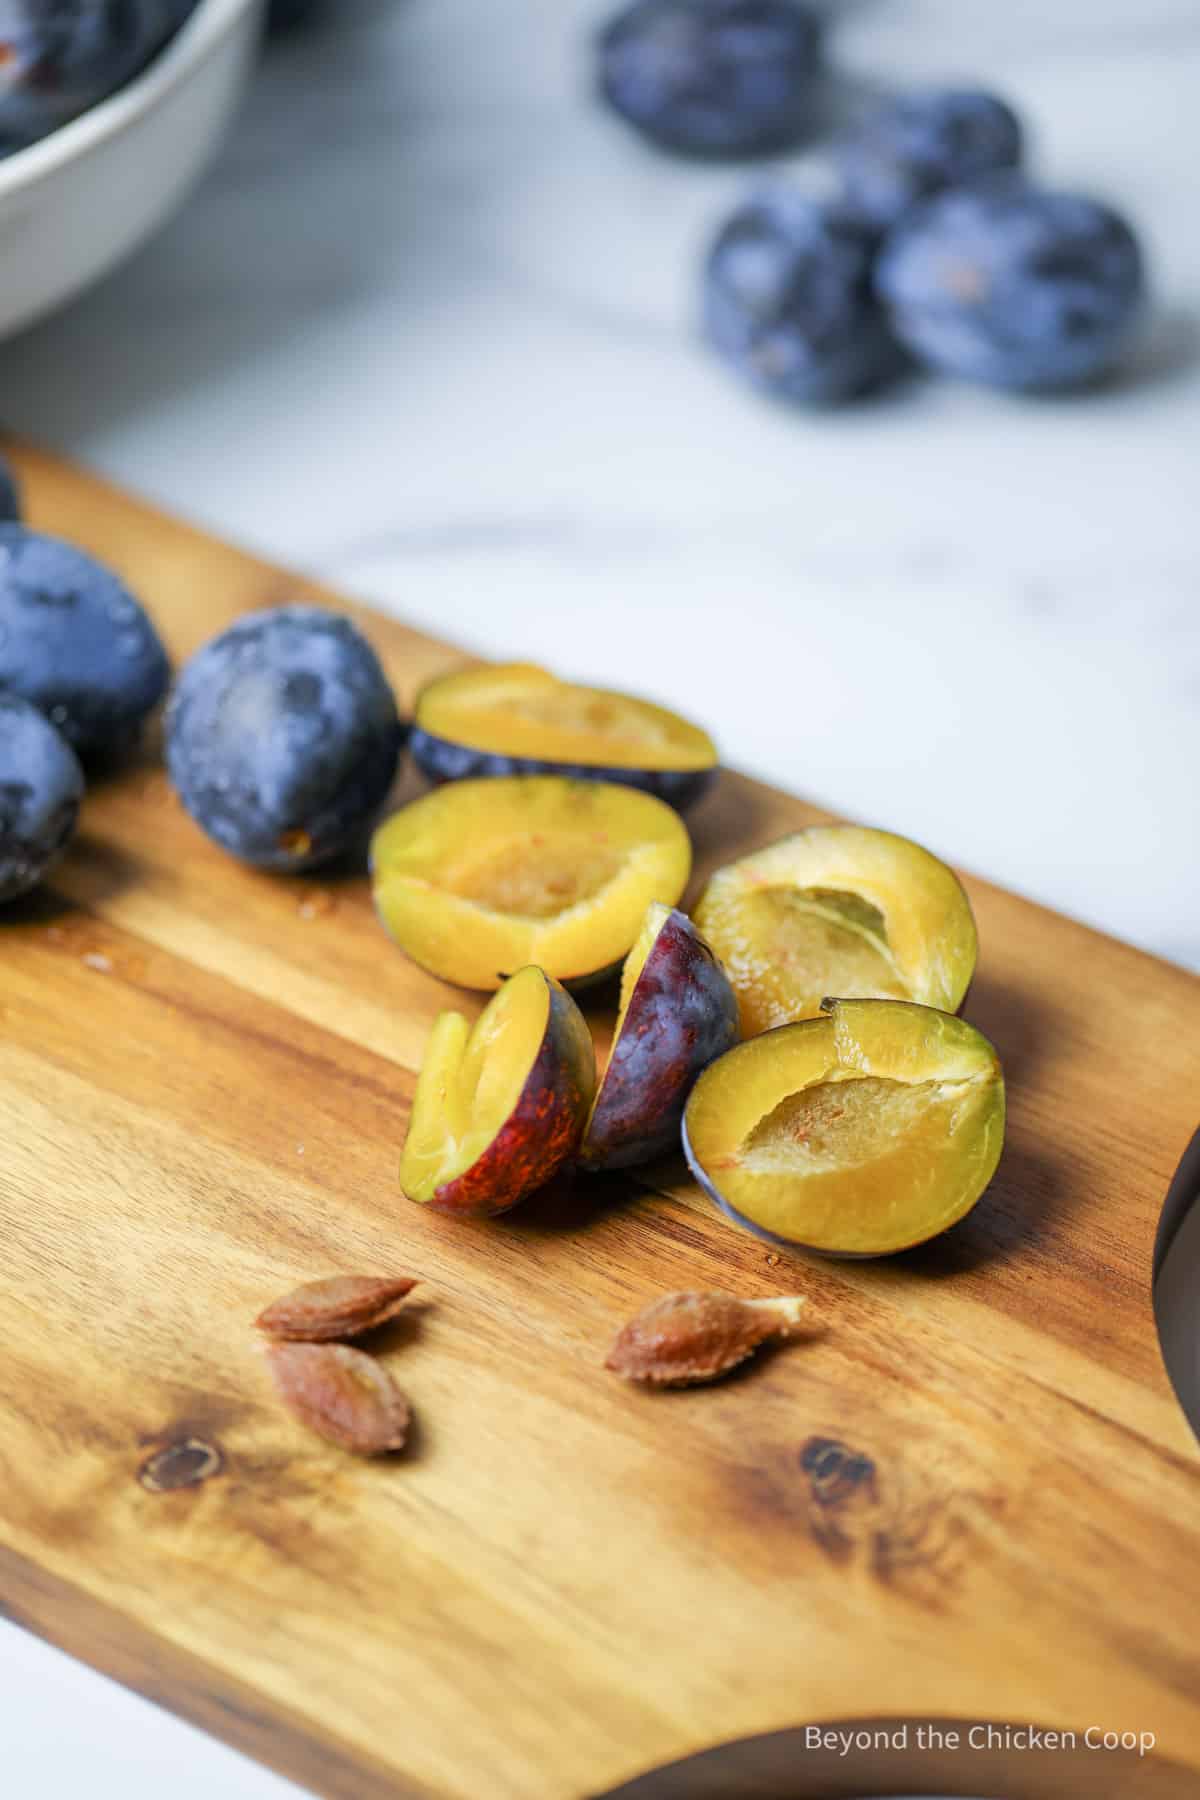
- Wash your plums with cool water
- Slice in half lengthwise and remove the pit
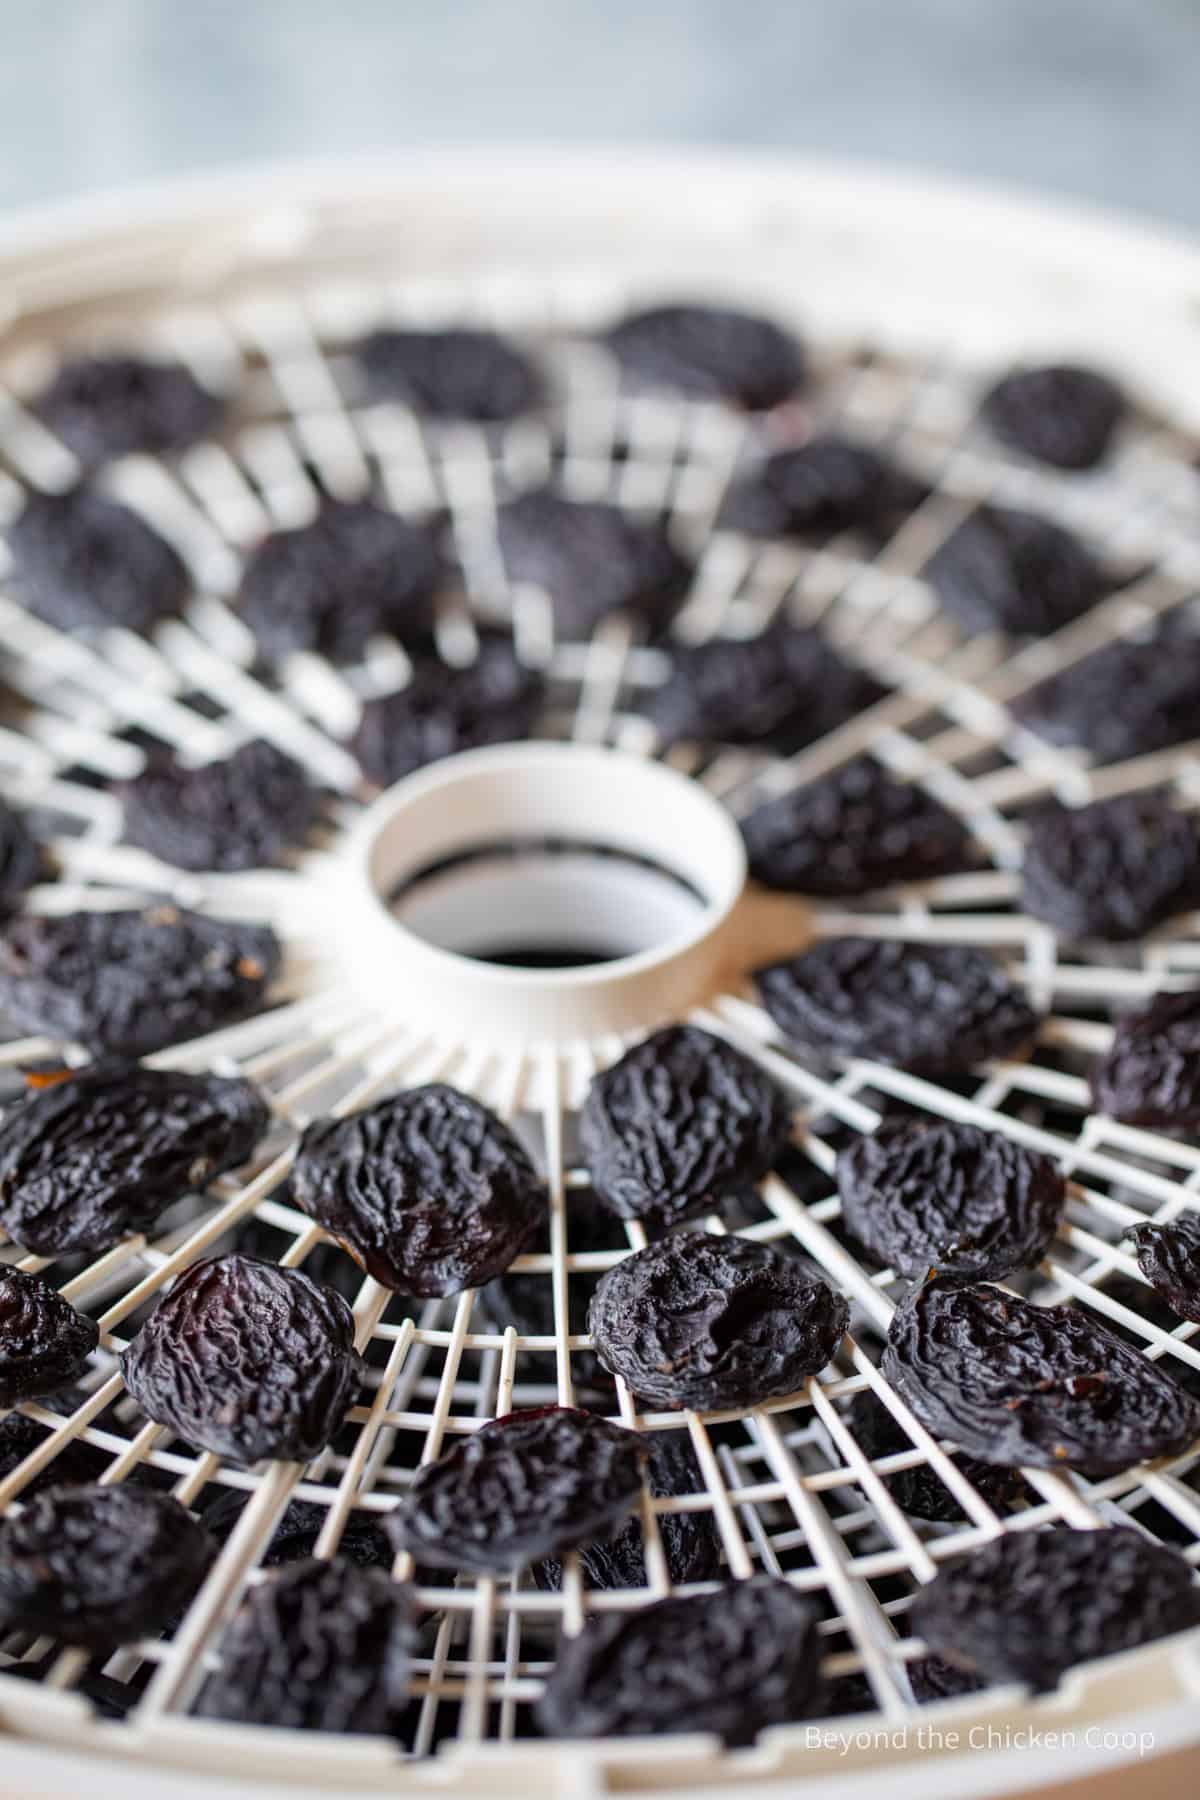
- Place plums skin side up on dehydrator trays. It's okay to fit them close together, just don't overlap the plums
- Turn the dehydrator to 145°F and let the drying begin!
- Drying will take anywhere between 10-18 hours. That's a huge range, but it really depends on many factors:
- Size of your plums
- Number of plums you're drying
- Where you are drying them. I often set my dehydrator outside under a covered porch. The cooler temperature or higher humidity will increase drying time.
- Check your plums every few hours to determine if they are dry enough
- I prefer my plums pretty dry but still pliable.
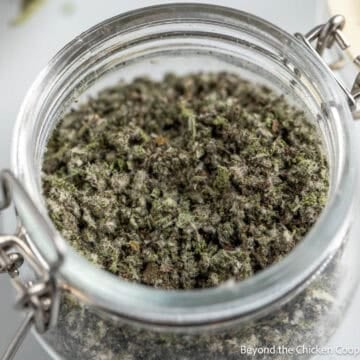
- Remove dried plums from the dehydrator and place them in a large glass jar or plastic bag. Rotate the plums around in the container to help condition the plums. If moisture appears on the jar or on the bag, the plums are not dried long enough. Just place it back on the dehydrator and dry it for a bit longer.
- Store prunes in an airtight container at room temperature for up to one month. For longer storage, place in vacuum seal bags and freeze for up to one year.

Dehydrating tips
- Dry as many plums as you have available and will fit into your dehydrator. I have extra trays from an older dehydrator and I just stack them all up. Sometimes I'll have 8 trays on at one time. The time will take a bit longer, but it still works.
- Don't spray your trays. Just add the plums. They will stick just a little, but once dry, they peel right off.
- Rotate your trays about halfway through the processing time. I move the ones on top to the bottom.
- Check your plums while they are drying. Make certain you know what's happening in that dehydrator. I'll do my first check after about 6 hours and then more frequently when they get closer to being done.
- It's okay to turn your dehydrator off and then back on again later. This may happen at night time when you're unable to check on them.
Drying in the oven
If you don't have a food dehydrator, you can also dry plums in the oven. Place sliced plums on a baking sheet lined with parchment paper. Turn oven on at its lowest temperature.
Place baking sheets in oven and check every hour. Be certain to open the oven when checking, not just peek through the window. Opening will allow some of the excess moisture to escape from the oven.
Oven drying will be much quicker. You'll need to monitor them closely to know when they are done.
Frequently asked questions
Drying prunes takes anywhere between 10 and 18 hours. Drying times vary depending on the moisture in your fruit, the size of your fruit, the amount you are drying and the weather conditions on the day you are drying.
Dried prunes are simply dried plums, however, they are a certain variety of plums. Prunes are usually Italian plums or European plums. They are purplish in color and oblong in shape.
More dehydrating recipes
If you make this recipe, I’d love to hear about it! Leave a comment below and snap a picture and tag me on Instagram @beyondthechickencoop
Be certain to check out all my recipes for preserving food!

Listen to the audio recipe on drying prunes!

How to Dry Plums
Equipment
Ingredients
- Italian prune plums (Use as many plums as you have that will fit on your dehydrator. )
Instructions
- Wash your plums with cool waterItalian prune plums
- Slice in half lengthwise and remove pit
- Place plums skin side up on dehydrator trays. It's okay to fit them close together, just don't overlap the plums
- Turn dehydrator to 145°F and let the drying begin!
- Drying will take anywhere between 10-18 hours. That's a huge range, but it really depends on the size of your plums, the moisture level in plums, the amount your are drying and weather conditions.
- Where you are drying them. I often set my dehydrator outside under a covered porch. The cooler temperature or higher humidity will increase drying time.
- Check your plums every few hours to determine if they are dry enough
- I prefer my plums pretty dry but still pliable.
- Remove dried plums from dehydrator and place in a large glass jar or plastic bag. Rotate the plums around in the container to help condition the plums. If moisture appears on the jar or on the bag, the plums are not dried long enough. Just place back on dehydrator and dry for a bit longer.
- Store prunes in an airtight container at room temperature for up to one month. For longer storage, place in vacuum seal bags and freeze for up to one year.
Notes
- Use Italian plums or European plums for best results. These are a purplish plum with a freestone seed and a firm flesh.
- Dry as many plums as you have available and will fit into your dehydrator. I have extra trays from an older dehydrator and I just stack them all up. Sometimes I'll have 8 trays on at one time. The time will take a bit longer, but it still works.
- Don't spray your trays. Just add the plums. They will stick just a little, but once dry, they peel right off.
- Rotate your trays about halfway through the processing time. I move the ones on top to the bottom.
- Check your plums while they are drying. Make certain you know what's happening in that dehydrator. I'll do my first check after about 6 hours and then more frequently when they get closer to being done.
- It's okay to turn your dehydrator off and then back on again later. This may happen at night time when you're unable to check on them.
Nutritional Disclaimer:
Nutritional information is provided as a courtesy and should only be construed as an estimate rather than a guarantee. To obtain the most precise nutritional information in a provided recipe, you should calculate the nutritional information with the exact ingredients you are using when preparing the recipe using your preferred nutrition calculator.

Yesi says
Hello, my dehydrator didn't come with silicone mesh sheets and I was reading for lungs this is highly recommended. Also read parchment paper with holes works. What's do you suggest?
Kathy Berget says
Hi,
I use just the trays that came with my dehydrator. I don't use silicone sheets or parchment paper.
Kathy
David @ Spiced says
Interesting - I had no idea that prunes had to be a certain type of plum. Good to know! We have a large dehydrator, and I'm intrigued about how homemade prunes would taste. The store-bought ones are ok, but I get tired of them before I can get through a whole package. I bet homemade are WAY better! Thanks for sharing this one, Kathy!
Kathy says
I just don't care for the store bought ones. I think I just like them much drier.