
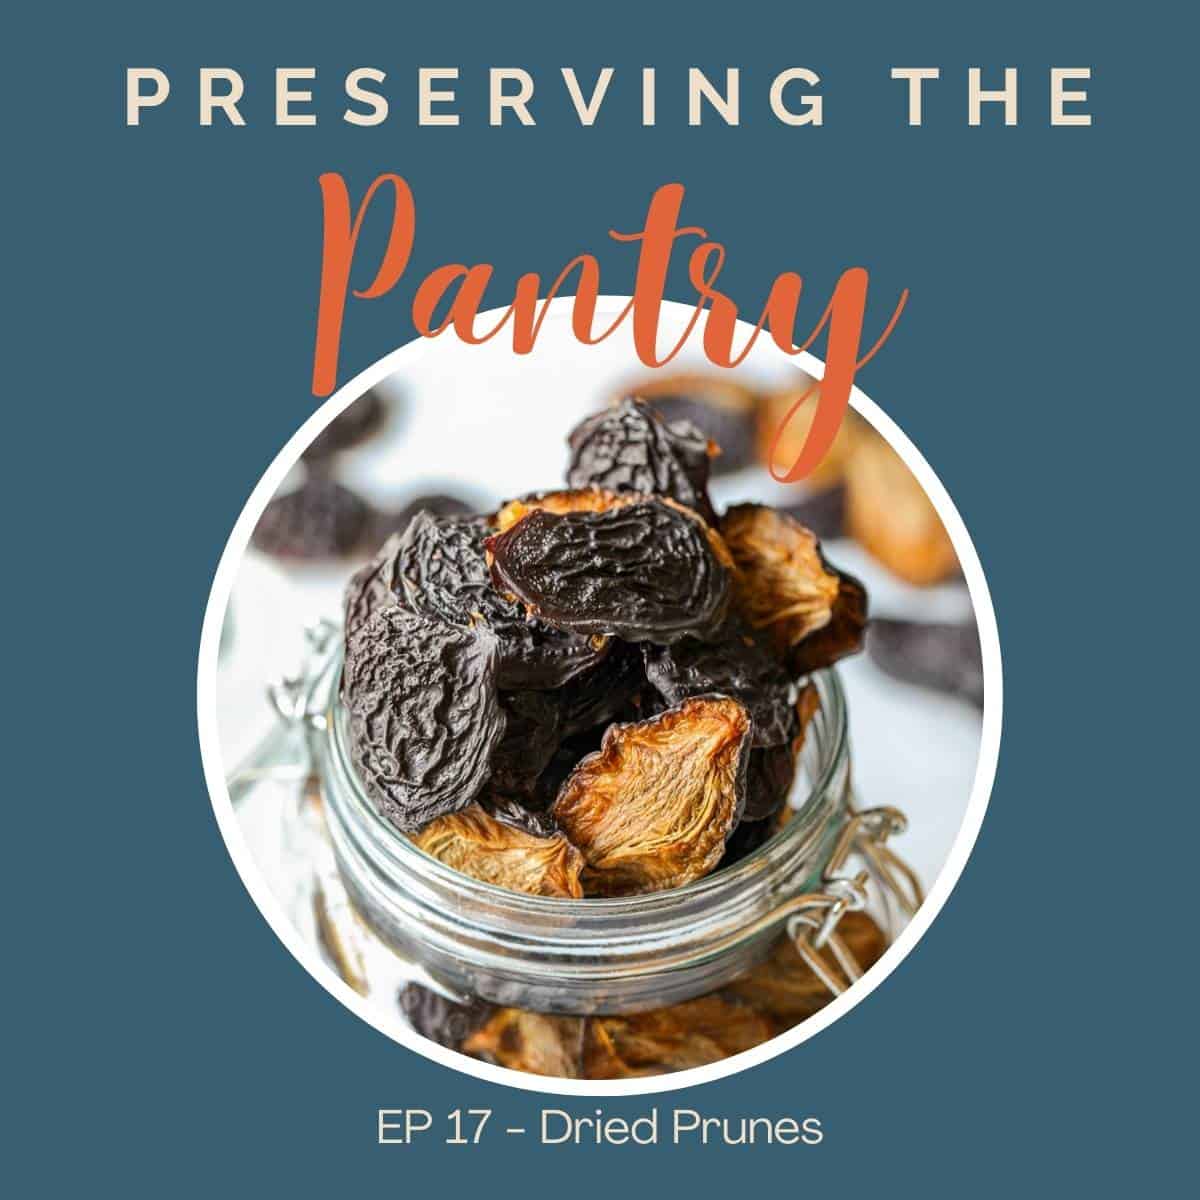
In episode 17, Kathy discusses how to make dried prunes. She shares what type of plum makes the best dried prune and the process for drying the plums.
Play the episode
Recipes
Find the complete recipe for How to Make Dried Plums
Recipes mentioned in this podcast:
In this episode you'll learn:
- What type of plum is perfect for drying
- The process for drying plums
- How to store your dried prunes
Equipment
- Dehydrator
Where to listen to the podcast
Listen to this episode on iTunes, Spotify, Amazon Podcast, or your favorite podcast player. Or scroll down to read a full transcript.
If you love this podcast, I’d love to hear about it! Leave a comment below and hop over and leave a comment on Instagram @preservingthepantry!
Transcript
Hi everyone, and welcome back to the Pantry. Today I am pulling the dehydrator back out, and we are drying plums, otherwise known as prunes.
Now, hold on there a minute. Did I just hear a Ewww? No, no, no! These prunes are delicious. To me they don't resemble anything at all like the ones you find in the store, those are a little bit on the soft and mushy side, and these homemade dried prunes are dry, but pliable and have a bit of tartness to them.
They're really a delicious snack, so you need to try them. And then you can decide if you like them.
The type of plum that we're going to use to make these prunes are an Italian plum. They are a small plum that are sort of an oblong shape, almost like an egg, and are a bluish purple. The pit is a freestone.
Remember we talked about freestones when we talked about our peaches? The pit just comes right out. It's not clinging to the flesh. The flesh is juicy, but not dripping with juice, and the flesh is nice and firm. Those are ideal for making these prunes.
We have another tree that is a different type of a plum tree. They're red, they're round a little bit larger and extremely juicy, and when we pick them, the juice is just dripping off those plums and especially when you take a bite out of them. We use those plums for making jam or juice or baking, but they don't make great dried plums. There's just too much moisture.
Once you have your plums, all you need to do is rinse them off, slice them in half, remove the pit, and then place your plums on the dehydrator. We place them flesh side down or skin side up, and you're really gonna pack that dehydrator. You don't need to worry about any space being left in between the fruit, but you don't want them to overlap.
When I make prunes, I fill up as many trays as I can, so use as much fruit as you have available and as many trays as you have available. I have two dehydrators. One is an older one, and I use those trays they stack on my newer one, so sometimes I'll stack up to eight or 10 trays on my dehydrator, and I just keep filling them until I don't have any more.
There's no need to spray your trays before you add that fruit. And you don't have to put anything on your fruit to preserve them. They're gonna be perfect just the way they are. Once your trays are loaded, you're going to turn on your dehydrator. I set mine at 145 degrees, and then you just let it do its job.
Now this can take anywhere from 10 to 18 hours for the fruit to dry. That's a really long time. It's okay to leave that fruit. If you need to leave for a long time, like overnight or you're, you need to leave the house for a while and you don't feel comfortable leaving that on, or you think that you're getting close to being the fruit being dried, it's okay to unplug that for a few hours and then just start it up again.
When you are home and have time to attend to your fruit, it really doesn't need much. After about six hours, I peek in there to check and see how everything's going. About halfway through, I also rotate my trays. I move the ones from the top down to the bottom and just make sure that everything is getting nice and dried.
As it gets closer to being dried, I start to peek in there a little bit more often. I want a fruit that's nice and dry, but pliable and not so it's brittle. When I think I'm there, I can turn my dehydrator off and let the fruit cool and then check it again when it cools. Sometimes you'll find it's just a tad bit drier than when it was still on the dehydrator.
If it's dried to your liking, then take everything off and put them in a large zip top bag or a large jar. You're gonna condition that fruit now. So what that means is some of those pieces are gonna be a little bit drier than others, and when it's conditioning, it's sort of leveling out the moisture level on all those different pieces.
So every day just shake or rotate that fruit around until it has leveled out. It takes about one to two days for this conditioning to occur. If you notice moisture on the inside of your jar or on the inside of the bag, your fruit is not dried enough, put it back on the dehydrator and let it dry for another couple of hours.
After my fruit has been conditioned, I take out what I think is enough for me to eat for about a month. Then I put those in a jar on my counter, it has a lid on it, and I distort those right there. Every day I can just grab one or two of the prunes out and nibble on those, the extra ones I put into a vacuum seal bag and store in my.
By doing this, it just extends the life of those prunes. Nothing's going to happen to them when they're in the freezer, and then I pull them out when I'm ready for a new bag and I let those sit on my counter for about a month while I eat them up. Dried prunes are a delicious and nutritious snack. If you have access to those Italian plums, you really wanna give this a try.
It's a great, easy way to preserve your pluma. After you make these, I want you to let me know did you like them? I bet you will.
We'll see you again next week in the pantry. Thanks everyone. Thanks for listening, and be sure to tune in again next week for more episodes of Preserving the Pantry.

Leave a Reply