
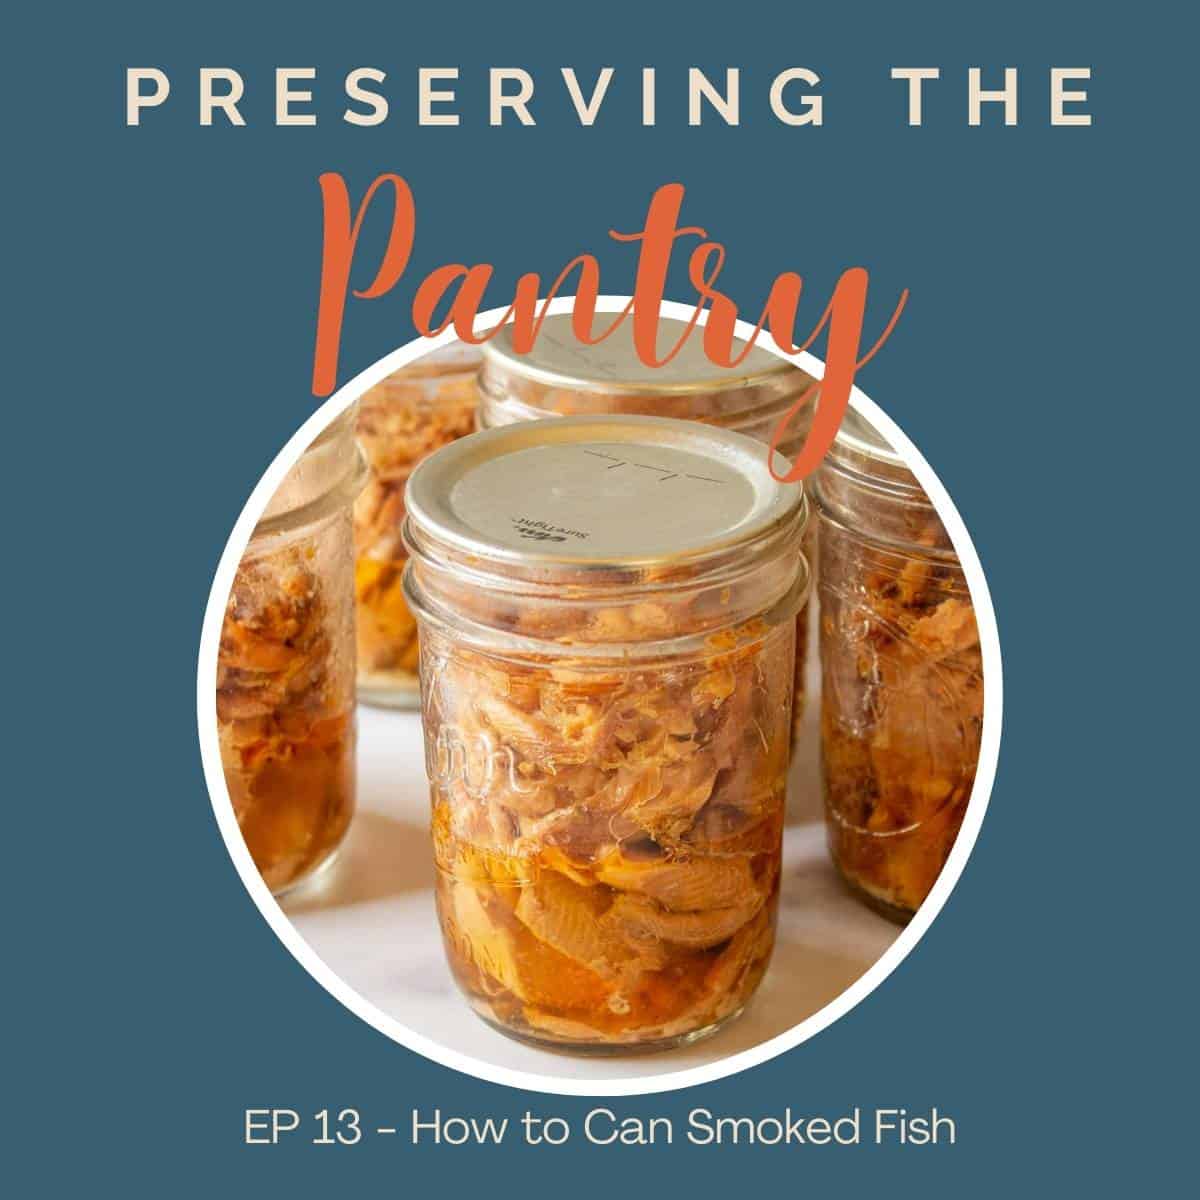
Episode 13 teaches you how to can smoked salmon and other smoked fish using a pressure canner.
Learn all the tips and techniques for canning smoked fish.
Play the episode
Recipes
Find the complete recipe for Canning Smoked Fish
Recipes mentioned in this podcast:
In this episode you'll learn:
- How to can smoked fish
- What types of smoked fish you can use
- How long to process canned fish in the pressure canner
- Ways to use smoked fish
Equipment
- My pressure canner is an All American 921 canner.
- Canning Jars
- Jar Lifter
Where to listen to the podcast
Listen to this episode on iTunes, Spotify, Amazon Podcast, or your favorite podcast player. Or scroll down to read a full transcript.
If you love this podcast, I’d love to hear about it! Leave a comment below and hop over and leave a comment on Instagram @preservingthepantry!
Transcript
Hello everyone. And welcome back to the Pantry. Today, we are going to be learning how to can smoked fish. Now, back in episode five, I talked about the process that we use to smoke our fish. And now we're going to be storing that fish in canning jars so that it is shelf stable. The other way that we store our smoked fish is in the freezer.
And that's really simple to do. You just simply put your cooled, smoked fish in zip top bags or in vacuum sealed bags and you freeze it in a deep freezer. That's easy. We like to do that, but we prefer to smoke our fish and then can it in canning jars using a pressure canner.
The reason I prefer that method is sometimes the fish in the freezer just seems to dry out a bit more than it does in the canning jars. We use both methods. Sometimes it just is a matter of what we have time.
The first thing that you'll need to do is of course smoke your fish. And this recipe will work for any type of smoked fish. So we usually use kokanee, but again, any type of fish will work. Smoke your fish the way that you prefer and then allow your fish to fully cool.
Now, if you can, it's absolutely best to be able to do the smoking and the canning on the same day. But realistically, that doesn't always happen because it's just a matter of time. If you can't do it both on the same day, place your cooled fish, your cooled smoked fish in the refrigerator, and then can the next day.
Now, if it's going to take longer than that, you'll want to get these fish into the freezer in a zip top bag and freeze them because the fish will not last very long in the refrigerator. So you want to get it into those canning jars right away. Or into the freezer right away, you can come back and then can the fish at a later day after it's been frozen, you'll just make sure certain that it's fully thawed before you're going to go through this canning process.
Smoke your fish remove all of the skin and the bones and chunk your fish into nice chunks. If you're using a large fish, you might have to break it or even cut it into pieces that will fit into your canning jars. You may use half pint canning, jars or pint canning jars for this recipe. Do not use anything larger than a pint sized jar.
Once you have all of your fish ready, you make certain, you also have all of your canning supplies ready? You need your clean jars. Clean lids rings a pressure canner ready with four inches of water in the pressure canner. Don't heat that water beforehand this time, you're just going to put the water in there.
Four inches of water is more water than you'll typically use, but because this has such a long processing time, we wanna make certain that the pressure canner does not run dry. So four inches of water in your pressure canner. The process for canning smoked fish is really quite simple. Once you have your fish all prepared, you're going to start stacking it or placing it into your canning jars.
If I have nice long strips of fish, I stack it vertically in the jars and hold my jars on their side and place it in there so that I can get some really nice pieces in there. With the kokanee, It is a smaller sized fish. So we often end up with small little pieces and I just place all those inside the jar.
Tap that fish down just a little bit. You're not going to want to smoosh it in there, but you can give a little bit of pressure to make certain that you're pushing it down. Now we don't add anything at all into the canning jar, except for the fish. There's no liquid that's added. You don't need to add any sort of seasoning because it's already seasoned from the smoking.
So you just put the fish in there once your fish is there. Make certain that you leave a one inch head space from the top of the. Once your fish is in there, then you're going to wipe down the rims really well, place the lid on and place the ring on. Remember, just give it a finger tightening don't over, tighten your jars, and then you're going to place your jars into your pressure canner.
Now with these, because we usually use half pint size jars, we add a double layer into our pressure canner and we put that, I can think it's called a heat diffuser. It's really a flat rack that comes with your pressure canner that goes in the canner.
We have one that's in the bottom of the pressure canner. We stack a layer of jars. We place the second diffuser. And then a second layer of jars on top of that. You'll place your lid on top, lock it in place and then turn, turn your heat up. Now make certain that the vent release valve is off during this time. You're going to be waiting for your pressure canner to begin to steam.
Once it steams you let that steam vent for 10 minutes. And then you'll place the vent, the steam vent cap back onto the pressure canner and wait for your pressure will begin to rise. So your pressure is going to be at 10 pounds, 10 PSI if you are at sea level. So if you are above sea level, you'll have to increase your pressure depending on the, the recommendations.
If you're above a thousand feet above elevation, you'll have to increase your pressure. And I have a chart on my website that shows you exactly the amount of pressure that you need to have depending on your elevation. I'm just over 2000 feet in elevation. So I have to put my pressure at 12 pounds of pressure.
Once your can reaches the appropriate pressure, then you'll start your time. Now, the amount of time here is 110 minutes, 110 minutes. It's a really long time. And during that entire processing time, you have to make certain that your pressure does not drop below your recommended pressure. So you have to really keep a close eye on your pressure.
I always have to fiddle. I use the same burner everytime and I fiddle around with my flame, my burner, just a tad to make certain that it doesn't drop below, but I also don't want it to get too hot. So just keep an eye on it. You can't just walk away from a pressure canner and call it good.
You can leave for a few minutes and come back. Keep an eye on it. Once your canning time is done. You'll turn off your heat, but don't do anything with your canner. It'll take some time for your pressure canner to come completely back to zero pounds of pressure. Once it's there, it's safe to open your canner. Now, if you had turned off your pressure canner and you needed to do something else, and it was a while before you could open your pressure canner that is not an issue, but don't open it before it has reached zero.
So once it has reached zero pounds of pressure, it is safe to first remove the steam vent cover. Remember there still might be a little bit of steam in there and it still might be hot. So use something to remove that like a pot holder or pair of tongs to help you remove it so you don't get burned.
Unlock your pressure canner, and then very carefully take off the lid and then let your jars sit there for just a few minutes to avoid siphoning. Then you will remove your jars and place them on a rack or on a towel on your counter. And then the jars have to fully cool. That can take anywhere from 12 to 24 hours.
Don't touch the rings. Don't touch the top of your jars. Just let them sit there. After they're fully cooled, then you can remove the rings and test to make sure they sealed wash off your jars. There will be a little bit of siphoning when they are in that pressure canner and so you'll have the little bit of the oil from the fish on the jars. Wash it off with good soapy water and then label and date your contents on the jar.
You will see inside your canning jar, the fish, and you will have a layer of the oil that came out of your fish. Now this is going to vary depending on the type of the fish that you have. We often end up with, oh, I'd say about an inch of the oil on the bottom of our jars. This is normal and it's totally fine.
You'll store your canning jars in your pantry. And they are good for a year to two years. It is recommended that all home canned food is best eaten within one year. It may start to lose its quality after the second year, but it is still safe to eat. Remember whenever you're opening any canned food, always inspected before you open.
And inspect it after you open it. If there's any doubt at all, throw away the food.
We use our canned salmon in a variety of ways. One of our favorite ways is in a smoked salmon dip. And I have a recipe for that on my website. We also use it in a pasta dish, and then we like to mix. Just like you would with like when you're making tuna fish, we like to mix it with chopped celery, a little bit of dice, still pickle, a little bit of onion and mayonnaise and mustard, a little bit of mustard in there and make a we call a tuna fish sandwich, but it's really a smoked fish sandwich has a light smokey flavor.
It makes a great sandwich or we serve it on crackers for lunch. So those are the main ways that we use it. But you can use this in any way at all that you like to use smoked fish. When we do open the jars, we drain off the oil that's in there and we discard that and just use the fish itself.
I hope you give it a try. If you can your smoked fish. I'd love to hear about it. We'll see you again, next time in the Pantry.
Thanks for listening and be sure to tune in again next week for more episodes of Preserving the Pantry.

Leave a Reply