
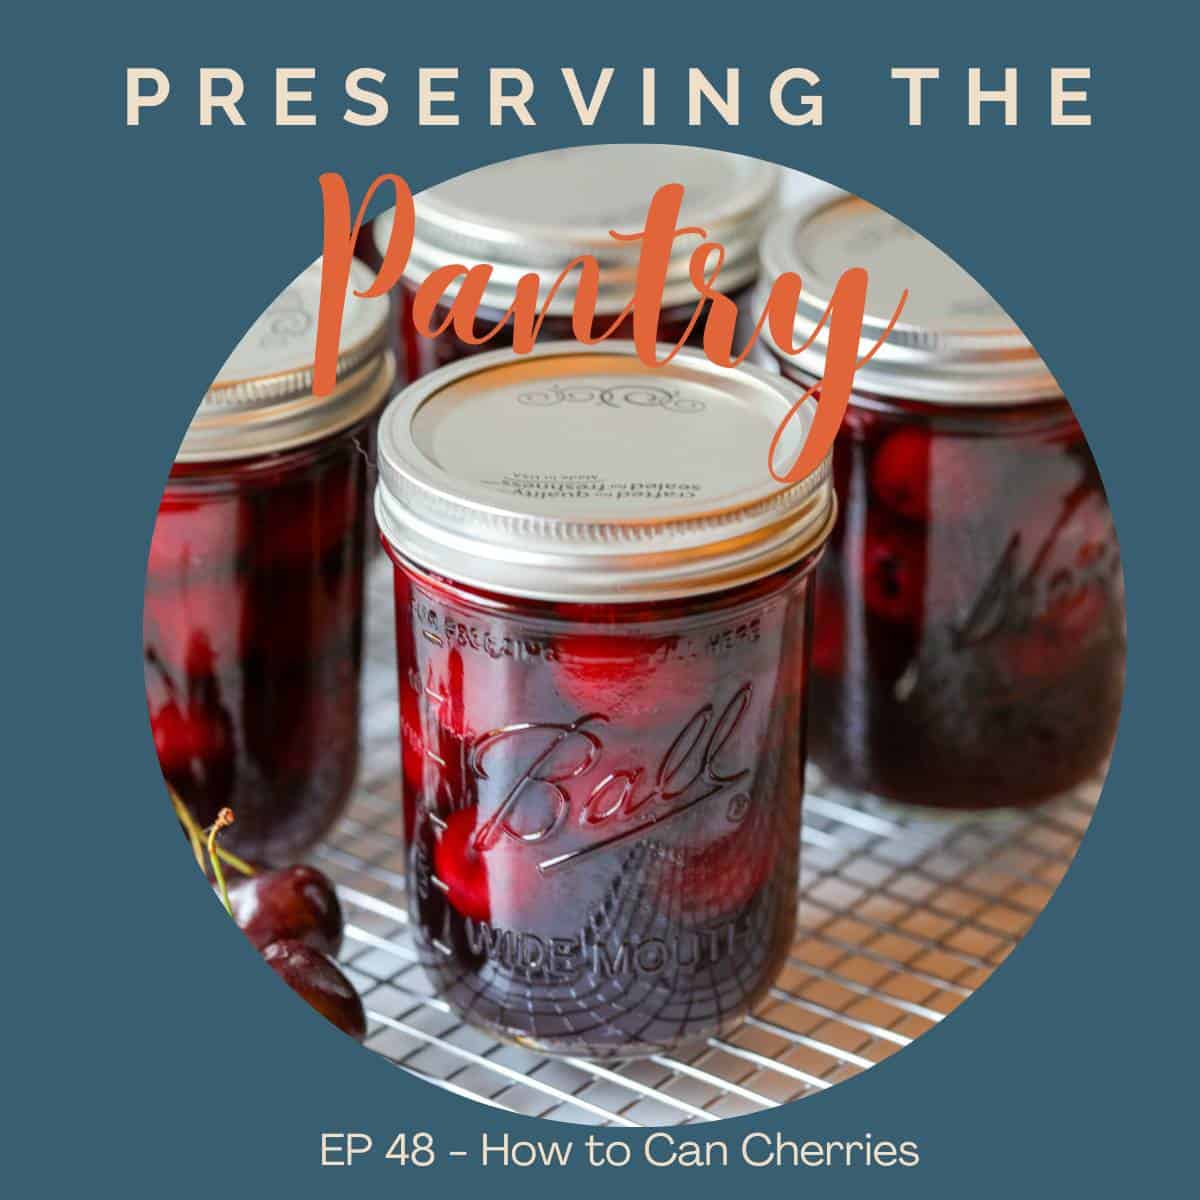
In this episode, Kathy shares her method for canning cherries.
Play the episode
Recipes
Find the complete recipe for How to Can Cherries.
In this episode you'll learn:
- How to can cherries
- Options for the canning syrup
- Remove the pit or leave it in
- How to avoid cherries from splitting
Where to listen to the podcast
Listen to this episode on iTunes, Spotify, Amazon Podcast, or your favorite podcast player. Or scroll down to read a full transcript.
If you love this podcast, I’d love to hear about it! Leave a comment below and hop over and leave a comment on Instagram @preservingthepantry!
Transcript
Hello everyone and welcome back to Preserving the Pantry. Today we are going to dive back into canning with a canning recipe. We're gonna be talking about how to can cherries. Cherries are one of those things. My grandmother always canned when we were little. We really enjoyed them. They were a special treat for us.
We would either eat them at lunchtime along with our sandwich as a fruit on the side. More often than not, we would eat them as a dessert at nighttime. There are a lot of options when you're canning cherries down to the type of cherry that you use and to how you actually can them. We typically used bing cherries, which are dark red cherries.
That was what my grandmother always had, and that's what we have here now. But you could use just about any type of cherry, a rainier, cherry, a sour cherry, whatever you have is going to work in this recipe. The other option you have is whether you keep the cherry whole with the pit or the seed in the cherry, or whether you remove the pit or the seed.
When my grandmother did them, she always left the pit in the cherry, and we ate them that way. It was really not a big deal, but you have to think about how you're going to be using these. When I can the cherries, I do some with a seed and some without. The ones without are the ones that I'm going to be using in baking.
It's so much easier to take those out and then just add them to whatever baked dish you're going to need to use to eat the ones with the pits in them. Well, what we always did as a kid, is we would have a bowl with the cherries and some of that juice from the cherries, and we would eat them with a spoon, one at a time, and you just remove the pit like you would if you were eating a fresh cherry.
You eat the cherry, you remove the pit. That's how we did it. It's really up to you what you prefer. If you're going to remove the pit, there are so many different versions out there of how to remove the pit. I have a little cherry pitter that I prefer to use. It's a small handheld, one cherry at a time pitter. You put the cherry on this little divot on this pitter, and then you just squeeze the handles and it pushes something right through the middle of the cherry and pops the seed out the other end. The only drawback with any sort of cherry pitter is going to be the mess that it makes. You always get juice somewhere or everywhere.
It just goes. I typically do it over the sink so that at least the juice is semi-contained in an area that can be just washed down. The other option you have is what type of syrup you're going to be adding to your cherries. I typically make a very light sugar syrup. You can make a heavy syrup, but you could also just use water.
Or you could even add apple juice to this recipe. It's going to make about six pints of canned cherries. When my grandmother did the Sheila canned in quartz, that was the amount that she needed and could go through that in a single setting. I typically use the pints because I don't need a full court anymore.
You're going to need four pounds of fresh cherries, not just the weight with the seeds and everything in them. Six cups of water and three-quarters cups of sugar. Now remember, I'm making a very light syrup, so there are some options if you're going to make a heavier syrup as well. The first thing you're going to do is.
Wash your cherries, and remove the stem and the pits if you're going to remove the pit. Now, I have found several recipes where if you're going to leave the pit in, they advise that you take the cherry and a very clean, sterile needle, and you poke or pierce the opposite side of the stem. And that is supposed to prevent the cherries from splitting while they're being canned.
I've never done this and I've never had an issue with my cherries splitting, but if you are finding that your cherries are splitting when you are canning them, that might be an option for you. You're going to put your water and your sugar on the stovetop in a small pot and bring it to a simmer. Then once your cherries are already, they're cleaned, they're stemmed, they're pitted.
If you're going to do that, you place them into your jars and leave a half-inch head space. Then pour the hot syrup over the cherries, remove any bubbles, wipe down the rim, add your lids and your rings, and then place your jars in a water bath. Can. You'll place the lid on the canner and turn the heat up to high, and then once it is at a full rolling boil, you start your timing.
Pints and quarts are processed for the same amount of time. It's 25 minutes at sea level, so every thousand feet above sea level you will add additional time. Remember that we talked about that in the last episode of why you have to adjust for your altitude or your elevation. So make certain that you check the chart.
I have one in this recipe, so just adjust for whatever your elevation is. Once your time is up, turn the heat off, leave the lid on, but allow the jars to stay in the canner for five to 10 minutes. Don't open the lit or anything. Then open the lid, let them rest for another minute or two, and then take your jars out and set them on a cooling rack.
That is gonna help prevent siphoning where the liquid is forced out of the jars with a sudden change of temperature during the cooling time on your rack, do not press down the. The center of the lids and don't tighten the rings at all. Just let 'em sit there. It actually takes 12 to 24 hours for those jars to fully cool.
And once that time is up, you're going to remove the rings. Check for a seal, wash your jars. Add the date and contents of the jars and then store them away in the pantry. I always store my canned goods without the rings on them. These canned cherries are perfect for eating or using and baking. I'll see you next week in the pantry.
Bye. Thanks for listening. And be sure to tune in again next week for more episodes of Preserving the Pantry.

Leave a Reply