
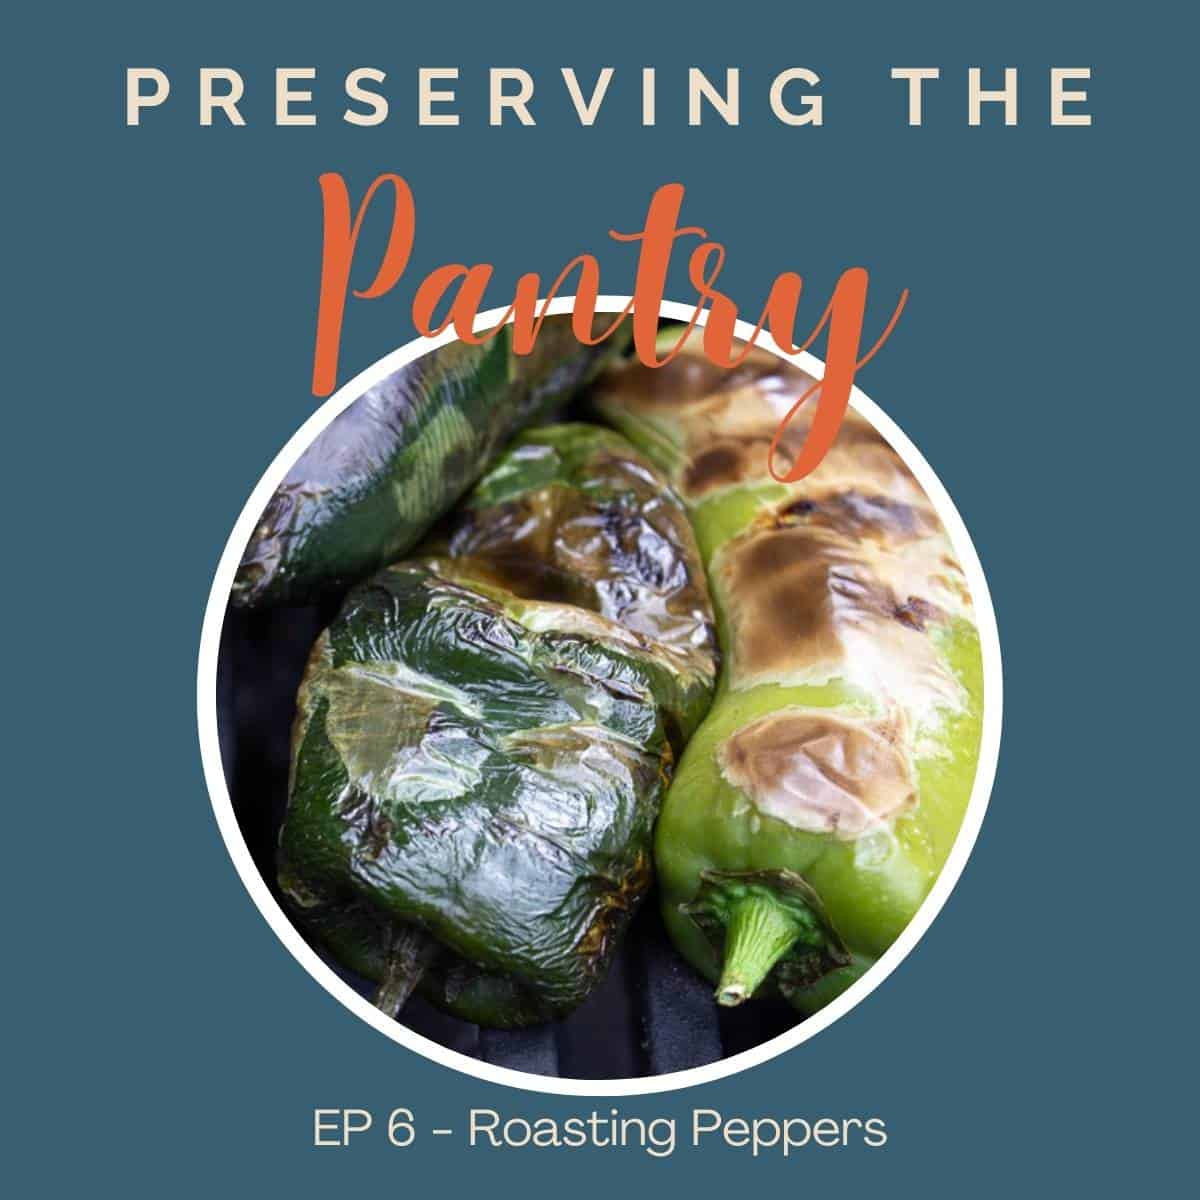
In episode 6, Kathy discusses how to roast and freeze chili peppers.
Play the episode
Find the complete recipe for Roasting and Freezing Chili Peppers
Recipes mentioned in this podcast:
In this episode you'll learn:
- What type of peppers you can roast and freeze
- How to roast peppers on a gas grill
- How to freeze roasted peppers
- How to use the frozen peppers
- Recipes using roasted chili peppers
Where to listen to the podcast
Listen to this episode on iTunes, Spotify, Amazon Podcast, or your favorite podcast player. Or scroll down to read a full transcript.
If you love this podcast, I’d love to hear about it! Leave a comment below and hop over and leave a comment on Instagram @preservingthepantry!
Transcript
Hi, and welcome back to the pantry! I am so glad that you are here with me again today. We are going to be talking about roasting chili peppers.
Roasted chili peppers are one of my favorite foods to add to other recipes. They add so much flavor and sometimes a little bit of heat, but really add depth and flavor to different recipes.
I like roasting chili peppers because it adds a touch of smokiness to the pepper and allows the outer skin to easily be peeled off. Some of the recipes that I really enjoy adding the chili peppers to are a chili relleno casserole. This is a super easy to make casserole that has all of the delicious flavors that you find in a chili relleno
I also have an appetizer that I make often it's cream cheese. You add the chopped roasted chili peppers, roll it up in a tortilla, slice it and serve it at any party or gathering. They're always a hit.
I have a delicious recipe for Santa Maria style beans. They're kind of a baked bean. They have bacon, roasted Anaheim, chili peppers and a tomato broth.
They're so yummy. Of course in the wintertime, which is hard to think about right now with the hot weather, but in the wintertime, I like to make a white chicken chili. And again, I add a few of those roasted chopped chili peppers.
Then sometimes I just want to add a few of the chili peppers to my scrambled eggs or add on top of a burger. They're so delicious.
In this recipe, I talk about roasted chili peppers, but you could also roast sweet bell peppers, like your sweet red, orange, or yellow peppers. It works exactly the same way, and they're perfect to add to the freezer so you can use all year long.
We grow a big variety of chili peppers in our garden. Every year we plant jalapenos, poblanos, Anaheims, and a couple of other varieties as well.
My theory is if we can grow them and I can preserve them, that's one less thing I have to buy at the grocery store. We can usually get enough chili peppers, roasted and frozen that'll last us the entire year. I love 'em.
So my method is I use a gas grill. The first thing I do is turn on that grill and let it heat up for a good five minutes. You want those grates to be nice and hot. I scrape down the grates so that they are clean.
One quick side note, you can use this method for roasting just two to three peppers, or as many as will fit on your.
Put the peppers on your grill and let them heat for three to five minutes and you're going to start to rotate them. You want them to have a nice char on them, but you don't want them to be burnt.
So you're going to rotate them around so that they're nice and dark brown or even blackish color. Once the chili pepper has been completely charred on all sides, you will remove it from the grill.
Now, if you're wanting to use these right away, slip the peppers into a paper bag, roll it down and let them sit for five to 10 minutes. Then you'll take your chili pepper out. The skin should just fall right off and you can take the seeds out if you want or leave the seeds in.
If you're wanting to freeze your chili peppers, I take them straight off the grill and I put them onto a baking sheet, a good old fashioned cookie sheet.
I line that with parchment paper and I just line up the chili peppers in a row. And I put as many as I can try to leave a little bit of a gap between them so they don't stick together. I place that whole tray in the deep freeze. And once they're fully frozen, I take them out and I store them in a plastic bag, either a zip top bag or a vacuum seal bag.
Then I put them back into the freezer when I'm ready to use them, I simply take out the number that I need. Sometimes it's one or two or if I'm making the casserole, I might need 10.
I take them out and I run them under warm water. The water will help start to thaw the chili pepper, but it also helps remove that skin.
The skin will just start to slide right off as you're thawing the chili peppers. If I don't want the seeds, I can also just lightly pull on the top of the stem and it'll pull that top right off. Sometimes all the seeds will come out right with it. If there's a few still remaining, just slice that pepper open and run it back underwater and all those seeds will come right out.
Then you'll just use those in any recipe that you'd like.
That's all for this episode. Be sure to check out all the recipes mentioned in today's episode, you'll find them linked in the description below or on the show notes page at, Beyond the Chicken Coop. Thanks for joining me today. I'll see you in the pantry.
Thanks for listening and be sure to tune in again next week for more episodes of Preserving the Pantry.
Leave a Reply